Viking RVER3301 Installation Instructions - Page 14
Leg Installation
 |
View all Viking RVER3301 manuals
Add to My Manuals
Save this manual to your list of manuals |
Page 14 highlights
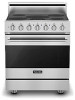
Leg Installation 1 2 Legs are packed in styrofoam top pack. Note: Legs should be installed near to where appliance is to be used, as they are not secure for long transit. 3 1 1 3 2 Note: It is strongly recommended that a pallet or lift jack be used rather than tilting. Raise unit about a foot. Unscrew temporary legs from couplings. 4 Screw legs into couplings on all four corners. Lower range gently to keep any undue strain from legs and internal mounting hardware. 14
-
 1
1 -
2
-
3
-
4
-
5
-
6
-
7
-
8
-
 9
9 -
 10
10 -
 11
11 -
 12
12 -
 13
13 -
 14
14 -
 15
15 -
 16
16 -
 17
17 -
 18
18 -
 19
19 -
20
-
21
-
22
-
23
-
24
-
25
-
26
-
27
-
28
 |
 |

14
1
1
1
2
3
2
2
Legs are packed in styrofoam top pack.
Note:
Legs should be installed near to where
appliance is to be used, as they are
not secure for long transit.
Note:
It is strongly recommended
that a pallet or lift jack be used rather than tilting.
Raise unit about a foot.
Unscrew temporary legs from
couplings
.
4
Lower range gently to keep any undue strain from
legs and internal mounting hardware.
3
Screw legs into couplings on all
four corners.
Leg Installation