Viking RVER3301 Installation Instructions - Page 21
Wall Mount Anti-tip Installation
 |
View all Viking RVER3301 manuals
Add to My Manuals
Save this manual to your list of manuals |
Page 21 highlights
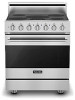
Wall Mount Anti-tip Installation 1 2 (A) 3(9-.52/c8m") +1/2"(A(1).3 cm) Measure from floor to bottom of the anit-tip opening located on the back of range. This will be measurement (A). Locate anti-tip bracket on rear wall with the top left corner at measurement (A) plus 1/2" (1.3 cm) from the floor and 3-5/8" (9.2 cm) from where the right side of range (facing range) is to be located. 3 4 Mark and drill holes where bracket will be located. Attach bracket with mounting hardware provided. 21
-
 1
1 -
2
-
3
-
4
-
5
-
6
-
7
-
8
-
9
-
10
-
11
-
12
-
13
-
14
-
15
-
 16
16 -
 17
17 -
 18
18 -
 19
19 -
 20
20 -
 21
21 -
 22
22 -
 23
23 -
 24
24 -
 25
25 -
 26
26 -
27
-
28
 |
 |

21
1
(A)
(A)
2
(A)
(A)
+1/2”
+1/2”
(1.3 cm)
(1.3 cm)
(A)
+1/2”
(1.3 cm)
3-5/8”
3-5/8”
(9.2 cm)
(9.2 cm)
3-5/8”
(9.2 cm)
Measure from floor to bottom
of the anit-tip opening located on the back of range.
This will be measurement (A).
Locate anti-tip bracket on rear wall with the top left corner at
measurement (A) plus 1/2” (1.3 cm) from the floor and 3-5/8” (9.2 cm)
from where the right side of range (facing range) is to be located.
3
Mark and drill holes where bracket
will be located.
4
Attach bracket with
mounting hardware provided.
Wall Mount Anti-tip Installation