Viking VRT LP/Propane Conversion Kit - LPKPDR - Installation Instructions - Page 15
Grill Conversion
 |
View all Viking VRT manuals
Add to My Manuals
Save this manual to your list of manuals |
Page 15 highlights
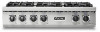
Grill Conversion (for models equipped with grill) Lift flavor grids from unit. Lift flavor grid support from unit. Remove screws securing rear bracket to burner box. Remove screws securing flame shield to burner box. Lift out left and right side burner box liners. Remove screws securing burner to burner box. Loosen air shutter screw and adjust opening on burner to 7/16" and tighten air shutter screw. Remove orifice by turning counterclockwise and replace with orifice from bag labeled Grill Orifice. IMPORTANT: The orifice tip must be located 3/16" inside the burner for proper gas mixture and combustion. The depth of the orifice can be adjusted by turning the orifice counterclockwise (more depth) or clockwise (less depth). Reverse procedures as needed to reassemble. Screw (Rear of Burner) Grill Burner Screw (Front of Burner) Adjustment Screw Air Shutter 15
-
 1
1 -
2
-
3
-
4
-
5
-
6
-
7
-
8
-
9
-
 10
10 -
 11
11 -
 12
12 -
 13
13 -
 14
14 -
 15
15 -
 16
16 -
 17
17 -
 18
18 -
 19
19 -
 20
20
 |
 |
