Vivitar DVR 690HD Camera Manual - Page 24
Video Playback Mode - review
 |
View all Vivitar DVR 690HD manuals
Add to My Manuals
Save this manual to your list of manuals |
Page 24 highlights
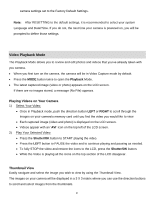
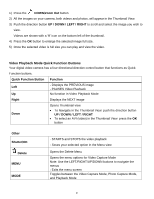
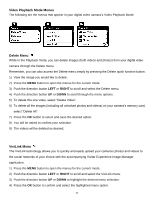
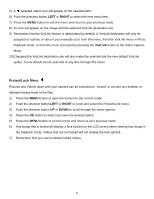
camera settings set to the Factory Default Settings. Note: After RESETTING to the default settings, it is recommended to select your system Language and Date/Time. If you do not, the next time your camera is powered on, you will be prompted to define those settings. Video Playback Mode The Playback Mode allows you to review and edit photos and videos that you‟ve already taken with you camera. When you first turn on the camera, the camera will be in Video Capture mode by default. Press the MODE button twice to open the Playback Mode. The latest captured image (video or photo) appears on the LCD screen. If there are no images stored, a message (No File) appears. Playing Videos on Your Camera 1) Select Your Video: Once in Playback mode, push the direction button LEFT or RIGHT to scroll through the images on your camera‟s memory card until you find the video you would like to view. Each captured image (video and photo) is displayed on the LCD screen. Videos appear with an „AVI‟ icon on the top left of the LCD screen. 2) Play Your Selected Video: Press the Shutter/OK button to START playing the video. Press the LEFT button to PAUSE the video and to continue playing and pausing as needed. To fully STOP the video and restore the icons to the LCD, press the Shutter/OK button. While the Video is playing all the icons on the top section of the LCD disappear. Thumbnail View Easily navigate and select the image you wish to view by using the Thumbnail View. The images on your camera will be displayed in a 3 X 3 matrix where you can use the direction buttons to scroll and select images from the thumbnails. 23
-
 1
1 -
2
-
3
-
4
-
5
-
6
-
7
-
8
-
9
-
10
-
11
-
12
-
13
-
14
-
15
-
16
-
17
-
18
-
 19
19 -
 20
20 -
 21
21 -
 22
22 -
 23
23 -
 24
24 -
 25
25 -
 26
26 -
 27
27 -
 28
28 -
 29
29 -
30
-
31
-
32
-
33
-
34
-
35
-
36
-
37
-
38
-
39
-
40
-
41
-
42
-
43
-
44
-
45
-
46
-
47
-
48
-
49
-
50
-
51
-
52
-
53
-
54
-
55
-
56
-
57
 |
 |