Vizio D24f-F1 User Manual
Vizio D24f-F1 Manual
 |
View all Vizio D24f-F1 manuals
Add to My Manuals
Save this manual to your list of manuals |
Vizio D24f-F1 manual content summary:
- Vizio D24f-F1 | User Manual - Page 1
USER MANUAL Models: D24f-F1, D32f-F1, D43f-F1, and D50f-F1 - Vizio D24f-F1 | User Manual - Page 2
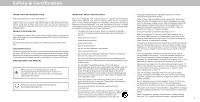
and installation services for your VIZIO product, visit our website at www.VIZIO.com or call toll free at (877) 698-4946. • To reduce the risk of electric shock or component damage, switch off the power before connecting other components to your TV. • Read these instructions. • Keep these - Vizio D24f-F1 | User Manual - Page 3
your TV will not be used for an extended period of time, unplug the power cord. • To reduce risk of electric shock, do not touch the connector with wet hands. • Insert batteries in accordance with instructions. Incorrect polarities may cause the batteries to leak which can damage the remote control - Vizio D24f-F1 | User Manual - Page 4
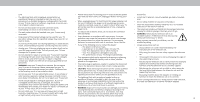
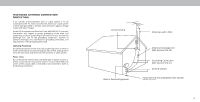
regard to proper grounding of the mast and supporting structure, grounding of the lead-in wire to TV during a lightning storm or when it is left unattended or unused for long periods of time, unplug the TV Antenna Lead In Wire Electric Service Equipment Antenna Discharge Unit (NEC Section 810- - Vizio D24f-F1 | User Manual - Page 5
, Inc. All Rights Reserved. This product qualifies for ENERGY STAR in the "factory default" settings ans this is the setting in which power savings will be achieved. Changing the factory default picture settings or enabling other features will increase power consumption that could exceed the limits - Vizio D24f-F1 | User Manual - Page 6
Your TV 7 Rear Panel D24f-F1 8 Rear Panel D32f-F1, D43f-F1, & D50f-F1 9 Replacing the Batteries 11 Completing The First-Time Setup 12 Using the On-Screen Menu 12 Navigating the On-Screen Menu 12 Changing the Input Source 12 Changing the Screen Aspect Ratio 13 Adjusting the Picture Settings - Vizio D24f-F1 | User Manual - Page 7
Getting to Know Your TV 1 REMOTE SENSOR & POWER INDICATOR When using the remote, aim it directly at this sensor. The power indicator flashes on when the TV turns on, then goes out after several seconds. To keep the power indicator on as long as the TV is on, see Turning the Power Indicator On or - Vizio D24f-F1 | User Manual - Page 8
REAR PANEL D24F-F1 Note: The image shown here is for illustrative TV. Press and hold to turn the TV off. Volume - Press to increase or decrease the TV volume level. Input - Press to access the input menu. USB - Connect a USB thumb drive to play photo, music, or video. Components - Connect a component - Vizio D24f-F1 | User Manual - Page 9
D32F-F1, D43F-F1, & D50F-F1 Note: The image shown here is for illustrative purposes only and may be subject to change. The actual number of ports and their locations may vary, depending on the model. 1 USB - Connect a USB thumb drive to play photo, music, or video. Components - Connect a component - Vizio D24f-F1 | User Manual - Page 10
following the instructions that came with your mount. Use only with a UL-listed wall mount bracket rated for the weight/load of this TV. Installing a TV on a wall requires lifting. To prevent injury or damage to the TV, ask someone to help you. D24f-F1 D32f-F1 D43f-F1 D50f-F1 Screw Size - Vizio D24f-F1 | User Manual - Page 11
1 USING THE REMOTE 1 2 3 4 5 6 7 8 9 11 10 12 14 13 15 16 17 18 19 1. Input - Change the currently displayed input 2. Power - Turn Television on or off 3. App Launcher - Quickly launch the pictured app 4. Exit - Close the on-screen menu 5. Menu - Display the settings menu 6. Arrow - Vizio D24f-F1 | User Manual - Page 12
SmartCast Mobile™ app and Television screen to complete setup. Need help setting up the Television? Refer to the printed Quick Start Guide for detailed instructions on how to install your new D-Series Television. You can also find a digital copy on support.vizio.com 3.Follow the instruction on the - Vizio D24f-F1 | User Manual - Page 13
Closed Captioning • Name and adjust Inputs • Adjust TV settings TV Settings Picture Audio Network Timers Channels CC Closed Captions Inputs System User Manual • View user manual NAVIGATING THE ON-SCREEN MENU To open the on-screen menu, press the Menu button on the remote. Use the Arrow buttons to - Vizio D24f-F1 | User Manual - Page 14
the picture so that the picture keeps its original shape. Examples include wide-screen movies and older television programs. To change the screen aspect ratio: 1. Press the Wide button on the remote. 2. . Normal Panoramic Wide Zoom Note: Aspect ratio settings may vary by Input source. 3 13 - Vizio D24f-F1 | User Manual - Page 15
for displaying game console output. • Computer mode optimizes the picture settings for displaying computer output. 4. To manually change each of the picture settings, use the Up/ Down Arrow buttons on the remote to highlight that picture setting, then use the Left/Right Arrow buttons to adjust the - Vizio D24f-F1 | User Manual - Page 16
of the Gamma curve. Use lower Gamma values for bright room conditions, and higher values when it's dark. 3. When you have finished adjusting MORE PICTURE Settings, press the Exit button on the remote. Adjusting the Color Temperature Adjusting the color temperature changes the white balance of the - Vizio D24f-F1 | User Manual - Page 17
prevent accidental changes to their settings. To lock all custom picture modes: 1. From the PICTURE MODE EDIT menu, use the Arrow buttons to highlight Lock Picture Mode, and then press OK. The LOCK PICTURE MODE menu is displayed. 2. Use the Number Pad on your remote to enter a unique 4-digit PIN - Vizio D24f-F1 | User Manual - Page 18
press OK. 3. Press the Exit button to exit the menu screens. Resetting a Picture Mode A preset picture mode that has been edited can be restored to the factory default settings. To reset a customized preset picture mode: 1. From the PICTURE MODE EDIT menu, use the Arrow buttons to highlight Reset - Vizio D24f-F1 | User Manual - Page 19
manually calibrate the TV. Calibration requires specialized training, an input with precisely set colors, and a specialized light meter. To adjust the HSB color settings -2 0 Brightness -24 0 -22 0 0 0 Offset 0 0 0 Gain 0 0 0 2. Use the Arrow buttons on the remote to highlight the - Vizio D24f-F1 | User Manual - Page 20
is displayed. Ramp Test Pattern Off 2. Use the Arrow buttons on the remote to highlight Off. Use the Left/Right Arrow buttons to highlight On to are finished, press the Exit button. 2. Use the Arrow buttons on the remote to highlight Off. Use the Left/Right Arrow buttons to select the color for - Vizio D24f-F1 | User Manual - Page 21
the Left/Right Arrow buttons until the UNIFORMITY ANALYZER TEST PATTERN menu is displayed. Uniformity Analyzer Test Pattern Off 2. Use the Arrow buttons on the remote to highlight Off. Use the Left/Right Arrow buttons to highlight On to show the Uniformity Analyzer Test Pattern. -or- To hide the - Vizio D24f-F1 | User Manual - Page 22
5. Press the Exit button on the remote. • Speakers - Turns the built-in speakers On or Off. When the TV speakers are set to On, DTS signals cannot be consistent volume levels during transitions between program content, AV formats, and input sources. Select On or Off. In a few cases, volume leveling - Vizio D24f-F1 | User Manual - Page 23
button on the remote. Finding MAC Addresses for Network Setup The security settings on your router may require you to enter the TV's MAC address in the router's settings. To find the TV's MAC address: 1. From the NETWORK menu, highlight Manual Setup and press OK. The MANUAL SETUP menu is displayed - Vizio D24f-F1 | User Manual - Page 24
Connect and press OK 3. Using the on-screen keyboard, enter your network's password, then highlight Connect and press OK. 4. Press the Exit button on the remote. Back Enter Access Point Name Enter your access point name. This is used to connect to an access point with a hidden SSID. abc def ghi - Vizio D24f-F1 | User Manual - Page 25
on the remote to highlight the period of time after which you want the TV to remote to change whether the TV will turn off. If you don't want the TV to turn off when there is no signal, change the setting to Off. Otherwise, select 10 minutes. 3. When you have finished setting the auto power off time - Vizio D24f-F1 | User Manual - Page 26
Set Parental Controls Find Channels Skip Channels Analog Audio Digital Audio Parental Controls Back Stereo English Scanning for Channels The TV For each channel you wish to remove, use the Up/Down Arrow buttons on the remote to 3 Test 3 4 Test 4 highlight the channel and press OK. A P appears - Vizio D24f-F1 | User Manual - Page 27
free) and cable channels broadcast programs in more than one language. The TV's Analog Audio feature allows you to listen to audio in an alternate Description, French. Press OK. 3. Press the Exit button on the remote. Back Digital Audio English Spanish/ Video Description French To use the Analog - Vizio D24f-F1 | User Manual - Page 28
the remote to highlight Parental Controls and press OK. 4. Enter your set System PIN. To set are meant for children, and at other times broadcast programs that are meant for mature audiences viewed. When this is the case, you can use the TV's Rating Block feature to block content based on its rating - Vizio D24f-F1 | User Manual - Page 29
TV will not display them. The Closed Captions menu does not appear when an HDMI input is selected. To activate or deactivate closed captions: 1. Press the Menu button on the remote As Broadcast to keep default settings or Custom to manually change each setting. Background Opacity Window Color - Vizio D24f-F1 | User Manual - Page 30
3 Typical choices include: • Opaque background, transparent window-Only a strip of background appears behind the text, expanding as the text appears. This is the typical "As Broadcast" mode. • Opaque background and window in the same color-When text appears, the entire line fills with color at once - Vizio D24f-F1 | User Manual - Page 31
menu. For example, if you have a DVD player connected to the Component input, you can rename that input to display "DVD Player." See Changing the Input Source. To change the name of an input: 1. Press the Menu button on the remote. The on-screen menu is displayed. 2. Use the Arrow buttons on the - Vizio D24f-F1 | User Manual - Page 32
screen menu language • Set time zone and local settings • Adjust the CEC settings • Adjust the Power Mode • Adjust the aspect ratio • Name the Display • Review and maintain the list of paired devicess • Adjust accessibility settings • Reset the Display settings & set up administrative controls Back - Vizio D24f-F1 | User Manual - Page 33
. Using CEC, your VIZIO TV remote can control: • Power On/Off • Volume • Mute Not all HDMI devices support CEC. See your device's user manual for details. To enable, disable, or adjust CEC settings: 1. Set up your audio device and connect it to the HDMI-1(HDMI Arc) input on the TV 2. On your audio - Vizio D24f-F1 | User Manual - Page 34
differentiate it from other cast devices you may have in your home. To view your TV name: 1. Press the Menu button on the remote. The on-screen menu is displayed. 2. Use the Arrow buttons on the remote to highlight System and press OK. The SYSTEM menu is displayed. 3. Use the Arrow buttons on - Vizio D24f-F1 | User Manual - Page 35
3 ACCESSIBILITY SETTINGS VIZIO is committed to providing intuitive, user-friendly products. Your new VIZIO TV offers several accessibility features that can help you get the most out of it. To access the ACCESSIBILITY menu: 1. Press the Menu button on the remote control. 2. Use the Arrow and OK - Vizio D24f-F1 | User Manual - Page 36
menu. If you have trouble enabling or disabling Viewing Data, please contact VIZIO customer service by emailing techsupport@ vizio.com or calling (855) 472-8817. For more information, see https://www.vizio.com/viewingdata and review VIZIO's privacy policy at https://www.vizio.com/privacy 3 35 - Vizio D24f-F1 | User Manual - Page 37
INFO WINDOW The INFO window can be displayed by pressing the Info button on the remote: • Press the Info button one time to display the TV name, current input, picture mode, network name, and time. Current Input Picture Mode Network Name TV Name Living Room HDMI-1 Normal HomeNetwork 5:00 pm - Vizio D24f-F1 | User Manual - Page 38
and Dolby Vision HDR. Plus, you can quickly set up and adjust settings right on the TV using the included remote control. What can you do with SmartCast TVSM? • Browse and launch top tier apps directly from the big screen using the included remote. • Stream content directly from the home screen - Vizio D24f-F1 | User Manual - Page 39
formatted as FAT32. • Files on the USB thumb drive must end in a supported file extension ( .mp4 only). • The player is not designed to play media from external hard drives, MP3 players, cameras, or smartphones. TVing USB Media To TV your USB media: 1. Connect your USB thumb drive to the USB port on - Vizio D24f-F1 | User Manual - Page 40
lengthen as the song progresses. Connected Sources TVs connected USB devices. VIZIO Music USB1: MyFlashDrive Current Folder Playback Controls Use associated with your music, the album art will TV here. Folder Contents/ Playlist This area TVs the contents of the currently selected folder. You can - Vizio D24f-F1 | User Manual - Page 41
OK to return to the previous screen. Connected Sources TVs connected USB devices. Current Folder VIZIO Video USB1: MyFlashDrive My Videos MyFlashDrive\Video\root\My TVed here. Folder Contents/Playlist This area TVs the contents of the currently selected folder. You can browse among files using the - Vizio D24f-F1 | User Manual - Page 42
Folder Contents This area TVs the contents of the currently selected folder. You can browse files and folders using the Arrow and OK buttons on the remote. Current Folder Start Fullscreen Slideshow Sort by Date or File Name View Thumbnails/Folders Adjust Slideshow Settings View Music Files root - Vizio D24f-F1 | User Manual - Page 43
Troubleshooting & Technical Support Do You Have Questions? Find Answers At SUPPORT.VIZIO.COM Find help with: • New Product Setup • Connecting Your Devices • Technical Problems • Product Updates • And More Live Chat Support Available You can also contact our award-winning support team at: Phone: (877 - Vizio D24f-F1 | User Manual - Page 44
A Take A Moment To Register Your Product At VIZIO.COM/PRODUCT-REGISTRATION Why Register? Customized Support Get assistance quickly with your information on-hand. News & Offers Take advantage of the latest news and special offers from VIZIO. Safety & Satisfaction Stay up to date with important - Vizio D24f-F1 | User Manual - Page 45
securely attached to the TV. • Ensure all devices are connected correctly. Devices differ; see your device's user manual for details. • Adjust Brightness, Contrast, or Backlight. See Adjusting the Picture Settings. • Press the Input button on the remote to select a different input source. There is - Vizio D24f-F1 | User Manual - Page 46
close to a window for the best signal. When I change input source, the display image changes size. • The TV remembers the viewing mode on each input source. If the viewing mode on the new input source differs from the one on the input source you switch from, the difference may be noticeable. • See - Vizio D24f-F1 | User Manual - Page 47
: Dimensions w/ Stand: w/o Stand: Weight w/ Stand: w/o Stand: LCD Backlight: Refresh Rate: Maximum Resolution: Pixel Pitch: Viewing Angle: HDMI Inputs: Component Video Inputs: Composite Inputs: RF Antenna Input: Ethernet USB Port: Audio Outputs: OSD Language: Ambient Light Sensor: D24f-F1 24" 23 - Vizio D24f-F1 | User Manual - Page 48
Screen Size: Viewable Area: Dimensions w/ Stand: w/o Stand: Weight w/ Stand: w/o Stand: LCD Backlight: Refresh Rate: Maximum Resolution: Dynamic Contrast Ratio: Pixel Pitch: Viewing Angle: HDMI Inputs: Component Video Inputs: Composite Inputs: RF Antenna Input: USB Port: Ethernet: Audio - Vizio D24f-F1 | User Manual - Page 49
w/ Stand: w/o Stand: LCD Backlight: Refresh Rate: Maximum Resolution: Dynamic Contrast Ratio: Pixel Pitch: Viewing Angle: HDMI Inputs: Component Video Inputs: Composite Inputs: RF Antenna Input: Ethernet: USB Port: Audio Outputs: OSD Language: Ambient Light Sensor: D43f-F1 43" 42.5" 38.44" x 24.59 - Vizio D24f-F1 | User Manual - Page 50
Screen Size: Viewable Area: Dimensions w/ Stand: w/o Stand: Weight w/ Stand: w/o Stand: LCD Backlight: Refresh Rate: Maximum Resolution: Dynamic Contrast Ratio: Pixel Pitch: Viewing Angle: HDMI Inputs: Component Video Inputs: Composite Inputs: RF Antenna Input: Ethernet: USB Port: Audio Outputs: OSD - Vizio D24f-F1 | User Manual - Page 51
used in accordance with the instructions, may cause harmful interference to by the party responsible for compliance could void the user's authority to user seek to obtain protection from other radio services operating in the same TV bands, a radio license is required. Please consult Industry Canada - Vizio D24f-F1 | User Manual - Page 52
product against defects in materials and workmanship serviced, regardless of the servicer. Only) when the product is used normally in accordance with VIZIO's user guides UNLESS YOU HAVE BROUGHT AN ELIGIBLE CLAIM IN SMALL CLAIMS and manuals. VIZIO's Responsibilities COURT OR HAVE OPTED OUT AS - Vizio D24f-F1 | User Manual - Page 53
change will not affect you resided at the time of your purchase (if in the United States award LIMITED IN DURATION TO THE WARRANTY PERIOD SET FORTH ABOVE. punitive or other damages not no equitable relief, injunction, or direction to VIZIO WILL NOT BE RESPONSIBLE FOR LOSS OF USE, LOSS OF any party - Vizio D24f-F1 | User Manual - Page 54
accordance be restored to its original state. You will be responsible for restoring with VIZIO's user guides and manuals. all applicable user data and downloaded applications. Recovery What to Do If You Are Not Satisfied With Service Except where restricted by law, this warranty applies only to - Vizio D24f-F1 | User Manual - Page 55
VIZIO WILL NOT BE RESPONSIBLE FOR LOSS OF USE, LOSS OF INFORMATION EXCLUSIVELY FOR MEXICO (b) When the product has not been operated according to the INFORMATION OR DATA, COMMERCIAL LOSS, LOST REVENUE OR To make a warranty claim, or to obtain parts, components, supplies accompanying instructions - Vizio D24f-F1 | User Manual - Page 56
or discontinuation without notice. VIZIO has no control over third party Other names of companies, products, and services used in this User applications or content and assumes no responsibility for the availability Manual may be trademarks, trade names or service marks of others Packaging Disposal - Vizio D24f-F1 | User Manual - Page 57
© 2017 VIZIO INC. ALL RIGHTS RESERVED. 08222017ET -US
-
 1
1 -
 2
2 -
 3
3 -
 4
4 -
 5
5 -
 6
6 -
 7
7 -
8
-
9
-
10
-
11
-
12
-
13
-
14
-
15
-
16
-
17
-
18
-
19
-
20
-
21
-
22
-
23
-
24
-
25
-
26
-
27
-
28
-
29
-
30
-
31
-
32
-
33
-
34
-
35
-
36
-
37
-
38
-
39
-
40
-
41
-
42
-
43
-
44
-
45
-
46
-
47
-
48
-
49
-
50
-
51
-
52
-
53
-
54
-
55
-
56
-
57
 |
 |
Models: D24f-F1, D32f-F1, D43f-F1, and D50f-F1
USER MANUAL