Vtech ATT E2525 User Manual - Page 10
Wall mounting - handset
 |
UPC - 650530003448
View all Vtech ATT E2525 manuals
Add to My Manuals
Save this manual to your list of manuals |
Page 10 highlights
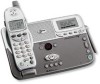
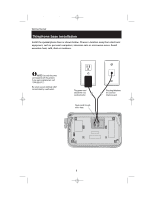
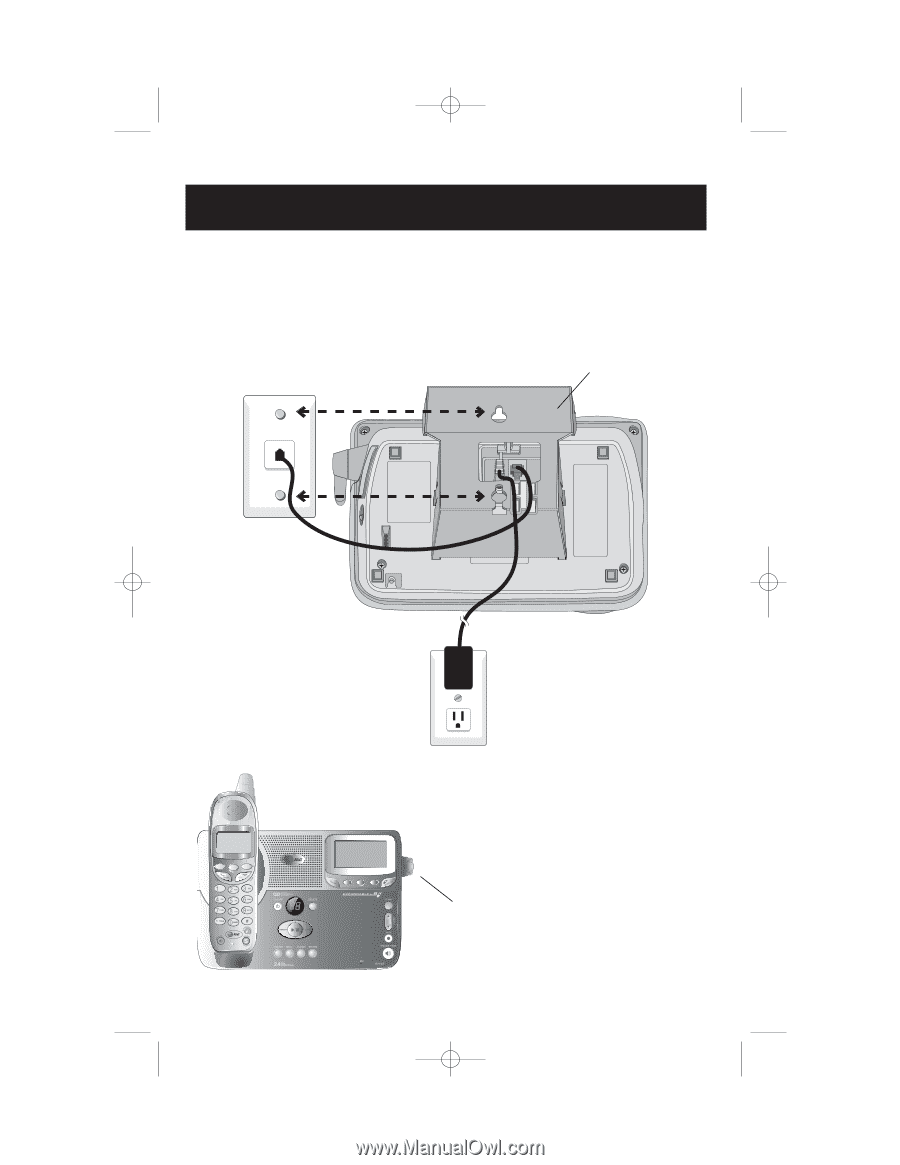
ATT-2525CIB-d2.qxd 12/30/2003 6:27 PM Page 8 Getting Started Wall mounting The speakerphone base can be installed on any standard wall-phone outlet as shown below. Choose a location away from electronic equipment, such as personal computers, television sets or microwave ovens. Avoid excessive heat, cold, dust or moisture. Connect cords as shown, then press and slide down firmly so base is held securely on outlet mounting pegs Clip wall-mount bracket securely into notches on underside of base Plug short telephone line cord into telephone jack Plug power cord transformer into electrical outlet Place handset in base to charge for 8 hours before first use. Rotate antenna to fully upright position 8
-
 1
1 -
2
-
3
-
4
-
 5
5 -
 6
6 -
 7
7 -
 8
8 -
 9
9 -
 10
10 -
 11
11 -
 12
12 -
 13
13 -
 14
14 -
 15
15 -
16
-
17
-
18
-
19
-
20
-
21
-
22
-
23
-
24
-
25
-
26
-
27
-
28
-
29
-
30
-
31
-
32
-
33
-
34
-
35
-
36
-
37
-
38
-
39
-
40
-
41
-
42
-
43
-
44
-
45
-
46
-
47
-
48
-
49
-
50
-
51
-
52
-
53
-
54
-
55
-
56
-
57
-
58
-
59
-
60
 |
 |
8
Getting Started
Wall mounting
The speakerphone base can be installed on any standard wall-phone outlet as shown
below. Choose a location away from electronic equipment, such as personal comput-
ers, television sets or microwave ovens. Avoid excessive heat, cold, dust or moisture.
Plug power cord transformer
into electrical outlet
Connect cords as shown, then press
and slide down firmly so base is held
securely on outlet mounting pegs
Plug short telephone
line cord into telephone
jack
Clip wall-mount bracket
securely into notches on
underside of base
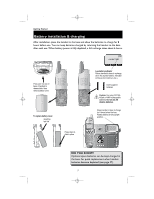
Place handset in base to charge
for 8 hours before first use.
Rotate antenna
to fully upright
position
ATT-2525CIB-d2.qxd
12/30/2003
6:27 PM
Page 8