Vtech KidiZoom Camera User Manual - Page 10
Activities - sd card
 |
View all Vtech KidiZoom Camera manuals
Add to My Manuals
Save this manual to your list of manuals |
Page 10 highlights
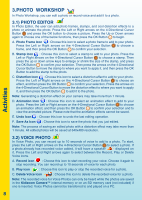
3.Photo Workshop In Photo Workshop, you can edit a photo or record voice and add it to a photo. 3.1) Photo Editor In Photo Editor, the user can add photo frames, stamps, and cool distortion effects to a photo or animate the photo. Press the Left or Right arrows on the 4-Directional Cursor Button and press the OK button to choose a picture. Press the Up or Down arrows again to choose one of the below functions, then press the OK Button to begin. A. Photo Frame Icon : Choose this icon to select a photo frame to add to your photo. Press the Left or Right arrows on the 4-Directional Cursor Button to choose a frame, and then press the OK Button to confirm your selection. B. Stamp Icon : Choose this icon to select a stamp to add to your photo. Press the Left or Right arrows on the 4-Directional Cursor Button to choose a stamp. Then press the up or down arrow keys to enlarge or shrink the size of the stamp, and press the OK Button to confirm your selection. Then press the arrows on the 4-Directional Cursor Button to move the stamp to where you want to apply it, and then press the OK Button to add the stamp to the photo. C. Distortion Icon : Choose this icon to select a distortion effect to add to your photo. Press the Left or Right arrows on the 4-Directional Cursor Button to choose an effect, and then press the OK Button to confirm your selection. Press the arrows on the 4-Directional Cursor Button to move the distortion effect to where you want to apply it, and then press the OK Button to add it to the photo. Note: Generating a distortion effect on your camera may take more than 1 minute. D. Animation Icon : Choose this icon to select an animation effect to add to your photo. Press the Left or Right arrows on the 4-Directional Cursor Button to choose an animation effect, and then press the OK Button to confirm your selection and to view the animated picture. Please note that the animation effects cannot be saved. E. Undo Icon : Choose this icon to undo the last editing operation. F. Save As Icon : Choose this icon to save the photo that you just edited. Note: The process of saving an edited photo with a distortion effect may take more than 1 minute. All edited photos will be saved at 640x480 resolution. Activities 3.2) Voice Photo In Voice Photo, you can record up to 10 seconds of voice to add to a photo. To start, press the Left or Right arrows on the 4-Directional Cursor Button to select a photo. If a photo already has recorded voice added, it will have a speaker displayed on it. Press the Left and Right arrows again to select between the Record, Play or Delete Voice icons. A. Record icon : Choose this icon to start recording your voice. Choose it again to stop recording. You can record up to 10 seconds of voice for each photo. B. Play icon : Choose this icon to play or stop the recorded voice for a photo. C. Delete Voice icon : Choose this icon to delete the recorded voice for a photo. Note: The recorded voice for Voice Photos can only be heard while the photos are saved in the Kidizoom Camera™ internal memory or on an SD memory card (not included) if one is inserted. Voice Photos cannot be transferred to and played on a PC. 8
-
 1
1 -
2
-
3
-
4
-
 5
5 -
 6
6 -
 7
7 -
 8
8 -
 9
9 -
 10
10 -
 11
11 -
 12
12 -
 13
13 -
 14
14 -
 15
15 -
16
-
17
-
18
-
19
-
20
 |
 |