Vtech KidiZoom Camera User Manual - Page 8
CONNECTING TO A PC, To Begin Using Kidizoom Camera™ - battery
 |
View all Vtech KidiZoom Camera manuals
Add to My Manuals
Save this manual to your list of manuals |
Page 8 highlights
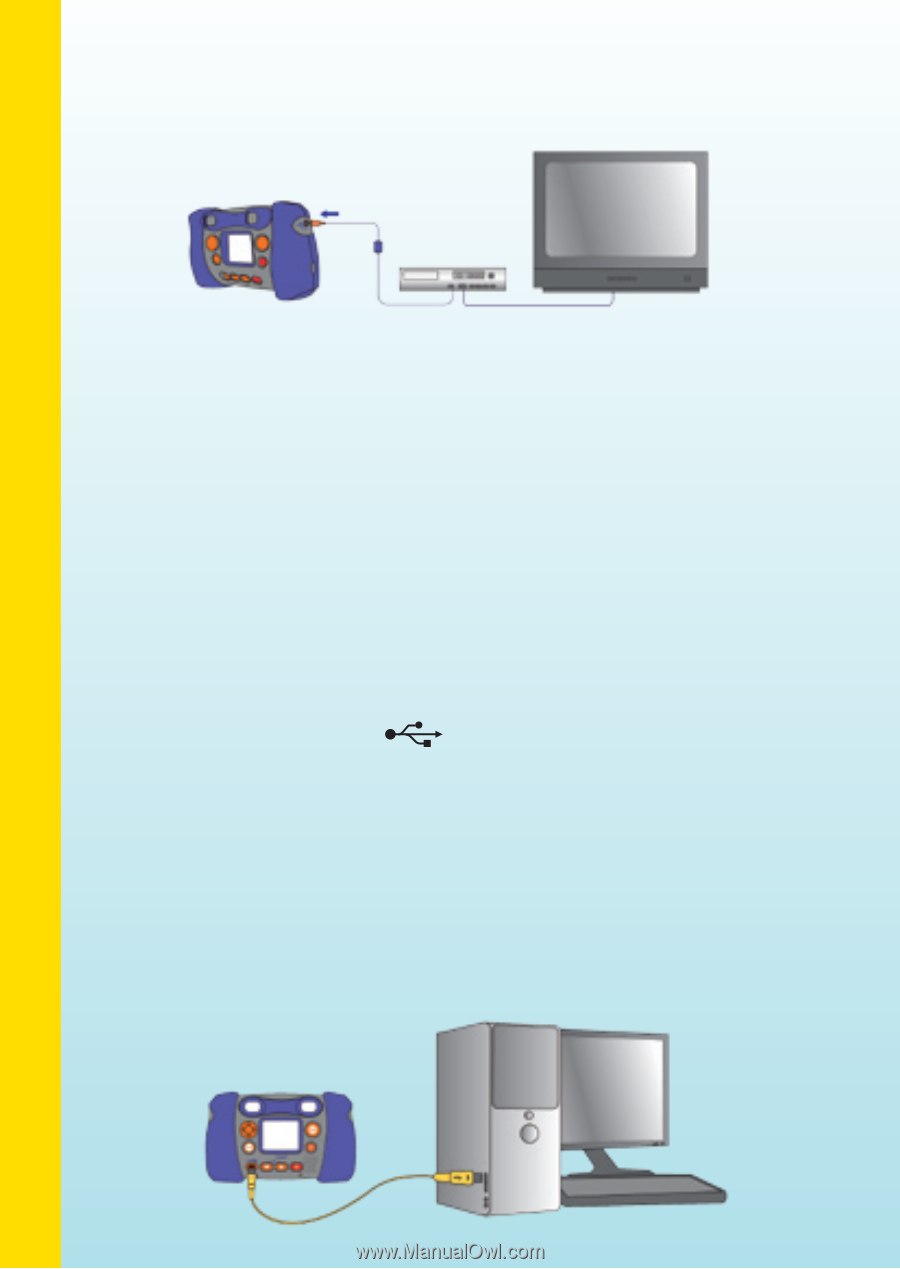
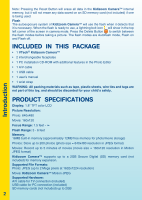
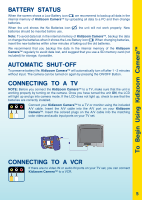
To Begin Using Kidizoom Camera™ • Insert the A/V cable into the A/V port on your Kidizoom Camera™. • Connect the yellow plug on the A/V cable to the yellow video input port on your VCR. • Connect the white plug on the A/V cable to the white audio input port on your VCR. Note: If the A/V cable is plugged into Kidizoom Camera™ while a game is already in progress on the LCD screen, the game will quit and exit to the main menu. Also, if the A/V cable is unplugged while a game is in progress on the TV screen, the game will quit and exit to the main menu. Connecting to a PC You can connect Kidizoom Camera™ to a PC using the included USB cable. Once connected, you can upload and download files to Kidizoom Camera™ by accessing your camera as a removable storage device. When Kidizoom Camera™ is connected to the PC, a new drive called "VTech 773" will appear on the PC. If there is also an SD memory card (not included) inserted into the camera when it is connected, two new drives will appear. One will be the "VTech 773" drive and the other will be a removable disk drive for the SD memory card. • Locate the USB port on the back of your camera and slide the door open. • Insert the USB cable (smaller end) into the USB port on the camera. • Insert the larger end of the USB cable into a USB port on the computer. A USB port is usually marked with this symbol . To avoid data corruption, before uploading data to the PC or downloading data to the camera make sure that your Kidizoom Camera™ does not have low battery levels. MINIMUM SYSTEM REQUIREMENTS FOR PC CONNECTION: Windows® 2000 SP3+/ XP Compatible with Apple® Computer (Mac OS® X 10.0 or above) in mass storage mode; photo editing program not compatible with Mac OS®. Note: Once the camera is connected to the PC, turn ON your Kidizoom Camera™ to enable the connection between it and the PC. Do not disconnect the camera or computer while files are uploading or downloading. After you have finished, turn off the camera to save power. 6
-
 1
1 -
2
-
 3
3 -
 4
4 -
 5
5 -
 6
6 -
 7
7 -
 8
8 -
 9
9 -
 10
10 -
 11
11 -
 12
12 -
 13
13 -
14
-
15
-
16
-
17
-
18
-
19
-
20
 |
 |