Vtech KidiZoom Camera User Manual - Page 7
Battery Status, Automatic Shut-off, Connecting To A Tv, Connecting To A Vcr, To Begin Using Kidizoom
 |
View all Vtech KidiZoom Camera manuals
Add to My Manuals
Save this manual to your list of manuals |
Page 7 highlights
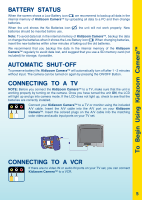
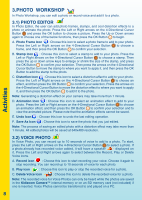
To Begin Using Kidizoom Camera™ BATTERY STATUS When the screen shows a Low Battery icon , we recommend to backup all data in the internal memory of Kidizoom Camera™ by uploading all data to a PC and then change batteries. When the unit shows the No Batteries icon , the unit will not work properly. New batteries should be inserted before use. Note: To avoid data lost in the internal memory of Kidizoom Camera™, backup the data or change the batteries when it shows the Low Battery icon . When changing batteries, insert the new batteries within a few minutes of taking out the old batteries. We recommend that you backup the data in the internal memory of the Kidizoom Camera™ regularly to avoid data lost, and suggest that you use a SD memory card (not included) for storage, if possible. Automatic Shut-Off To preserve battery life, Kidizoom Camera™ will automatically turn off after 1 - 2 minutes without input. The camera can be turned on again by pressing the ON/OFF Button. Connecting to a TV NOTE: Before you connect the Kidizoom Camera™ to a TV, make sure that the unit is working properly by turning on the camera. Once you have turned the unit ON, the LCD will light up and go into camera mode. If the LCD does not light up, check to see that the batteries are correctly installed. Connect your Kidizoom Camera™ to a TV or monitor using the included A/V cable. Insert the A/V cable into the A/V port on your Kidizoom Camera™. Insert the colored plugs on the A/V cable into the matching color video and audio input ports on your TV set. Connecting to a VCR If there are no video IN or audio IN ports on your TV set, you can connect Kidizoom Camera™ to a VCR. 5
-
 1
1 -
 2
2 -
 3
3 -
 4
4 -
 5
5 -
 6
6 -
 7
7 -
 8
8 -
 9
9 -
 10
10 -
 11
11 -
 12
12 -
13
-
14
-
15
-
16
-
17
-
18
-
19
-
20
 |
 |