Waring FP2200 Instruction Manual - Page 5
types
 |
View all Waring FP2200 manuals
Add to My Manuals
Save this manual to your list of manuals |
Page 5 highlights
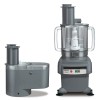
• Refer to the assembly instructions for the Continuous Feed Bowl. Position the bowl on the motor base, theriiItach the ejector disk, a dicing plate above the ejector disk, and the appropriate slicing plate on top of the dicing plate. Attach the coveraMplate-the bowl counterclockwise until it locks into position. Choldie'iffOrn- the following options, depending upon the quantity and/Or shape of theft)* to be cut and the desired length of strips. Load the feed tube and position' e food pusher at the top of the stack before plugging the unit in and pressing the "On" switch. (Or, insert the food pusher into the empty feed tube, remove the food pusher insert, and load the food pusher insert port. Position the food pusher insert at the top of the stack before pressing the "On" switch). Use moderate, steady pres$ip*on the food pusher (or the food pusher insert) to push the items down when ttilWate starts turning. if the pressure is not steady, the cut items may vary in thickness. Avoid heavy pressure, which may deform the plate.' •The smaller the dice destixid, the more difficult the cut is to successfully attain. Soft orjuicy produce wilttet mushy if the produce is too small and/or the dice is too Small: . , • • When dicing different types of produce, always dice the softest produce first. This will allow the harder, produce to push the softer produce through the dicing grid. (It is difficult for soft produce to effectively push hard produce through the dicing grids • For best results When dicing onions, celery, pepper or tomatoes, insert them vertically into the food pusher (or food pusher insert opening), so that the slicing plate wi€l slice them acrosdifietrain. • DO NOT ATTEMPT -TO DICE CHEESES OR MEATS. Damage could occur to the motor andfor the blades: such damage will not be covered under warranty. • A noticeable change iRthe diced produce will occur when the dicing grid needs cleaning. When that.f*P- ens, press the "Off" switch, unplug the unit, and remove the cover and the,alOrng plate. Then use a stiff bristle brush to force through any produce that is stuck ih.the dicing grid. Reassemble the unit and continue dicing. • When dicing different types of produce, follow the above procedure to clean out the dicing grid between operations. TECHNIQUES AND TIPS - SHREDDING/FINE GRATE PLATES • All models of the Waring Commercial Food Processor come with the (#CAF20) 3116" Shredding Plate. This plate is for processing cheeses such as Mozzarella, Jack, Swiss, or other soft food items. It is also used for making cole slaw, shredded carrots or coconut, and potato strings or hash browns. • Optional additional plates include: 1. (#CAF19) 1/8" Shredding Plate: Most popular for shredding Cheddar cheeses for tacos and salad bars. Also works well with carrots, potatoes, chocolate, nut meats, and coconut. 2. (#CAF21) 3/8" Shredding Plate: For processing soft cheeses and items such as hard-boiled eggs, and chipped vegetables. It is excellent for the large scale production of cole slaw. 3. (#CAF22) Fine Grate Plate: Excellent for grating chocolate, nut meats, coconut, and hard cheeses such as Parmesan. (Note: Softer cheeses will gum up the plate.) Also for fine cracker, cookie, or bread crumbs. Use only dried bread: fresh bread will clog up the plate. • Refer to the assembly instructions for the bowl you will be using. Attach the 12 preloading the bowl with food before putting on the cover, load the bowl now. (See Basic Operating Instructions, pg.6.) • If a plate is to be used, place it on the tip of the drive shaft, and gently press it in place. The plate will sit on the top of the drive shaft. Handle plates with care. • After the desired tool is selected and assembled in the bowl (and the bowl is preloaded if required), put the cover on the bowl with the cover's interlock tab positioned at about 1 o'clock when viewed from above, and the "FRONT" arrow on the cover positioned at about 7 o'clock. Gently press the cover down until it is fully seated on the bowl. Turn the bowl and cover counterclockwise until the bowl handles are in the 3 o'clock and 9 o'clock positions and the locking tabs on the motor base are engaged in the bowl locking slots . Be sure that the cover's interlock tab slides into the tower interlock slot. (The feed tube will be in the 9 o'clock position.) This locks the cover securely in position and activates the magnetic safety interlock switch. The interlock switch prevents operation of the machine unless the cover is in its proper position. • NEVER ATTEMPT TO START THE FOOD PROCESSOR WITHOUT THE COVER LOCKED INTO POSITION. • Insert the food pusher insert into the food pusher port and turn the food pusher insert clockwise to lock it into the food pusher. Insert the assembled food pusher into the feed tube. DISASSEMBLY WITH BATCH BOWL • ALWAYS UNPLUG THE CORD BEFORE DISASSEMBLING. • Turn the bowl and cover clockwise until the bowl handles are in the 4 o'clock and 10 o'clock positions, the bowl locking slots are disengaged from the locking tabs on the motor base, and the interlock tab on the cover is out of the tower interlock slot. Remove the cover from the bowl. Remove the food pusher from the feed tube. Remove the food pusher insert from the food pusher insert port. • To remove a plate, insert your thumb and forefinger into the 2 finger holes in the plate, and lift it off of the drive shaft. Handle plates carefully. • Gently lift the bowl off of the motor base. • Remove the bowl from the motor base before you remove the S-blade or the mixing blade. Keep a slight downward pressure on the top of the center hub of the blade while removing the bowl from the motor base. This will form a seal to prevent food particles from spilling into the center tube of the bowl, and onto the motor base or the work surface. Then remove the S-blade or the mixing blade from the bowl. Handle the S-blade with caution; the blades are extremely sharp. ASSEMBLY WITH CONTINUOUS FEED BOWL • Clean and sanitize the motor base, and wash, rinse, and sanitize the bowl, cover, food pusher, food pusher insert, ejector disk and processing tools prior to initial use. (See Cleaning, page 8.) • Position the motor base with the nameplate facing you. Be certain that the cord is unplugged and the "OFF" switch has been pressed. Place the bowl on the motor base with the discharge chute in the 4 o'clock position,and the bowl locking slots on the bottom of the bowl aligned to the left of the grey locking tabs on the motor base. 5
-
 1
1 -
 2
2 -
 3
3 -
 4
4 -
 5
5 -
 6
6 -
 7
7 -
 8
8
 |
 |
