Weber Summit FT 600 LP Owners Manual
Weber Summit FT 600 LP Manual
 |
View all Weber Summit FT 600 LP manuals
Add to My Manuals
Save this manual to your list of manuals |
Weber Summit FT 600 LP manual content summary:
- Weber Summit FT 600 LP | Owners Manual - Page 1
the owner and the owner should keep them for future use. THIS GAS APPLIANCE IS DESIGNED FOR OUTDOOR USE ONLY. WARNING: Do not try to light this appliance without reading "Lighting" instructions section of this manual. ® NationalPROPANEGAS Association FOR YOUR SAFETY 1. Do not store or use gasoline - Weber Summit FT 600 LP | Owners Manual - Page 2
using. See instructions in this manual for correct procedures. Do not operate the Weber Gas Barbecue if there is a gas leak present. Do not use a flame to check for gas leaks. Combustible materials should never be within 24 inches of the top, bottom, back or sides of your Weber Gas Barbecue. Do - Weber Summit FT 600 LP | Owners Manual - Page 3
of this Weber Gas Barbecue that and operated in accordance with the printed instructions accompanying it. Weber may require reasonable out in this owner's manual. Deterioration or damage due Service Center 250 South Hicks Road Palatine, IL 60067-6241 (847) 705-8660 (800) 446-1071 LP Tank The LP - Weber Summit FT 600 LP | Owners Manual - Page 4
PATENTS AND TRADEMARKS © 1996 Weber-Stephen Products Co. Weber, , Flavorizer and Crossover are registered U.S. trademarks; Gas Catcher is a trademark of Weber-Stephen Products Co., 200 East Daniels Road, Palatine, IL 60067-6266, U.S.A. Weber is also a registered trademark (Reg. TM., Marca Registrada - Weber Summit FT 600 LP | Owners Manual - Page 5
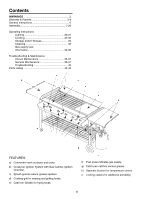
Contents WARNINGS 2 Warranty & Patents 3-4 General Instructions 6 Assembly 7-29 Operating Instructions Lighting 30-31 Cooking 32-33 Storage and/or Nonuse 33 Cleaning 33 Gas supply tank Information 34-36 Troubleshooting & Maintenance Annual Maintenance 36-37 General Maintenance 38-41 - Weber Summit FT 600 LP | Owners Manual - Page 6
in your yard or on your patio. Portability means you can take your Weber Gas Barbecue with you if you move. Liquid Propane (LP) gas supply is easy to use and gives you more cooking control than charcoal fuel. ■ These instructions will give you the minimum requirements for assembling your Weber - Weber Summit FT 600 LP | Owners Manual - Page 7
occur. If a part is missing, do not go back to the store. Call the Weber Customer Service Center toll free 1-800-446-1071 to receive immediate assistance. Have your owner's manual and serial number of the barbecue available for reference. Bottom connectors (2) Back panel Top frame rail #1's (2) Top - Weber Summit FT 600 LP | Owners Manual - Page 8
bar / Cooking grill holders (2) Cooking grills (2) Griddle Flavorizer bars (11) Fuel scale assembly Catch pan holder Catch pan Aluminum drip pans (2) ER Wheels (2) Accessory rack LP tank LP tank filler adapter 8 WE B ER WE B - Weber Summit FT 600 LP | Owners Manual - Page 9
Check contents of hardware packs Glides (4) 1/4-20 x 3 1/2 inch bolts (4) (actual size) 1/4-20 x 1 3/4 inch bolt (actual size) 1/4-20 x 1/2 inch bolts (6) (actual size) Phillips head 1/4-20 x 1 inch machine screws (4) (actual size) 1/4-20 wing nuts (2) (actual size) 1/4-20 hex nut (actual size) 1/4 - Weber Summit FT 600 LP | Owners Manual - Page 10
the frame assembly. Set one end of wheel frame on the block of wood (or other hard, protected surface). Put one wheel on axle, WEBER side facing up, and tap on one hubcap. Figure 1. Repeat with other wheel and hubcap. ER Step 3 Insert casters You will need: caster frame and two - Weber Summit FT 600 LP | Owners Manual - Page 11
Figure 3. Note: Fuel scale decal on wheel frame must be on the back side. Hold one bottom connector up to the wheel frame, slots to the outside. . Tighten. Repeat with the other bottom connector. (a) Turn frame assembly right side up. The fuel scale decal should be toward the front. Figure 4. Fuel - Weber Summit FT 600 LP | Owners Manual - Page 12
insert the plastic button through the match holder bracket and frame.Figure 5. Uncoil match holder and chain and hang on bracket. View from underneath side of frame Step 6 Assemble front top frame rail You will need: one top frame rail #1, one top frame rail #2, one 1/4-20 x 1/2 inch bolt, frame - Weber Summit FT 600 LP | Owners Manual - Page 13
#2 turned the wrong way. Turn top frame rail #2 around.) Note: Do not use a washer for this step. (a) (b) Front caster frame Fuel scale decal on front side Figure 7 Front wheel frame 1 2 Figure 8 13 - Weber Summit FT 600 LP | Owners Manual - Page 14
Position the top frame rail assembly with the tabs to the inside of the cart. Figure 9 (a). Insert the tabs onto the back caster frame and back wheel frame, the round tubing of the top frame rail assembly will rest in the cut out portion of the caster frame and wheel frame. (a) Cut out Back caster - Weber Summit FT 600 LP | Owners Manual - Page 15
Step 9 Bolt back panel and back top frame rail assembly You will need: back panel, two nylon washers, two 1/4-20 x 1/2 inch bolts and frame assembly. Position back panel cut outs to the top and the flanges to inside of the frame assembly. Figure 11 (a). Flange (a) Caster frame Cut out Align hole - Weber Summit FT 600 LP | Owners Manual - Page 16
of the fuel scale assembly through the two small holes in the tank panel. Make sure indicator rod of fuel scale is on the left side of the wheel frame. Add washers, then wing nuts and tighten. Figure 14. Tabs on tank panel Wheel frame (b) E E F F View from front left View from - Weber Summit FT 600 LP | Owners Manual - Page 17
Step 12 Add cooking box assembly You will need: frame assembly and cooking box assembly. Note: This assembly takes two people to lift the cooking box assembly into the frame. Uncoil the hose. Set the cooking box into the frame so the control panel is under the top frame rail. Figure 15. The cooking - Weber Summit FT 600 LP | Owners Manual - Page 18
Step 13 Remove the control panel and the front panel Take off all 6 burner control knobs. Pull up on the ignition buttons until they stay in the up position. Figure 17. Burner control knobs Put your fingers under the front edge of the control panel and lift up and pull evenly toward you. Figure 19 - Weber Summit FT 600 LP | Owners Manual - Page 19
Step 14 Check burner alignment Your Weber Gas Barbecue burner assembly has been factory assembled, pressure and flame out of the way. Figure 22 (a). Lift and hook the tank onto the fuel scale. With an empty LP tank, adjust the fuel scale setting to E with scale setting (top) wing nut. Figure 22 (b). - Weber Summit FT 600 LP | Owners Manual - Page 20
call WeberStephen Products Co., Customer Service Center. Take the LP tank to an RV center (or some other source of LP gas) to fill the tank with do not leave the LP tank in a car on a hot day). For full instructions on safe handling of LP tanks, see Section "Operating Instructions". Step 17 Check - Weber Summit FT 600 LP | Owners Manual - Page 21
LP tank onto the fuel scale. Loosen the tank lock wing nut. Swing the tank lock down. Tighten the wing nut. Figure 24. E Tank lock wing nut F Figure 24 Put the clamp over the hose. Insert the screw through the hose clamp and into the threaded hole in the side Hose Hole in side of wheel frame - Weber Summit FT 600 LP | Owners Manual - Page 22
Figure 28 (a). b) Regulator to tank connection. Figure 28 (b). ƽWARNING: If there is a leak at connections 27 (a), 27 (b), 27 (c) or 28 (a), turn OFF the gas. Do not operate the barbecue. Contact your dealer. ƽWARNING: If there is a leak at connection 28 (b) retighten and recheck for leaks with soap - Weber Summit FT 600 LP | Owners Manual - Page 23
behind the brackets at the front of the cooking box assembly. Figure 29. Slides behind this bracket Flavorizer Bar/cooking grill support Step 21 Install Flavorizer Bars You will need: eleven flavorizer bars. Set the Flavorizer bars front to back over the burners in the slots of - Weber Summit FT 600 LP | Owners Manual - Page 24
Step 22 Install splash guards You will need: two splash guards Position splash guard, flanges to the rear, at the back of the cooking box assembly. Figure 31 (a). Insert both wire ends into the mounting holes in the cooking box. Figure 31. Note: You will have to bend the splash guards slightly - Weber Summit FT 600 LP | Owners Manual - Page 25
Install Cooking Grills and Griddle You will need: two cooking grills and one griddle. Set the griddle on top of the Flavorizer Bar/cooking grill support. Figure 34. ƽCAUTION: The drain hole of the griddle needs to be toward the front. The open "U" of the cooking grill goes down. Set both - Weber Summit FT 600 LP | Owners Manual - Page 26
36. The left work surface will cover half of the handles on the left side. Position the glide as shown in figure 36 (a). Align the front hole in Figure 37. The right work surface will cover half of the handles on the right side. Position the glide as shown in figure 37 (a). Align the front hole in - Weber Summit FT 600 LP | Owners Manual - Page 27
stay in the up position. Place the control panel into the grooves on either side of the front of the cooking box. Push the control panel into place, edge of the control panel slightly and set it into the recess on both sides of the cooking box. Figure 39. Figure 38 (a) Front Panel Control Panel - Weber Summit FT 600 LP | Owners Manual - Page 28
Step 27 Install bottom tray You will need: Bottom tray, catch pan holder, catch pan, and one drip pan. Slide the bottom tray into the mounting slots under the bottom of the cooking box with the finger grip of the catch pan toward you. Figure 43. ƽCAUTION: Do not line the bottom tray with aluminum - Weber Summit FT 600 LP | Owners Manual - Page 29
Step 28 Add accessory rack You will need: accessory rack. Set the bottom rack between the two bottom connectors. Figure 45. Figure 45 29 - Weber Summit FT 600 LP | Owners Manual - Page 30
Lighting EACH HEAT ZONE OPERATES INDEPENDENTLY. Summary lighting instructions are on the control panel. 1) Open the sliding work turn on the LP tank valve, the excess flow control will activate, limiting the flow of gas from the LP tank. If this should occur, turn OFF the LP tank valve and - Weber Summit FT 600 LP | Owners Manual - Page 31
in the OFF position, when you turn on the LP tank valve, the excess flow control will activate, limiting the flow of gas from the LP tank. If this should occur, turn OFF the LP tank valve and burner control knobs and start over. Manual Lighting 1 3 Figure 2 4 2 ƽ DANGER ƽ When the excess flow - Weber Summit FT 600 LP | Owners Manual - Page 32
Cooking The Weber Gas Barbecue should not be moved when operating or hot. High Use caution when cooking foods with high fat content, such as chops, bacon or sausage. ƽ Follow all safety instructions provided with your barbecue. ƽ Do not drop cast iron griddle, it will break. ƽ Prior to storing, - Weber Summit FT 600 LP | Owners Manual - Page 33
instructions. Periodic Cleaning ƽCAUTION: Turn your Weber Gas gas must be turned off at the LP cylinder when the Weber Gas Barbecue is not in use. s When the Weber Gas Barbecue is stored indoors, the gas supply must be DISCONNECTED and the LP cylinder stored outdoors in a well-ventilated space. s LP - Weber Summit FT 600 LP | Owners Manual - Page 34
and turn tank lock up out of the way. 4) Lift tank off. To refill take LP tank and tank filler adapter to a "Gas Propane" dealer. ƽWARNING: We recommend that your LP tank be filled at an authorized LP gas dealer, by a qualified attendant, who fills the tank by weight. IMPROPER FILLING IS DANGEROUS - Weber Summit FT 600 LP | Owners Manual - Page 35
a leak. If leak does not stop, turn off the gas and contact Weber-Stephen Customer Service. Do not use the barbecue. g) When leak checks are complete, turn gas supply OFF and rinse connections with water. LP Tank The LP tank manufacturer is responsible for the materials, workmanship and performance - Weber Summit FT 600 LP | Owners Manual - Page 36
can do this for you. Figure 8. If you have questions about spare LP tanks, please call Weber-Stephen Customer Service. D.O.T. Certification (example) ƽWARNING: We recommend that your LP tank be filled at an authorized LP gas dealer, by a qualified attendant, who fills the tank by weight. IMPROPER - Weber Summit FT 600 LP | Owners Manual - Page 37
The burners have been flame tested. As a safety precaution you should recheck all fittings for leaks before using your Weber Gas Barbecue. Shipping and handling may have loosened or damaged a gas fitting. You will need: a soap and water solution and a rag or brush to apply it. To perform leak checks - Weber Summit FT 600 LP | Owners Manual - Page 38
ƽWARNING: If there is a leak at connection 9 (d), turn OFF the gas and retighten the fitting with a spanner and recheck for leaks with soap and in the venturi section of the burner tubes. This blocks the normal gas flow, and can cause the gas to flow back out of the air shutter. Figure 11. This - Weber Summit FT 600 LP | Owners Manual - Page 39
appear to be uniform the length of the burner tube, follow the burner cleaning procedures. Main Burner Cleaning Procedure Turn off the gas supply. Remove the manifold. (See Section "Replacing the main burners".) Look inside each burner with a flashlight. Figure 14. Replacing the Burners 1. Your - Weber Summit FT 600 LP | Owners Manual - Page 40
10. Unlatch the Spider Stopper Guards and remove. Figure 18. 12. Slide the burner assembly from each Heat Zone. The left and right burners are connected by the Crossover tube. Figure 20(a). Pull out of here Figure 18 11. Pull the manifold out of the burners. Figure 19. Crossover tube Manifold - Weber Summit FT 600 LP | Owners Manual - Page 41
Valve Burner (b) Check fit around burner Figure 23 ƽCAUTION: If the Spider Stopper Guards do not fit tightly, contact Weber-Stephen Customer Service. ƽCAUTION: After reinstalling the gas lines, they should be leak checked with a soap and water solution before using the barbecue. See Step"Check for - Weber Summit FT 600 LP | Owners Manual - Page 42
supply the burners with gas. This is due to the air temperature cooling the LP cylinder which slows the vaporization process.) Is there frost/ice on the outside of the LP cylinder? If problems cannot be corrected by using these methods, please contact Weber-Stephen Customer Service. 42 Turn off - Weber Summit FT 600 LP | Owners Manual - Page 43
43 - Weber Summit FT 600 LP | Owners Manual - Page 44
1 2 3 4 5 6 7 8 9-13 14 15 16 17 18 19 20 21 22 23 24 25 26 27 28 41 42 E BE R W E BE R W 29 30 31 32 33 34 44 35 36 37 38 3940 43 44 45 46 47 48, 39 49 50 51 52 53 54 39, 55 56 57 58 59 - Weber Summit FT 600 LP | Owners Manual - Page 45
12 Igniter wire (white) (3) 13 Gas catcher ignition chamber (3) 14 Manifold mounting clips Service Center toll free 1-800-446-1071 to receive immediate assistance. Have your owner's manual nuts 56 Fuel scale assembly 57 Hose / Regulator 58 LP tank 59 Filler adapter ƽ WARNING: Use only Weber factory - Weber Summit FT 600 LP | Owners Manual - Page 46
46 - Weber Summit FT 600 LP | Owners Manual - Page 47
47 - Weber Summit FT 600 LP | Owners Manual - Page 48
products, an occasional error may occur. Our knowledgeable Customer Service staff is prepared to help you with any problems with parts or assembly. Call our toll free number 1-800-446-1071. For quicker service, please have your owner's manual available for reference. We also welcome any comments or
-
 1
1 -
 2
2 -
 3
3 -
 4
4 -
 5
5 -
 6
6 -
 7
7 -
8
-
9
-
10
-
11
-
12
-
13
-
14
-
15
-
16
-
17
-
18
-
19
-
20
-
21
-
22
-
23
-
24
-
25
-
26
-
27
-
28
-
29
-
30
-
31
-
32
-
33
-
34
-
35
-
36
-
37
-
38
-
39
-
40
-
41
-
42
-
43
-
44
-
45
-
46
-
47
-
48
 |
 |
Serial Number
Please use this number in registering your warranty
and any correspondence with the factory.
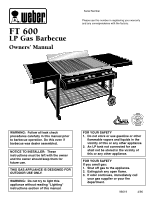
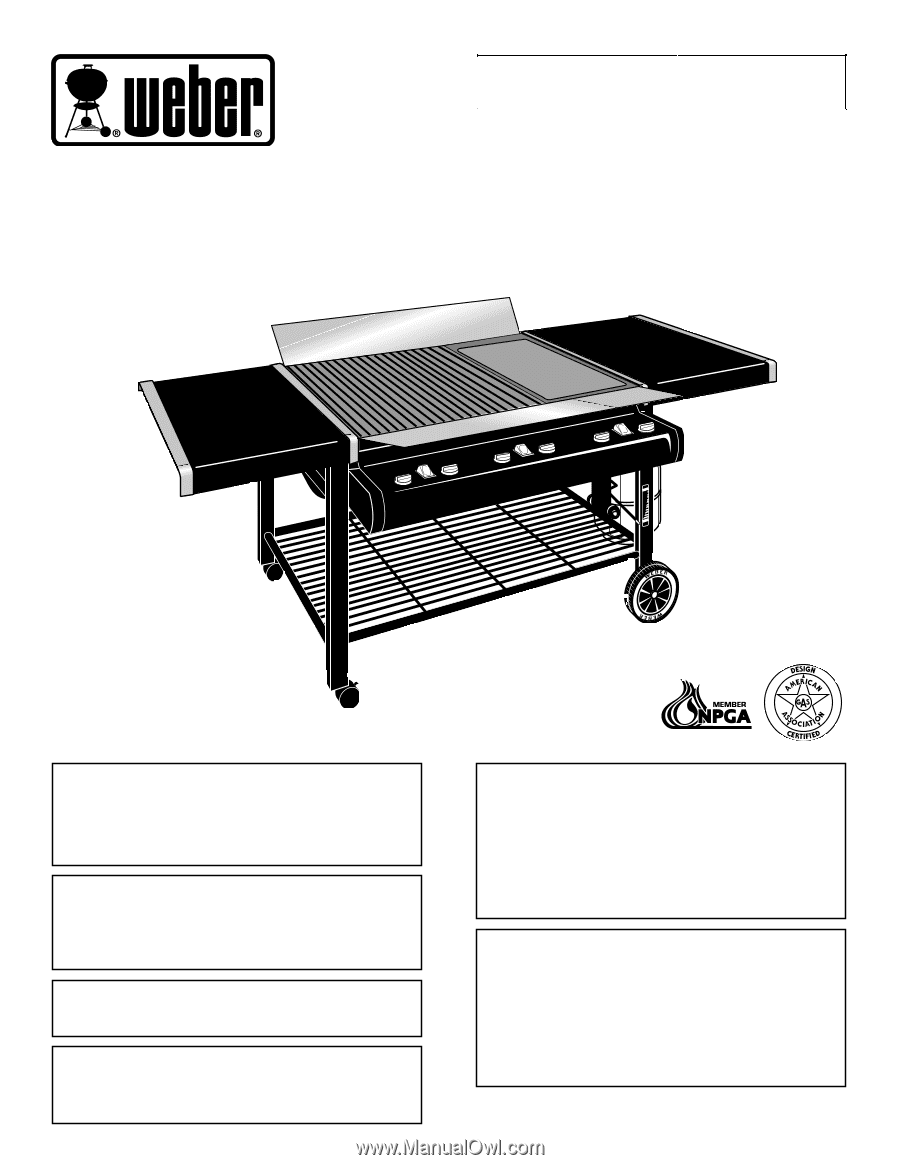
FT 600
LP Gas Barbecue
Owners’ Manual
96619
4/96
E
F
National
Association
PROPANE
GAS
®
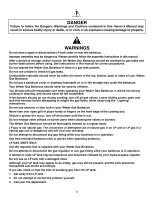
WARNING:
Do not try to light this
appliance without reading "Lighting"
instructions section of this manual.
THIS GAS APPLIANCE IS DESIGNED FOR
OUTDOOR USE ONLY.
NOTICE TO INSTALLER:
These
instructions must be left with the owner
and the owner should keep them for
future use.
FOR YOUR SAFETY
If you smell gas:
1.
Shut off gas to the appliance.
2.
Extinguish any open flame.
3.
If odor continues, immediately call
your gas supplier or your fire
department.
FOR YOUR SAFETY
1.
Do not store or use gasoline or other
flammable vapors and liquids in the
vicinity of this or any other appliance.
2.
An LP tank not connected for use
shall not be stored in the vicinity of
this or any other appliance.
WARNING:
Follow all leak check
procedures carefully in this manual prior
to barbecue operation. Do this even if
barbecue was dealer assembled.