Weider Club C650 English Manual - Page 11
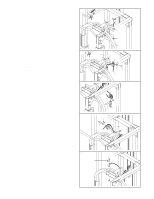
Attach the Weight Guide Top Frame 49 to
 |
View all Weider Club C650 manuals
Add to My Manuals
Save this manual to your list of manuals |
Page 11 highlights
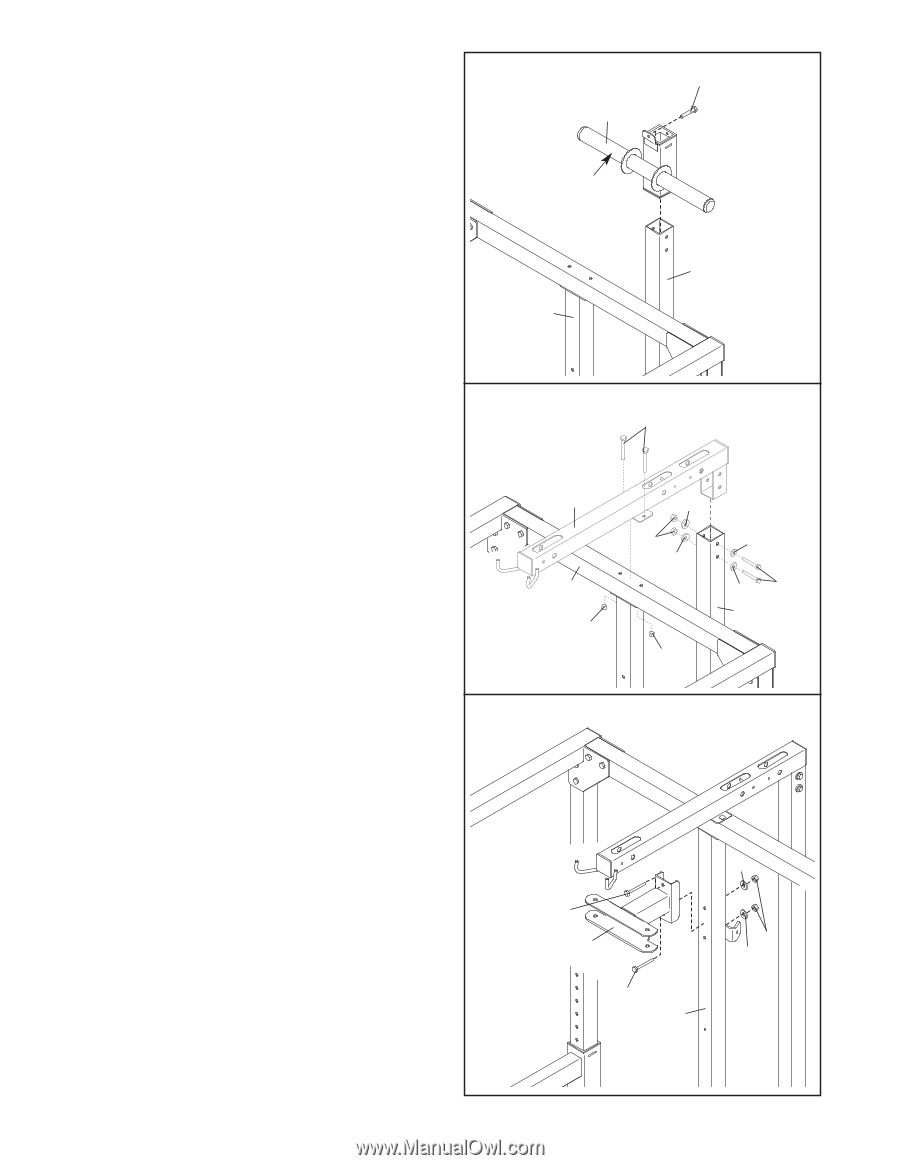
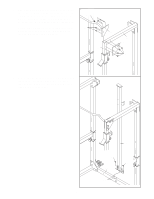
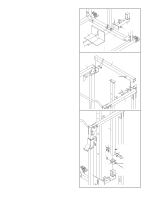
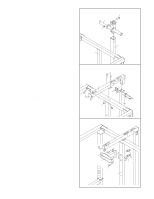
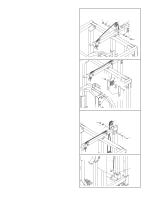
12. Insert an M10 x 19mm Bolt (102) into the bracket 12 on the Weight Carriage (62) from the side shown. Slide the Weight Carriage (62) onto the Weight Guide Upright (42) so that the weight tube is toward the Center Upright (45). 102 62 Weight Tube 42 45 13. Attach the Weight Guide Top Frame (49) to the 13 Weight Guide Upright (42) with two M10 x 75mm Bolts (92), four M10 Washers (35), and two M10 Nylon Locknuts (34). Do not tighten the Locknuts yet. Attach the Weight Guide Top Frame (49) to the Center Top Frame (46) with two M10 x 78mm Bolts (32) and two M10 Nylon Locknuts (34). Tighten the M10 Nylon Locknuts (34) used in steps 1-13. 14. Attach the Butterfly Bracket (55) to the Center 14 Upright (45) with two M10 x 78mm Bolts (32), two M10 Washers (35), and two M10 Nylon Locknuts (34). 32 49 46 34 35 34 35 34 35 92 35 42 32 55 32 45 35 34 35 11
-
 1
1 -
2
-
3
-
4
-
5
-
 6
6 -
 7
7 -
 8
8 -
 9
9 -
 10
10 -
 11
11 -
 12
12 -
 13
13 -
 14
14 -
 15
15 -
 16
16 -
17
-
18
-
19
-
20
-
21
-
22
-
23
-
24
-
25
-
26
-
27
-
28
-
29
-
30
-
31
-
32
-
33
 |
 |