Weider Pro 3650 English Manual - Page 25
Troubleshooting
 |
View all Weider Pro 3650 manuals
Add to My Manuals
Save this manual to your list of manuals |
Page 25 highlights
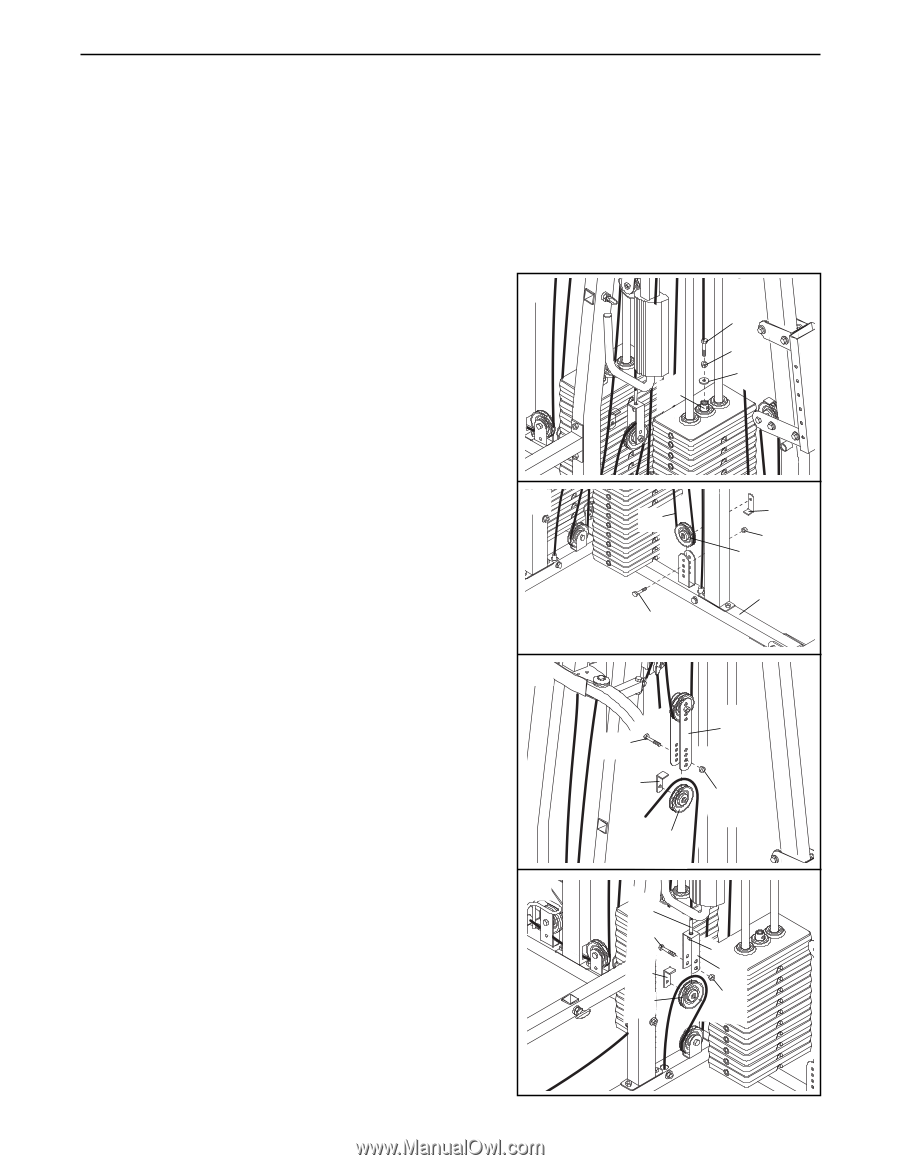
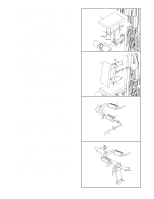
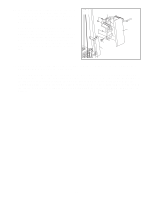
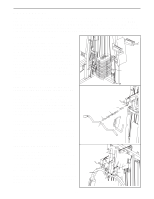
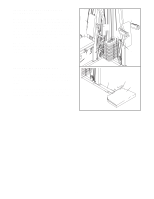
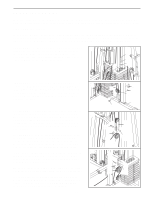
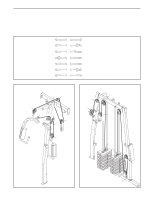
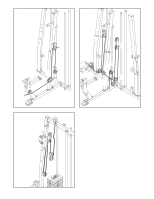
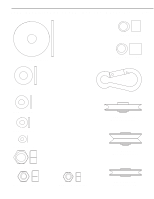
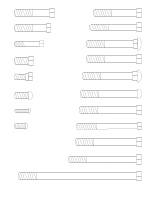
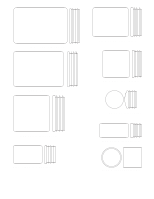
TROUBLESHOOTING Make sure all parts are properly tightened each time the weight system is used. Replace any worn parts immediately. The weight system can be cleaned using a damp cloth and mild non-abrasive detergent. Do not use solvents. TIGHTENING THE CABLES Woven cable, the type of cable used on the weight system, can stretch slightly when it is first used. If there is slack in the cables before resistance is felt, the cables should be tightened. To tighten the cables, first insert the weight pins into the centers of the weight stacks. Slack can be removed from the cables in several ways: See drawing 1. To tighten the Squat Cable (73) or the Swivel 1 High Cable (not shown), first loosen the M12 Nut (118) on the end of the Cable, away from the 50mm Washer (1). Screw the end of the Cable farther into the Weight Tube (43). Then, retighten the Nut against the Washer. 73 118 1 43 See drawing 2. To further tighten the Squat Cable (73), first remove the M10 Nylon Locknut (87), the M10 x 50mm Bolt 2 (100), Cable Trap (68), and 90mm Pulley (78) from the indi- cated bracket on the Long Base (101). Reattach the Pulley and Cable Trap between a lower set of holes with the Bolt and Nylon Locknut. See drawing 3. To tighten the other five cables, first remove the upper or lower M10 Nylon Locknut (87), M10 x 50mm 3 Bolt (100), 90mm Pulley (78), and Cable Trap (68) from the Pulley Plates (63) or Small Pulley Plates (not shown). Reattach the Pulley and the Cable Trap between a set of holes closer to the center of the Pulley Plates with the Bolt and Locknut. See drawing 4. To remove additional slack, first remove the M10 Nylon Locknut (87), M10 x 50mm Bolt (100), 90mm Pulley (78), and Cable Trap (68) from the "U"-bracket (64). Reattach the Pulley and the Cable Trap between the higher set of holes in the "U"-bracket with the Bolt and Locknut. Slack can also be removed from the cables by tightening the 4 M8 Nylon Locknut (34) at the end of the Leg Lever Cable (75). To do this you may need to remove the 90mm Pulley (78) from the "U"-Bracket (64). Do not overtighten the cables. If the cables are overtightened, the top weights will be lifted off the weight stacks. If a cable slips off the pulleys repeatedly, it may have become twisted. Remove the cable and re-install it. If the cables need to be replaced, see ORDERING REPLACEMENT PARTS on the back cover of this manual. 25 73 68 87 78 101 100 63 100 68 87 78 75 100 34 68 64 78 87
-
 1
1 -
2
-
3
-
4
-
5
-
6
-
7
-
8
-
9
-
10
-
11
-
12
-
13
-
14
-
15
-
16
-
17
-
18
-
19
-
 20
20 -
 21
21 -
 22
22 -
 23
23 -
 24
24 -
 25
25 -
 26
26 -
 27
27 -
 28
28 -
 29
29 -
 30
30 -
31
-
32
-
33
 |
 |