Weider Pro 9628 English Manual - Page 7
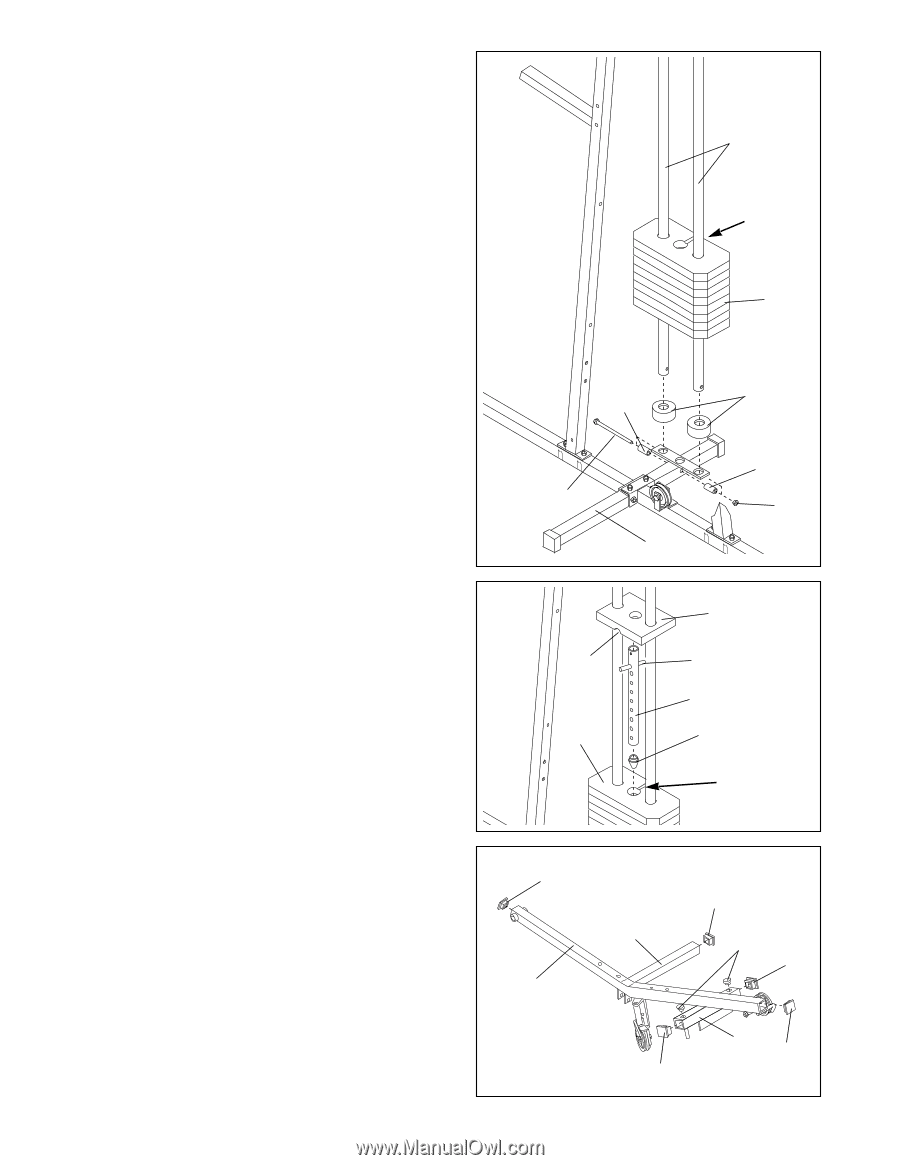
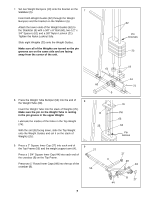
in the pin groove in the upper Weight. - weights
 |
View all Weider Pro 9628 manuals
Add to My Manuals
Save this manual to your list of manuals |
Page 7 highlights
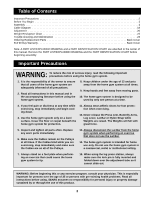
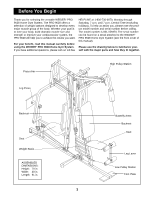
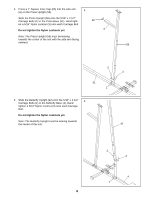
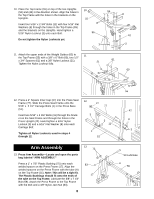
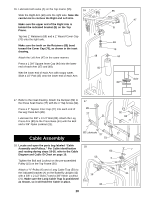
7. Set two Weight Bumpers (19) onto the bracket on the 7 Stabilizer (5). Insert both Weight Guides (62) through the Weight Bumpers and the bracket on the Stabilizer (5). Attach the lower ends of the Weight Guides (62) to the Stabilizer (5) with a 3/8" x 6" Bolt (60), two 1/2" x 3/4" Spacers (61) and a 3/8" Nylon Locknut (21). Tighten the Nylon Locknut fully. Slide eight Weights (25) onto the Weight Guides. Make sure all of the Weights are turned so the pin grooves are on the same side and are facing away from the center of the unit. 62 Pin Grooves 25 19 61 8. Press the Weight Tube Bumper (64) into the end of 8 the Weight Tube (63). Insert the Weight Tube into the stack of Weights (25). Make sure the pin on the Weight Tube is resting in the pin groove in the upper Weight. Lubricate the insides of the holes in the Top Weight (76). With the slot (B) facing down, slide the Top Weight onto the Weight Guides and set it on the stack of Weights (25). 60 B 25 61 21 5 76 Pin 63 64 Pin Groove 9. Press a 2" Square Inner Cap (27) into each end of 9 the Top Frame (55) and the weight support arm (A). 27 Press a 1 3/4" Square Inner Cap (44) into each end of the crossbar (B) on the Top Frame. A Press two 1" Round Inner Caps (49) into the top of the crossbar (B). 55 27 49 44 B 27 44 7
-
 1
1 -
 2
2 -
 3
3 -
 4
4 -
 5
5 -
 6
6 -
 7
7 -
 8
8 -
 9
9 -
 10
10 -
 11
11 -
 12
12 -
13
-
14
-
15
-
16
-
17
-
18
-
19
-
20
-
21
-
22
-
23
-
24
-
25
-
26
-
27
-
28
 |
 |