Weslo Cadence G-40 Treadmill English Manual - Page 14
How To Use The Manual Mode
 |
View all Weslo Cadence G-40 Treadmill manuals
Add to My Manuals
Save this manual to your list of manuals |
Page 14 highlights
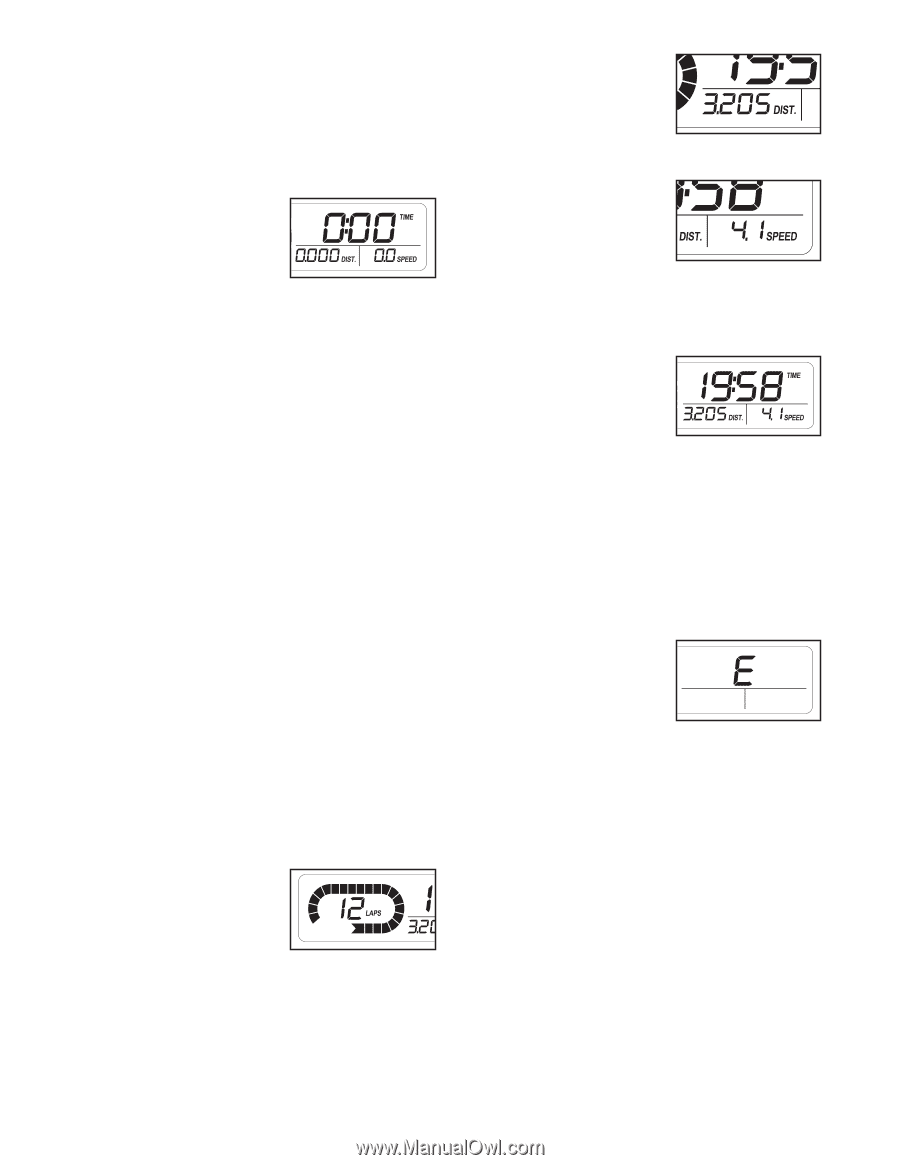
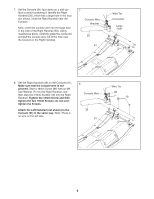
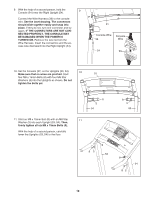
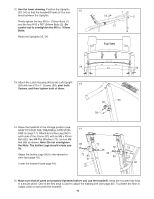
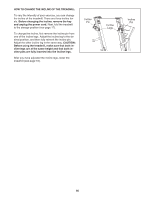
HOW TO USE THE MANUAL MODE 1. Insert the key into the console. See HOW TO TURN ON THE POWER on page 13. 2. Select the manual mode. When the key is inserted, the manual mode will be selected. If you have selected a speed program, reselect the manual mode by pressing the Program Select button repeatedly until only zeros appear in the displays. 3. Start the walking belt. To start the walking belt, press the Start button, the speed increase button, or one of the numbered speed buttons. If you press the Start button or the speed increase button, the walking belt will begin to move at 1 mph. As you exercise, change the speed of the walking belt as desired by pressing the speed increase and decrease buttons. Each time you press a button, the speed setting will change by 0.1 mph; if you hold down a button, the speed setting will change in increments of 0.5 mph. Note: After you press the buttons, it may take a moment for the walking belt to reach the selected speed setting. If you press one of the numbered speed buttons, the walking belt will gradually change speed until it reaches the selected speed setting. To stop the walking belt, press the Stop button. The time will begin to flash in one of the displays. To restart the walking belt, press the Start button or the speed increase button. 4. Follow your progress with the track and the displays. The track-The track represents a distance of 1/4 mile (400 meters). As you walk or run on the treadmill, the indicators around the track will appear in succession until the entire track appears. The track will then disappear and the indicators will again begin to appear in succession. The center of the track will show the number of laps that you have completed. The lower left display- As you exercise, the lower left display can show the elapsed time and the distance that you have walked or run. The lower right display-The lower right display can show the speed of the walking belt and the approximate number of calories that you have burned. The display also shows your heart rate when you use the pulse sensor (see step 5 on page 15). The upper display-The upper display can show the elapsed time, the distance that you have walked or run, the speed of the walking belt, or the approximate number of calories you have burned. Press the Display button repeatedly until the upper display shows the information that you are most interested in viewing. Note: While information is shown in the upper display, the same information will not be shown in the lower displays. To reset the displays, press the Stop button, remove the key, and then reinsert the key. Note: The console can display speed and distance in either miles or kilometers. To see which unit of measurement is selected, first remove the key from the console. Next, hold down the Stop button, reinsert the key, wait until you hear a tone, and then release the Stop button. An "E" for English miles or an "M" for metric kilometers will appear in the upper display. Press the speed increase button to change the unit of measurement if desired. When the desired unit of measurement is selected, remove the key and then reinsert it. 14
-
 1
1 -
2
-
3
-
4
-
5
-
6
-
7
-
8
-
 9
9 -
 10
10 -
 11
11 -
 12
12 -
 13
13 -
 14
14 -
 15
15 -
 16
16 -
 17
17 -
 18
18 -
 19
19 -
20
-
21
-
22
-
23
-
24
-
25
-
26
-
27
-
28
 |
 |