Western Digital Sentinel RX4100 User Manual - Page 105
Removing the Unit Front Cover, On the top of the unit
 |
View all Western Digital Sentinel RX4100 manuals
Add to My Manuals
Save this manual to your list of manuals |
Page 105 highlights
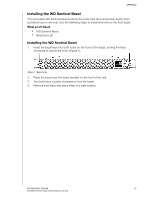
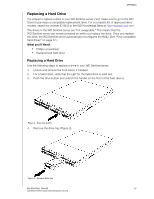
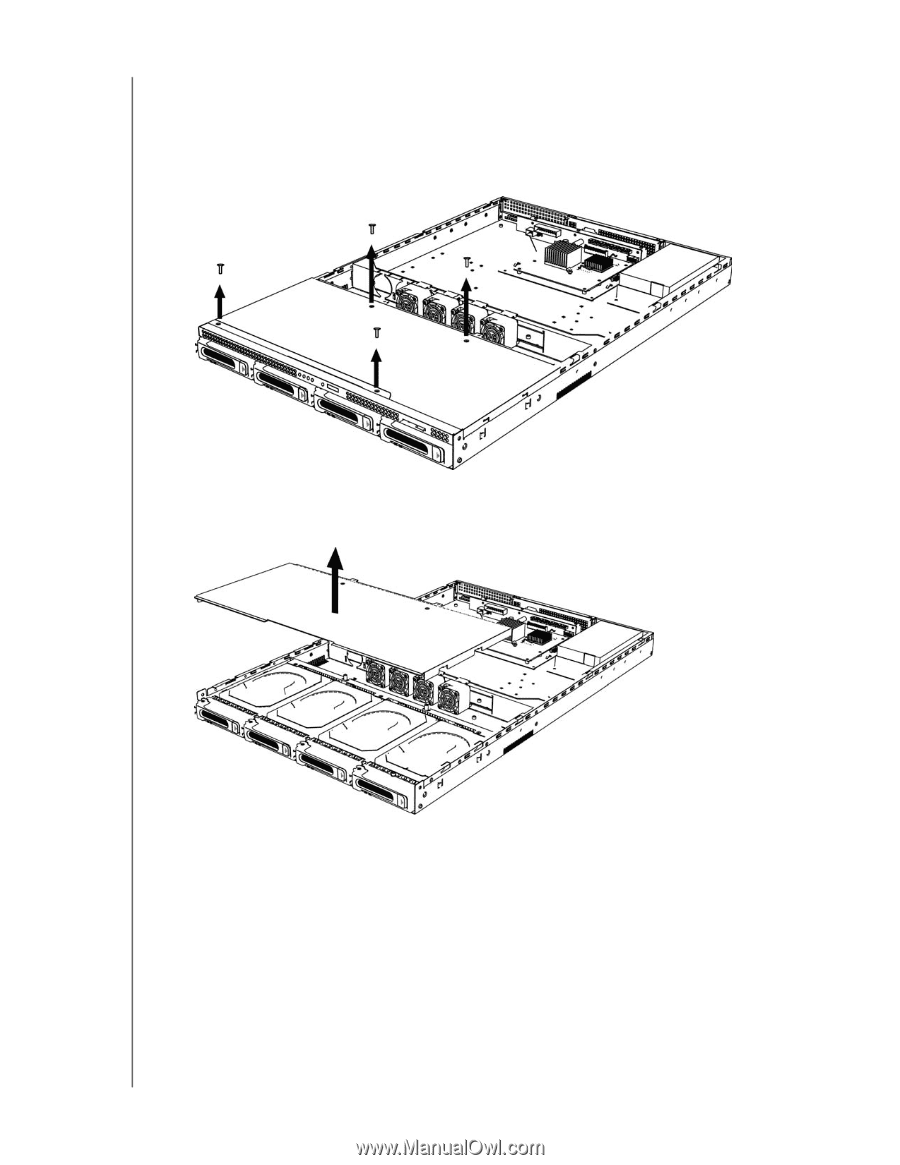
APPENDIX Removing the Unit Front Cover 1. Before getting started, shut down the server and disconnect all external connections. 2. Place the unit on a clean and stable surface, with the front of the unit facing you. 3. On the top of the unit, release the two (2) screws closest to you and two (2) screws toward the top middle of the unit (Figure 6). Figure 6. Remove unit front screws 4. Push the unit cover away from you to release the cover, then lift it away from the unit (Figure 7). Figure 7. Remove unit front cover WD SENTINEL RX4100 99 ADMINISTRATOR AND MAINTENANCE GUIDE
-
 1
1 -
2
-
3
-
4
-
5
-
6
-
7
-
8
-
9
-
10
-
11
-
12
-
13
-
14
-
15
-
16
-
17
-
18
-
19
-
20
-
21
-
22
-
23
-
24
-
25
-
26
-
27
-
28
-
29
-
30
-
31
-
32
-
33
-
34
-
35
-
36
-
37
-
38
-
39
-
40
-
41
-
42
-
43
-
44
-
45
-
46
-
47
-
48
-
49
-
50
-
51
-
52
-
53
-
54
-
55
-
56
-
57
-
58
-
59
-
60
-
61
-
62
-
63
-
64
-
65
-
66
-
67
-
68
-
69
-
70
-
71
-
72
-
73
-
74
-
75
-
76
-
77
-
78
-
79
-
80
-
81
-
82
-
83
-
84
-
85
-
86
-
87
-
88
-
89
-
90
-
91
-
92
-
93
-
94
-
95
-
96
-
97
-
98
-
99
-
 100
100 -
 101
101 -
 102
102 -
 103
103 -
 104
104 -
 105
105 -
 106
106 -
 107
107 -
 108
108 -
 109
109 -
 110
110 -
111
-
112
-
113
-
114
-
115
-
116
-
117
-
118
 |
 |
APPENDIX
99
WD SENTINEL RX4100
ADMINISTRATOR AND MAINTENANCE GUIDE
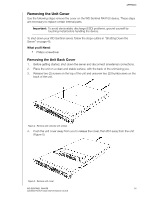
Removing the Unit Front Cover
1.
Before getting started, shut down the server and disconnect all external connections.
2.
Place the unit on a clean and stable surface, with the front of the unit facing you.
3.
On the top of the unit, release the two (2) screws closest to you and two (2) screws
toward the top middle of the unit (Figure 6).
Figure 6.
Remove unit front screws
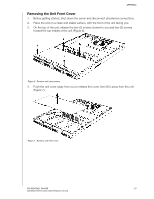
4.
Push the unit cover away from you to release the cover, then lift it away from the unit
(Figure 7).
Figure 7.
Remove unit front cover