Xerox 6250B Print Quality Problems - Page 5
Color Settings, Color Calibration, Lighten/Darken Colors - replacement for
 |
UPC - 095205770346
View all Xerox 6250B manuals
Add to My Manuals
Save this manual to your list of manuals |
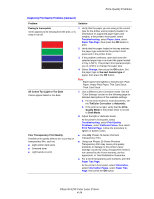
Page 5 highlights
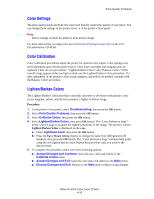
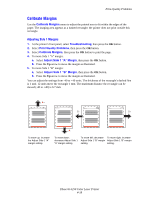
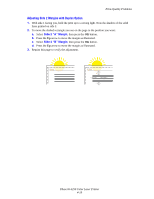
Print-Quality Problems Color Settings The print-quality mode and TekColor correction directly control the quality of your prints. You can change these settings in the printer driver or at the printer's front panel. Note Driver settings override the printer's front panel settings. For more information on using color, go to Reference/Printing/Using Color on the User Documentation CD-ROM. Color Calibration Color calibration procedures adjust the printer for optimal color output. Color settings may need adjustment upon initial printer setup or when toner cartridges and imaging units are replaced. There are two procedures: "Lighten/Darken Colors" and "Balance Colors." If the overall image appears either too light or dark, use the Lighten/Darken Colors procedure. If a finer adjustment of the primary colors (cyan, magenta, and yellow) is needed, continue with the Balance Colors procedure. Lighten/Darken Colors The Lighten/Darken Colors procedure uniformly increases or decreases each primary color (cyan, magenta, yellow, and black) to produce a lighter or darker image. Procedure: 1. At the printer's front panel, select Troubleshooting, then press the OK button. 2. Select Print Quality Problems, then press the OK button. 3. Select Calibrate Colors, then press the OK button. 4. Select Lighten/Darken Colors, then press OK button. The "Color Reference Page" prints. Use this page to evaluate the lightness/darkness of the image. The printer's current Lighten/Darken Value is displayed on the page. a. Select Lightness Level, then press the OK button. b. Press the Up or Down Arrow buttons to change the value from -5 (lightest) to 5 (darkest), then press the OK button. The "Color Reference Page" automatically prints using the new lighten/darken value. Repeat this procedure until you achieve the desired result. 5. To complete the procedure, select one of the following options: ■ Accept Changes and Continue: Saves the new value and returns to the Calibrate Colors menu. ■ Accept Changes and Exit: Saves the new value and returns to the Main menu. ■ Discard Changes and Exit: Returns to the Main menu without saving changes. Phaser® 6250 Color Laser Printer 4-16
-
 1
1 -
 2
2 -
 3
3 -
 4
4 -
 5
5 -
 6
6 -
 7
7 -
 8
8
 |
 |
