Xerox 6250B Print Quality Problems - Page 7
Adjusting Side 1 Margins - imaging unit
 |
UPC - 095205770346
View all Xerox 6250B manuals
Add to My Manuals
Save this manual to your list of manuals |
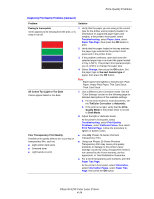
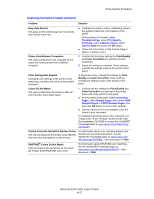
Page 7 highlights
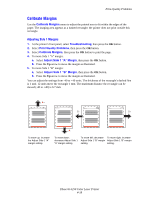
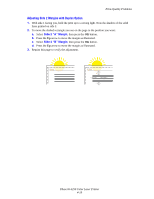
Print-Quality Problems Calibrate Margins Use the Calibrate Margins menu to adjust the printed area to fit within the edges of the paper. The imaging area appears as a dashed rectangle; the printer does not print outside this rectangle. Adjusting Side 1 Margins 1. At the printer's front panel, select Troubleshooting, then press the OK button. 2. Select Print Quality Problems, then press the OK button. 3. Select Calibrate Margins, then press the OK button to print the page. 4. To move Side 1 "A" margin: a. Select Adjust Side 1 "A" Margin, then press the OK button. b. Press the Up arrow to move the margin as illustrated. 5. To move Side 1 "B" margin: a. Select Adjust Side 1 "B" Margin, then press the OK button. b. Press the Up arrow to move the margin as illustrated. You can adjust the settings from -40 to +40 units. The thickness of the rectangle's dashed line is 1 unit. 12 units move the rectangle 1 mm. The maximum distance the rectangle can be moved (-40 to +40) is 6.7 mm. Calibrate Margins A+ Phaser Calibrate Margins Phaser B- Calibrate Margins Phaser Calibrate Margins Phaser B+ A- To move up: increase the Adjust Side 1 "A" margin setting. To move down: To move left: decrease To move right: increase decrease Adjust Side 1 Adjust Side 1 "B" margin Adjust Side 1 "B" margin "A" margin setting. setting. setting. Phaser® 6250 Color Laser Printer 4-18
-
 1
1 -
 2
2 -
 3
3 -
 4
4 -
 5
5 -
 6
6 -
 7
7 -
 8
8
 |
 |
