Xerox X76007D-WU User Manual - Page 14
Step 2: Connect the Scanner, To connect your Xerox scanner
 |
View all Xerox X76007D-WU manuals
Add to My Manuals
Save this manual to your list of manuals |
Page 14 highlights
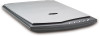
Installation Step 2: Connect the Scanner NOTE: The scanner does not have an external power supply. It draws its power directly from the computer through the USB cable. If you use a USB hub with your computer, the hub must have its own power supply. The scanner does not have an on/off switch. The scanner is ready to scan as soon as its software is finished loading onto your computer. To connect your Xerox scanner: 1. Remove any tape from the USB cable. 2. Plug the USB cable into the USB port on the scanner then into a USB port on the computer. Check your computer's manual for USB port locations. If the plug does not attach easily, make sure that you are plugging it in correctly. Do not force the plug into either connection. 3. The status light on the front of the scanner is illuminated, indicating the scanner is receiving power. Your computer recognizes that a scanner has been plugged into the USB port and automatically loads the appropriate software to run the scanner. Do not proceed until you receive a message that your computer has found the new hardware, or updated the driver database. If your computer is running Windows XP or Windows Vista, you will see a message similar to the one below. Xerox 7600 Scanner User's Guide 9
-
 1
1 -
2
-
3
-
4
-
5
-
6
-
7
-
8
-
 9
9 -
 10
10 -
 11
11 -
 12
12 -
 13
13 -
 14
14 -
 15
15 -
 16
16 -
 17
17 -
 18
18 -
 19
19 -
20
-
21
-
22
-
23
-
24
-
25
-
26
-
27
-
28
-
29
-
30
-
31
-
32
-
33
-
34
-
35
-
36
-
37
-
38
-
39
-
40
-
41
-
42
-
43
-
44
-
45
-
46
-
47
-
48
-
49
-
50
-
51
-
52
-
53
-
54
-
55
-
56
-
57
-
58
-
59
-
60
-
61
-
62
-
63
-
64
-
65
-
66
-
67
-
68
-
69
-
70
-
71
-
72
-
73
-
74
-
75
-
76
-
77
-
78
-
79
-
80
-
81
-
82
-
83
-
84
-
85
-
86
-
87
-
88
 |
 |
