Yamaha DSP-A592 Owner's Manual - Page 4
CAUTION, For U.K. customers - manual
 |
View all Yamaha DSP-A592 manuals
Add to My Manuals
Save this manual to your list of manuals |
Page 4 highlights
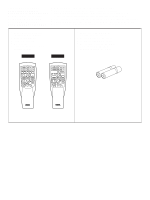
CAUTION : READ THIS BEFORE OPERATING YOUR UNIT. 1. To assure the finest performance, please read this manual carefully. Keep it in a safe place for future reference. 2. Install this unit in a cool, dry, clean place - away from windows, heat sources, sources of excessive vibration, dust, moisture and cold. Avoid sources of humming (transformers, motors). To prevent fire or electrical shock, do not expose the unit to rain or water. 3. Never open the cabinet. If something drops into the set, contact your dealer. 4. Do not use force on switches, controls or connection wires. When moving the unit, first disconnect the power plug and the wires connected to other equipment. Never pull the wires themselves. 5. The openings on the cabinet assure proper ventilation of the unit. If these openings are obstructed, the temperature inside the cabinet will rise rapidly. Therefore, avoid placing objects against these openings, and install the unit in wellventilated condition. Make sure to allow a space of at least 20 cm behind, 20 cm on the both sides and 30 cm above the top panel of the unit. Otherwise it may not only damage the unit, but also cause fire. 6. Always set the VOLUME control to "- ∞" before starting the audio source play. Increase the volume gradually to an appropriate level after playback has been started. 7. Do not attempt to clean the unit with chemical solvents; this might damage the finish. Use a clean, dry cloth. 8. Be sure to read the "TROUBLESHOOTING" section regarding common operating errors before concluding that the unit is faulty. 9. When not planning to use this unit for long periods of time (ie., vacation, etc.), disconnect the AC power plug from the wall outlet. 10. To prevent lightning damage, disconnect the AC power plug and disconnect the antenna cable when there is an electrical storm. 11. Grounding or polarization - Precautions should be taken so that the grounding or polarization of an appliance is not defeated. 12. AC outlet Do not connect audio equipment to the AC outlet on the rear panel if that equipment requires more power than the outlet is rated to provide. 13. Voltage Selector (General Model only) The voltage selector on the rear panel of this unit must be set for your local main voltage BEFORE plugging into the AC main supply. Voltages are 110/120/220/240 V AC, 50/60 Hz. IMPORTANT Please record the serial number of this unit in the space below. Serial No.: The serial number is located on the rear of the unit. Retain this Owner's Manual in a safe place for future reference. WARNING TO REDUCE THE RISK OF FIRE OR ELECTRIC SHOCK, DO NOT EXPOSE THIS UNIT TO RAIN OR MOISTURE. For U.K. customers If the socket outlets in the home are not suitable for the plug supplied with this appliance, it should be cut off and an appropriate 3 pin plug fitted. For details, refer to the instructions described below. Note: The plug severed from the mains lead must be destroyed, as a plug with bared flexible cord is hazardous if engaged in a live socket outlet. Special Instructions for U.K. Model IMPORTANT THE WIRES IN THE MAINS LEAD ARE COLOURED IN ACCORDANCE WITH THE FOLLOWING CODE: Blue: NEUTRAL Brown: LIVE As the colours of the wires in the main lead of this apparatus may not correspond with the coloured markings identifying the terminals in your plug, proceed as follows: The wire which is coloured BLUE must be connected to the terminal which is marked with the letter N or coloured BLACK. The wire which is coloured BROWN must be connected to the terminal which is marked with the letter L or coloured RED. Make sure that neither core is connected to the earth terminal of the three pin plug. The apparatus is not disconnected from the AC power source as long as it is connected to the wall outlet, even if the apparatus itself is turned off. FREQUENCY STEP switch (General Model only) Because the interstation frequency spacing differs in different areas, set the FREQUENCY STEP switch (located at the rear) according to the frequency spacing in your area. Before setting this switch, disconnect the AC power plug of this unit from the AC outlet. 4
-
 1
1 -
 2
2 -
 3
3 -
 4
4 -
 5
5 -
 6
6 -
 7
7 -
 8
8 -
 9
9 -
 10
10 -
11
-
12
-
13
-
14
-
15
-
16
-
17
-
18
-
19
-
20
-
21
-
22
-
23
-
24
-
25
-
26
-
27
-
28
-
29
-
30
-
31
-
32
-
33
-
34
 |
 |