Yamaha G1D Owner's Manual - Page 5
Installation - pickup
 |
View all Yamaha G1D manuals
Add to My Manuals
Save this manual to your list of manuals |
Page 5 highlights
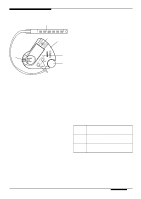
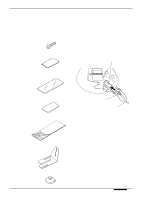
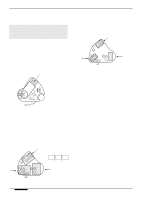
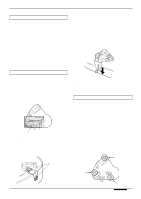
Installation Installing the G1D on a guitar is not a difficult process, but it does require care and at least a modicum of mechanical ability. If you don't feel totally confident that you can handle the job, it might be a good idea to leave the installation to someone experienced in guitar modification or repair. IMPORTANT! Make sure your guitar's neck (truss rod) and string height/intonation (bridge) are properly adjusted before installing the G1D. Guitar Compatibility The G1D can be installed on most electric and steel-string acoustic guitars, with the following exceptions: • Since the G1D employs a magnetic pickup, it will not work with nylon or other non-metallic strings. • The G1D is designed for use with 6-string guitars. It will not work properly with 12-string guitars or other non-standard string configurations. • The G1D pickup should be installed between the guitar's bridge and bridge pickup. Installation may not be possible if there is not enough room between the bridge and bridge pickup of your guitar, or between the guitar top and strings. Installing the Controller Unit Install the controller unit before installing the pickup, being careful not to damage the pickup during the installation process. A number of installation options are provided: • Screw. • Double-sided adhesive tape. • Re-usable adhesive pads. • Velcro fastener. • Bracket. • Suction cups. Choose the method which best is best suited to your guitar and playing requirements. 4 Installation
-
 1
1 -
 2
2 -
 3
3 -
 4
4 -
 5
5 -
 6
6 -
 7
7 -
 8
8 -
 9
9 -
 10
10 -
 11
11 -
12
-
13
-
14
-
15
-
16
 |
 |
