Yamaha HTR-5590 Owner's Manual - Page 27
ON-SCREEN DISPLAY (OSD), OSD Modes, Selecting the OSD Mode
 |
View all Yamaha HTR-5590 manuals
Add to My Manuals
Save this manual to your list of manuals |
Page 27 highlights
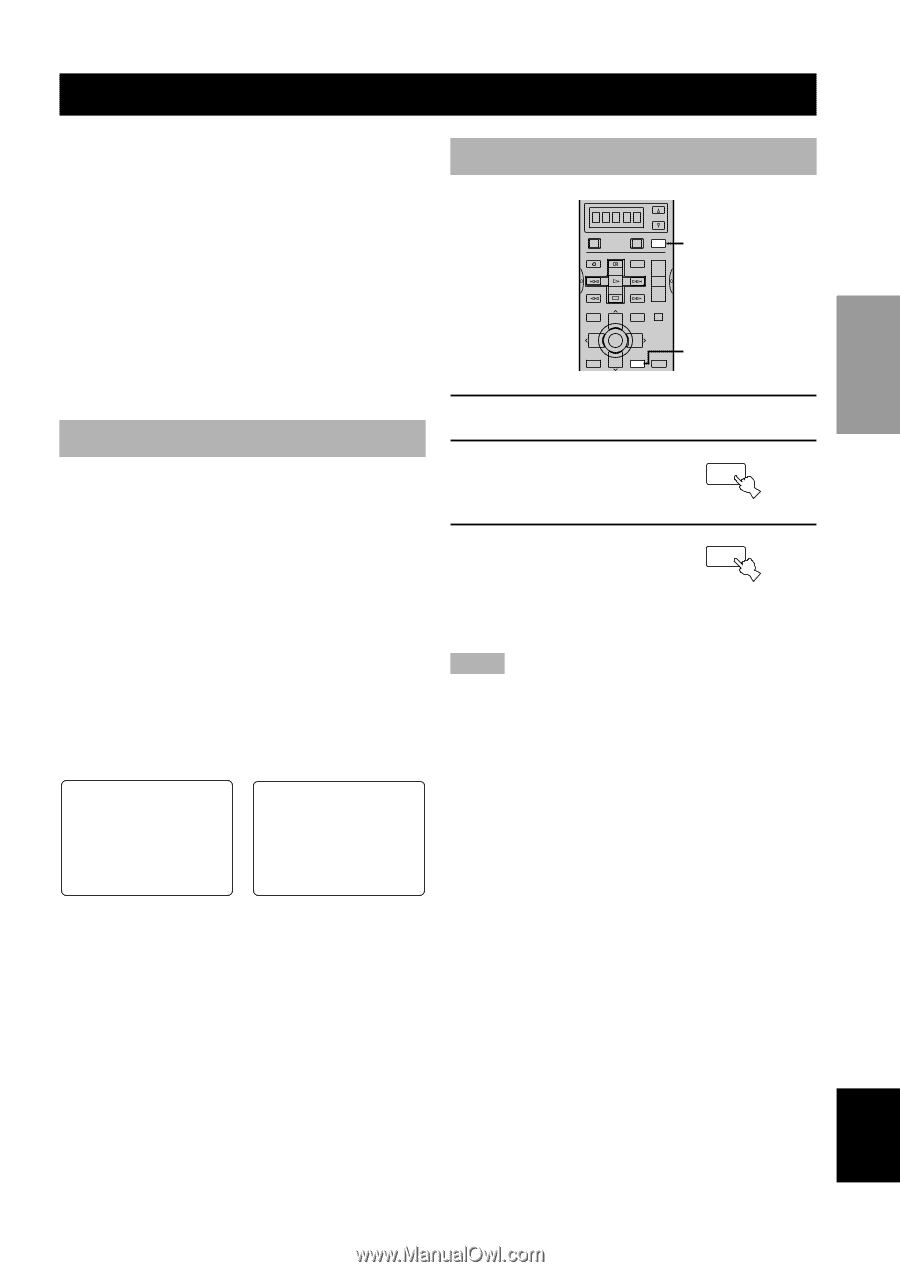
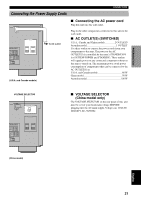
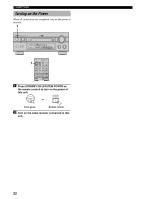
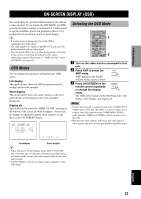
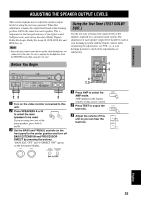
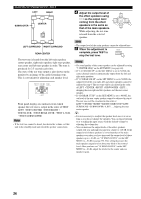
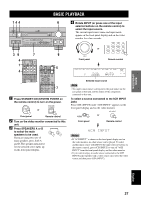
INTRODUCTION PREPARATION BASIC OPERAIONT ON-SCREEN DISPLAY (OSD) You can display the operation information for this unit on a video monitor. If you display the SET MENU and DSP program parameter settings on a monitor, it is much easier to see the available options and parameters than it is by reading this information on the front panel display. y • If a video source is being reproduced, the OSD is superimposed over the image. • The OSD signal is not output to the REC OUT jack, and will not be recorded with any video signal. • You can set the OSD to turn on (gray background) or off when a video source is not being reproduced (or the source component is turned off) by using "13 DISPLAY SET" on the SET MENU (see page 65). OSD Modes You can change the amount of information the OSD shows. Full display This mode always shows the DSP program parameter settings on the video monitor. Short display This mode briefly shows the same contents as the front panel display at the bottom of the screen and then disappears. Display off This mode briefly shows the "DISPLAY OFF" message at the bottom of the screen and then disappears. Afterwards, no changes to operations appear on the monitor except those of the ON SCREEN button. P01 CONCERT HALL ≥ DSP LEVEL............0dB INIT.DLY............45ms ROOM SIZE............1.O LIVENESS 5 Selecting the OSD Mode SELECT POWER TV REC DISC SKIP POWER AV AMP AUDIO + VOL - LEVEL TITLE TV INPUT + TV VOL SET MENU MENU A/B/C/D/E MUTE CH - PRESET TEST RETURN TV MUTE SELECT TV VOL - CH + PRESET ON SCREEN DISPLAY STEREO EFFECT 2 3 1 Turn on the video monitor connected to this unit. 2 Press AMP to select the AMP AMP mode. AMP appears in the display window on the remote control. 3 Press ON SCREEN on the ON SCREEN remote control repeatedly DISPLAY to change the display mode. The OSD mode changes in the following order: full display, short display, and display off. Notes • If your video monitor is connected only to the COMPONENT VIDEO jacks of this unit, the OSD is not shown. Make sure to connect your video monitor to the COMPONENT VIDEO jacks and either VIDEO or S VIDEO jacks if you want to see the OSD. • Playing back video software that has an anti-copy signal or video signals with a lot of noise may produce unstable images. P01 CONCERT HALL Full display Short display y • When you choose the full display mode, INPUT, VOLUME and some other types of operation information are displayed at the bottom of the screen in the same format as that for the front panel display. • The SET MENU and test tone display appear regardless of the OSD mode. ADVANCED OPERATION ADDITIONAL INFORMATION APPENDIX English 23
-
 1
1 -
2
-
3
-
4
-
5
-
6
-
7
-
8
-
9
-
10
-
11
-
12
-
13
-
14
-
15
-
16
-
17
-
18
-
19
-
20
-
21
-
 22
22 -
 23
23 -
 24
24 -
 25
25 -
 26
26 -
 27
27 -
 28
28 -
 29
29 -
 30
30 -
 31
31 -
 32
32 -
33
-
34
-
35
-
36
-
37
-
38
-
39
-
40
-
41
-
42
-
43
-
44
-
45
-
46
-
47
-
48
-
49
-
50
-
51
-
52
-
53
-
54
-
55
-
56
-
57
-
58
-
59
-
60
-
61
-
62
-
63
-
64
-
65
-
66
-
67
-
68
-
69
-
70
-
71
-
72
-
73
-
74
-
75
-
76
-
77
-
78
-
79
-
80
-
81
-
82
-
83
-
84
-
85
-
86
-
87
-
88
 |
 |