Yamaha MT50 Owner's Manual - Page 15
Step 3 — Recording the Guitar
 |
View all Yamaha MT50 manuals
Add to My Manuals
Save this manual to your list of manuals |
Page 15 highlights
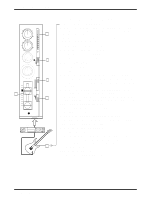
HIGH +6 9 +3 - LOW + 0 -5 - AUX -10 + REC REC SEL 3 4 0 10 OFF L PAN L R CUE 10 3 10 9 8 7 6 85 4 3 2 1 0 0 GAIN MIC 2 LINE 3 MIC/LINE Guitar Effect Processor FX770 1 Step 3 - Recording the Guitar 11 Step 3 - Recording the Guitar 1. Connect the guitar to MIC/LINE input 3. Note: Connecting an instrument with a high output impedance such as an electric guitar or bass to the MT50 may increase noise and distortion and preclude high quality recordings. As explained in Step 1 on page 10, connect a direct box or effect unit between the instrument and the MT50 to reduce the impedance. 2. Set Module 3's GAIN switch to LINE. 3. Set Module 3's CUE slider to about 8. 4. Set Module 3's REC SEL switch to 3. The REC indicator starts flashing. 5. Press the PAUSE button. 6. Press the REC button. The REC indicator lights up. 7. While strumming the guitar, raise Module 3's fader gradually. You should be able to hear the guitar and the level meter should light up. 8. Set the fader so that the 0 light is on most of the time and the +6 light comes on occasionally. 9. In order to set the CUE levels, press the PAUSE button to start recording. (This is only a temporary recording.) 10. While listening to the drum and bass tracks, play the guitar and set Module 1, 2, and 3's CUE sliders so that you can hear the drums, bass, and guitar clearly. 11. Press REW to rewind the tape to 000. 12. Press the REC button to start recording. The REC indicator lights up. 13. Play your guitar part while listening to the drum and bass tracks. 14. When your guitar part is finished, press STOP to stop recording. 15. Press REW to rewind the tape to 000. 16. Set Module 3's REC SEL switch to OFF. The REC indicator goes off. 17. Press PLAY to listen to the drum track, bass track, and new guitar track. If you like the track, go to "Step 4 - Recording the Vocals" once you finish this procedure. If you don't like it, re-record it. 18. Disconnect the guitar. 19. Set Module 3's fader to 0. 20. Press REW to rewind the tape to 000. MT50 User's Guide
-
 1
1 -
2
-
3
-
4
-
5
-
6
-
7
-
8
-
9
-
 10
10 -
 11
11 -
 12
12 -
 13
13 -
 14
14 -
 15
15 -
 16
16 -
 17
17 -
 18
18 -
 19
19 -
 20
20 -
21
-
22
-
23
-
24
-
25
-
26
-
27
-
28
-
29
-
30
-
31
-
32
-
33
-
34
-
35
-
36
-
37
-
38
-
39
-
40
-
41
-
42
-
43
-
44
-
45
-
46
-
47
-
48
-
49
-
50
-
51
-
52
-
53
-
54
-
55
-
56
-
57
-
58
-
59
-
60
-
61
-
62
-
63
-
64
-
65
-
66
-
67
-
68
-
69
-
70
-
71
-
72
-
73
-
74
-
75
-
76
-
77
-
78
-
79
-
80
-
81
-
82
-
83
-
84
-
85
-
86
-
87
-
88
-
89
-
90
-
91
-
92
-
93
-
94
-
95
-
96
-
97
-
98
-
99
-
100
-
101
-
102
-
103
-
104
-
105
-
106
-
107
-
108
-
109
-
110
-
111
-
112
-
113
-
114
-
115
-
116
-
117
-
118
-
119
-
120
-
121
-
122
-
123
-
124
-
125
-
126
-
127
-
128
-
129
-
130
-
131
-
132
-
133
-
134
-
135
-
136
-
137
-
138
-
139
-
140
-
141
-
142
-
143
-
144
-
145
-
146
-
147
-
148
-
149
-
150
-
151
-
152
-
153
 |
 |
