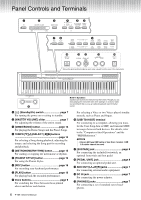
Yamaha P-105 Owner's Manual - Page 7
Setting Up, Turning the Power On/Off, Setting the Volume, Using Headphones - demo
 |
View all Yamaha P-105 manuals
Add to My Manuals
Save this manual to your list of manuals |
Page 7 highlights
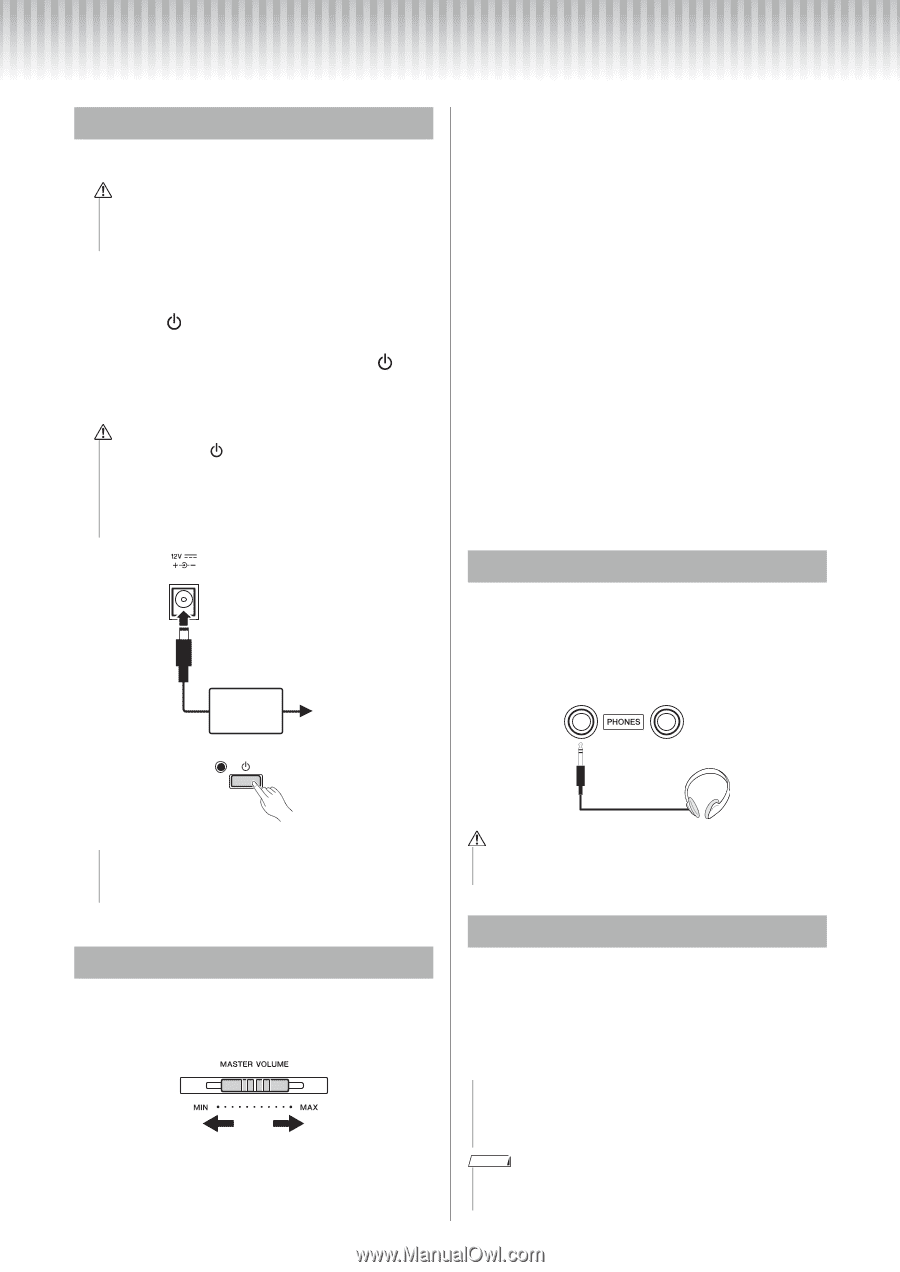
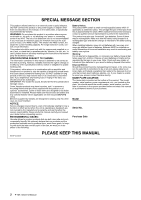
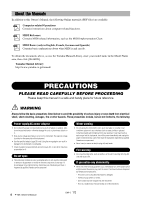
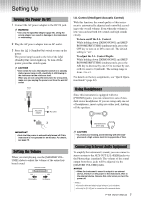
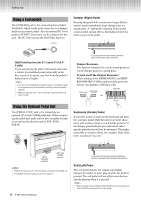
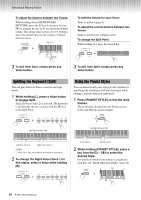
Setting Up Turning the Power On/Off 1 Connect the AC power adaptor to the DC IN jack. WARNING • Use only the specified adaptor (page 20). Using the wrong adaptor can result in damage to the instrument or overheating. 2 Plug the AC power adaptor into an AC outlet. 3 Press the [ ] (Standby/On) switch to turn on the power. The power lamp located to the left of the [ ] (Standby/On) switch lights up. To turn off the power, press this switch again. CAUTION • Even when the [ ] (Standby/On) switch is in standby status (power lamp is off), electricity is still flowing to the instrument at the minimum level. When you are not using the instrument for a long time, make sure you unplug the power cord from the wall AC outlet. 1 AC power adaptor 2 AC outlet I.A. Control (Intelligent Acoustic Control) With this function, the sound quality of this instrument is automatically adjusted and controlled according to the overall volume. Even when the volume is low, you can hear both low sounds and high sounds clearly. To turn on/off the I.A. Control: While holding down [DEMO/SONG] and [METRONOME/RHYTHM] simultaneously, press the C#5 key to turn on or D5 to turn off. The default setting is "on". To adjust the I.A. Control Depth: While holding down [DEMO/SONG] and [METRONOME/RHYTHM] simultaneously, press the A#4 key to decrease by one, C5 to increase by one, or B4 to reset to 0 (default). The setting range is from -3 to +3. For details on the key assignments, see "Quick Operation Guide" (page 22). Using Headphones Since this instrument is equipped with two [PHONES] jacks, you can connect two sets of standard stereo headphones. If you are using only one set of headphones, insert a plug into either jack, shutting off the speakers. 3 IMPORTANT • Note that the power is automatically turned off if this instrument is not operated for 30 minutes. For details, see page 19. Setting the Volume When you start playing, use the [MASTER VOLUME] slider to adjust the volume of the entire keyboard sound. Decreases. Increases. Standard stereo phone plug CAUTION • To protect your hearing, avoid listening with the head- phones at a high volume level for long periods of time. Connecting External Audio Equipment To amplify the instrument's sound, you can connect a stereo system to the AUX OUT [L/L+R]/[R] jacks via the Phone plugs (standard). The volume of the sound output from those jacks will be adjusted via the [MASTER VOLUME] slider. NOTICE • When the instrument's sound is output to an external device, first turn on the power to the instrument, then to the external device. Reverse this order when you turn the power off. NOTE • Use audio cables and adaptor plugs having no (zero) resistance. • Use only the [L/L+R] jack for connection with a monaural device. P-105 Owner's Manual 7
-
 1
1 -
 2
2 -
 3
3 -
 4
4 -
 5
5 -
 6
6 -
 7
7 -
 8
8 -
 9
9 -
 10
10 -
 11
11 -
 12
12 -
13
-
14
-
15
-
16
-
17
-
18
-
19
-
20
-
21
-
22
-
23
-
24
-
25
-
26
-
27
-
28
 |
 |