Yamaha PSR-S975 PSR-S975/PSR-S775 Reference Manual - Page 30
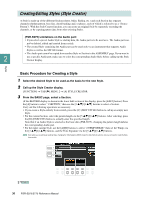
Creating/Editing Styles (Style Creator), Basic Procedure for Creating a Style
 |
View all Yamaha PSR-S975 manuals
Add to My Manuals
Save this manual to your list of manuals |
Page 30 highlights
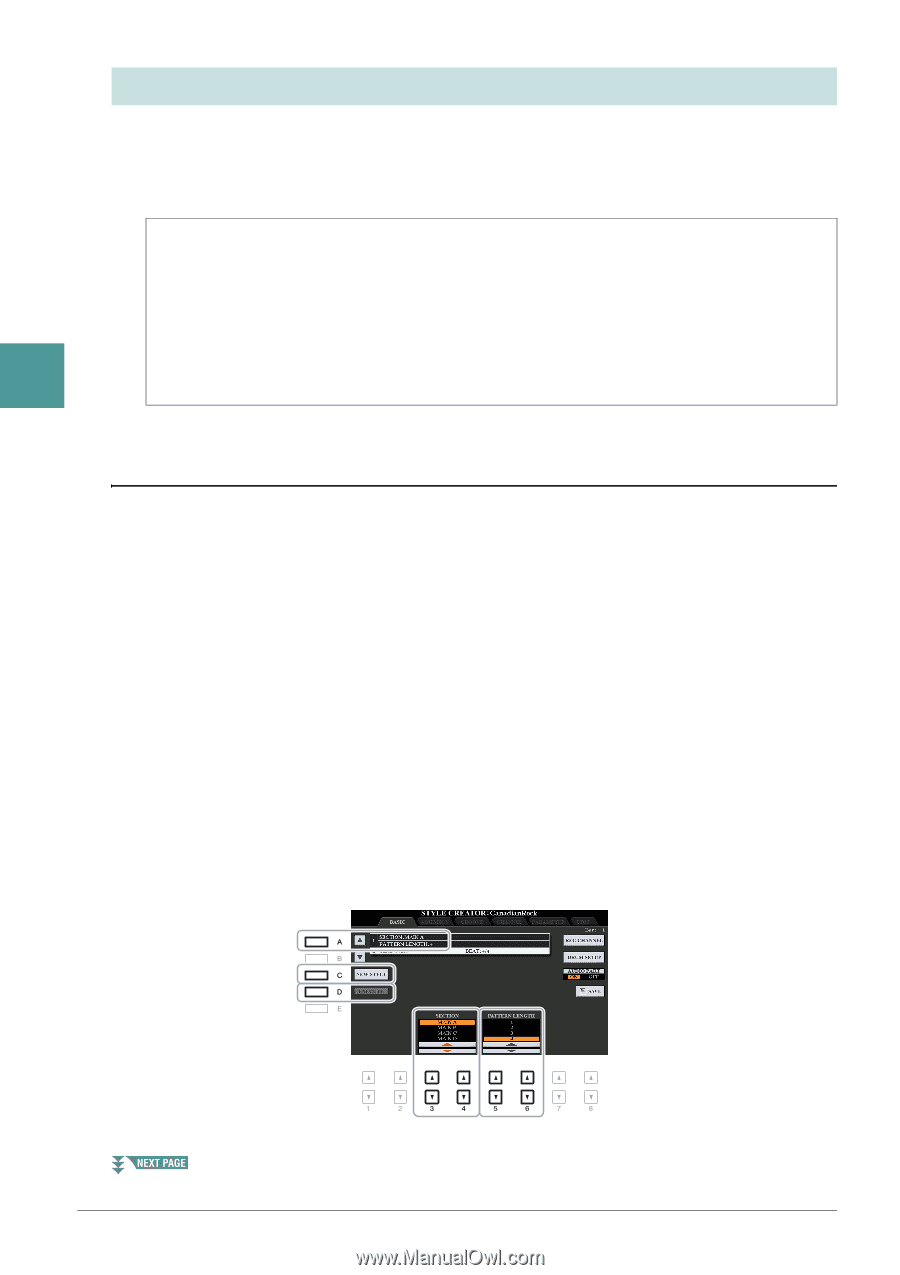
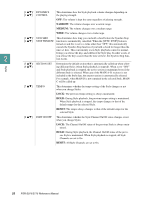
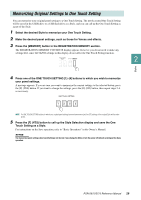
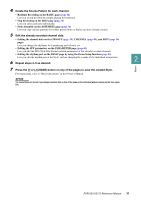
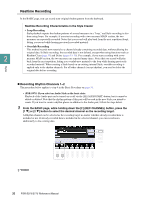
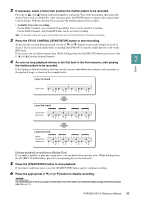
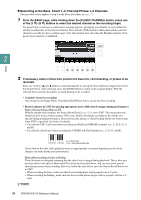
Creating/Editing Styles (Style Creator) A Style is made up of the different Sections (Intro, Main, Ending, etc.) and each Section has separate channels (rhythm pattern, bass line, chord backing, pad, or phrase, each of which is referred to as a "Source Pattern"). With the Style Creator function, you can create an original Style by separately recording the channels, or by copying pattern data from other existing Styles. (PSR-S975) Limitations on the Audio part: • If you select a preset Audio Style as starting data, the Audio part is to be used as is. The Audio part can- not be deleted, edited and created from scratch. • The created Style containing the Audio part can be used only via an instrument that supports Audio Styles as well as the SFF GE format. • The Audio part cannot be copied from another Style or Section in the ASSEMBLY page. If you want to 2 use a specific Audio part, make sure to select the corresponding Audio Style before calling up the Style Creator display. Styles Basic Procedure for Creating a Style 1 Select the desired Style to be used as the basis for the new Style. 2 Call up the Style Creator display. [FUNCTION] → TAB [F] MENU 2 → [A] STYLE CREATOR 3 From the BASIC page, select a Section. (If the RECORD display is shown in the lower half section of the display, press the [EXIT] button.) Press the [A] button to select "1 SECTION," then use the [3 ]/[4 ] buttons to select a Section. Carry out the following operations as necessary. • If you create a Style entirely from scratch, press the [C] (NEW STYLE) button to call up an empty new Style. • For the current Section, select the pattern length via the [5 ]/[6 ] buttons. After selecting, press the [D] (EXECUTE) button to actually enter the specified length. Note that if an Audio Style is selected as the basic data (PSR-S975), changing the pattern length deletes the corresponding Audio part. • For the entire current Style, use the [A]/[B] buttons to select "2 TEMPO/BEAT," then set the Tempo via the [3 ]/[4 ] buttons, and the Time Signature via the [5 ]/[6 ] buttons. NOTE Even when you are editing an existing Style, changing the Time Signature (BEAT) clears the data from all sections, and you will need to create the Style from scratch. 30 PSR-S975/S775 Reference Manual
-
 1
1 -
2
-
3
-
4
-
5
-
6
-
7
-
8
-
9
-
10
-
11
-
12
-
13
-
14
-
15
-
16
-
17
-
18
-
19
-
20
-
21
-
22
-
23
-
24
-
 25
25 -
 26
26 -
 27
27 -
 28
28 -
 29
29 -
 30
30 -
 31
31 -
 32
32 -
 33
33 -
 34
34 -
 35
35 -
36
-
37
-
38
-
39
-
40
-
41
-
42
-
43
-
44
-
45
-
46
-
47
-
48
-
49
-
50
-
51
-
52
-
53
-
54
-
55
-
56
-
57
-
58
-
59
-
60
-
61
-
62
-
63
-
64
-
65
-
66
-
67
-
68
-
69
-
70
-
71
-
72
-
73
-
74
-
75
-
76
-
77
-
78
-
79
-
80
-
81
-
82
-
83
-
84
-
85
-
86
-
87
-
88
-
89
-
90
-
91
-
92
-
93
-
94
-
95
-
96
-
97
-
98
-
99
-
100
-
101
-
102
-
103
-
104
-
105
-
106
-
107
-
108
-
109
-
110
-
111
-
112
-
113
-
114
-
115
-
116
-
117
-
118
-
119
-
120
-
121
-
122
-
123
-
124
-
125
-
126
-
127
-
128
-
129
-
130
-
131
-
132
-
133
-
134
-
135
-
136
 |
 |