Yamaha PSR-S975 PSR-S975/PSR-S775 Reference Manual - Page 67
REPLACE ALL, PUNCH OUT, PLAY/PAUSE button to start Punch In/Out recording.
 |
View all Yamaha PSR-S975 manuals
Add to My Manuals
Save this manual to your list of manuals |
Page 67 highlights
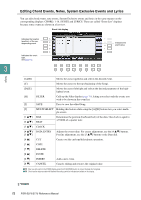
[4 ]- REC END [6 ] (Punch Out) Determines the Punch Out timing. REPLACE ALL: This deletes all data after the point at which recording is stopped. PUNCH OUT: The Song position at which recording is stopped is regarded as the Punch Out point. This setting maintains all data after the point at which recording is stopped. PUNCH OUT AT: Actual overwrite recording continues until the beginning of the specified Punch Out measure (set with the corresponding display button), at which point recording stops and normal playback continues. This setting maintains all data after the point at which recording is stopped. You can set the Punch Out measure by pressing the [6 ] buttons. [7 ]/ PEDAL PUNCH When this is set to ON, you can use Foot Pedal 2 to control the Punch In [8 ] IN/OUT and Punch Out points. While a Song is playing back, pressing (and hold- ing) Foot Pedal 2 instantly enables Punch In recording, while releasing the pedal stops recording (Punch Out). You can press and release Foot Pedal 2 as often as you want during playback to punch in/out of overwrite recording. Note that the current function assignment of the Foot Pedal 2 is can- 3 celled when the Pedal Punch In/Out function is set to ON. NOTE Pedal Punch In/Out operation may be reversed depending on the particular pedal you've connected to the instrument. If necessary, change the pedal polarity to reverse the control (page 117). Songs 4 While holding the SONG [REC] button, press the desired track button. 5 Press the SONG [F/ K] (PLAY/PAUSE) button to start Punch In/Out recording. According to the settings in step 3, play the keyboard between the Punch In and Punch Out points. Refer to the examples of various settings illustrated below. 6 Press the [I] (SAVE) button to carry out the Save operation. For details, refer to "Basic Operations" in the Owner's Manual. NOTICE The recorded Song data will be lost if you select another Song or turn off the power to the instrument without carrying out the Save operation. PSR-S975/S775 Reference Manual 67
-
 1
1 -
2
-
3
-
4
-
5
-
6
-
7
-
8
-
9
-
10
-
11
-
12
-
13
-
14
-
15
-
16
-
17
-
18
-
19
-
20
-
21
-
22
-
23
-
24
-
25
-
26
-
27
-
28
-
29
-
30
-
31
-
32
-
33
-
34
-
35
-
36
-
37
-
38
-
39
-
40
-
41
-
42
-
43
-
44
-
45
-
46
-
47
-
48
-
49
-
50
-
51
-
52
-
53
-
54
-
55
-
56
-
57
-
58
-
59
-
60
-
61
-
 62
62 -
 63
63 -
 64
64 -
 65
65 -
 66
66 -
 67
67 -
 68
68 -
 69
69 -
 70
70 -
 71
71 -
 72
72 -
73
-
74
-
75
-
76
-
77
-
78
-
79
-
80
-
81
-
82
-
83
-
84
-
85
-
86
-
87
-
88
-
89
-
90
-
91
-
92
-
93
-
94
-
95
-
96
-
97
-
98
-
99
-
100
-
101
-
102
-
103
-
104
-
105
-
106
-
107
-
108
-
109
-
110
-
111
-
112
-
113
-
114
-
115
-
116
-
117
-
118
-
119
-
120
-
121
-
122
-
123
-
124
-
125
-
126
-
127
-
128
-
129
-
130
-
131
-
132
-
133
-
134
-
135
-
136
 |
 |
