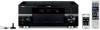
Yamaha RX-V3900BL Owner's Manual - Page 38
Reviewing and reloading the, automatic setup parameters, setup to view the measurement
 |
UPC - 705105565903
View all Yamaha RX-V3900BL manuals
Add to My Manuals
Save this manual to your list of manuals |
Page 38 highlights
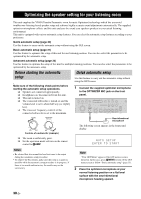
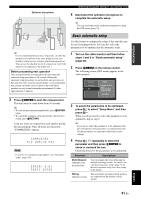
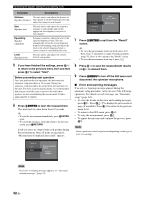
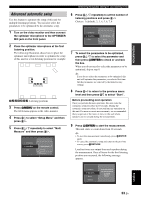
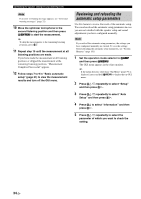
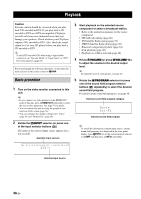
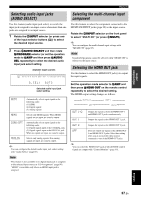
Optimizing the speaker setting for your listening room Note If an error or warning message appears, see "Error and warning messages" (page 32). 10 Move the optimizer microphone to the second listening position and then press 9ENTER to start the measurement. y To skip the measurements at the remaining listening positions, press 9n. 11 Repeat step 10 until the measurement at all listening positions are made. If you have made the measurement at all listening positions or skipped the measurement at the remaining listening positions, "Measurement Completed Successful" appears. 12 Follow steps 7 to 9 in "Basic automatic setup" (page 31) to view the measurement results and turn off the GUI menu. Reviewing and reloading the automatic setup parameters Use this feature to review the result of the automatic setup. You can also reload the automatic setup parameters in case you are not satisfied with the speaker setup and sound adjustments you have configured manually. Note If you reload the automatic setup parameters, the settings you have configured manually are cleared. To save the settings before reloading the automatic setup parameters, see "System Memory" (page 101). 1 Set the operation mode selector to FAMP and then press IMENU. The GUI menu appears in the video monitor. y If the menu directory other than "Top Menu" (page 79) is displayed, press and hold IMENU to display the top GUI menu. 2 Press 9k / n repeatedly to select "Setup" and then press 9h. 3 Press 9k / n repeatedly to select "Auto Setup" and then press 9h. 4 Press 9k to select "Information" and then press 9h. 5 Press 9k / n repeatedly to select the parameter of which you want to check the setting. 34 En
-
 1
1 -
2
-
3
-
4
-
5
-
6
-
7
-
8
-
9
-
10
-
11
-
12
-
13
-
14
-
15
-
16
-
17
-
18
-
19
-
20
-
21
-
22
-
23
-
24
-
25
-
26
-
27
-
28
-
29
-
30
-
31
-
32
-
 33
33 -
 34
34 -
 35
35 -
 36
36 -
 37
37 -
 38
38 -
 39
39 -
 40
40 -
 41
41 -
 42
42 -
 43
43 -
44
-
45
-
46
-
47
-
48
-
49
-
50
-
51
-
52
-
53
-
54
-
55
-
56
-
57
-
58
-
59
-
60
-
61
-
62
-
63
-
64
-
65
-
66
-
67
-
68
-
69
-
70
-
71
-
72
-
73
-
74
-
75
-
76
-
77
-
78
-
79
-
80
-
81
-
82
-
83
-
84
-
85
-
86
-
87
-
88
-
89
-
90
-
91
-
92
-
93
-
94
-
95
-
96
-
97
-
98
-
99
-
100
-
101
-
102
-
103
-
104
-
105
-
106
-
107
-
108
-
109
-
110
-
111
-
112
-
113
-
114
-
115
-
116
-
117
-
118
-
119
-
120
-
121
-
122
-
123
-
124
-
125
-
126
-
127
-
128
-
129
-
130
-
131
-
132
-
133
-
134
-
135
-
136
-
137
-
138
-
139
-
140
-
141
-
142
-
143
-
144
-
145
-
146
-
147
-
148
-
149
-
150
-
151
-
152
-
153
-
154
-
155
-
156
-
157
-
158
-
159
-
160
-
161
-
162
-
163
-
164
-
165
-
166
-
167
-
168
-
169
 |
 |