Yamaha YV-1600A Owner's Manual - Page 11
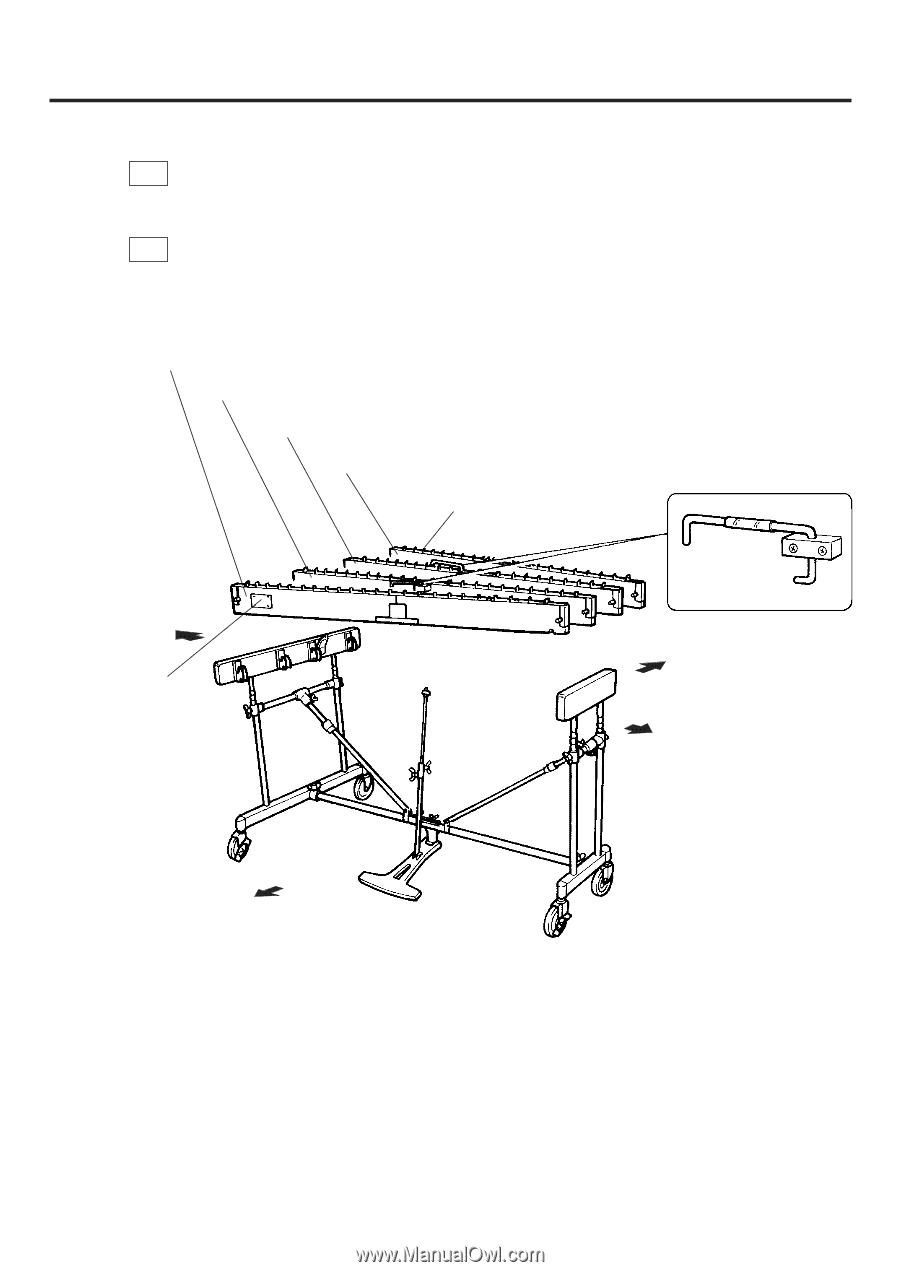
Insert the rails 1 through 4 into the legs.
 |
View all Yamaha YV-1600A manuals
Add to My Manuals
Save this manual to your list of manuals |
Page 11 highlights
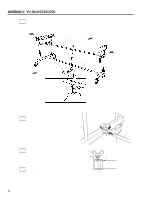
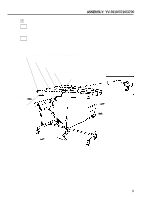
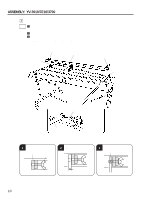
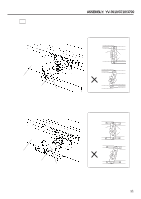
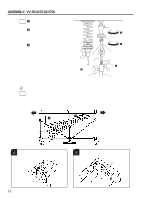
ASSEMBLY: YV-3910/3710/3700 x Insert the rails (1) through (4) into the legs. 2-1 First, insert rail (2). * Do not insert the rail one side at a time, but at first alternately push in the left and right sides little by little , after which the rail can be pushed down until it stops. 2-2 Next, securely insert the rails (3), (1) and (4), in this order. Rail (1): With name plate. The name plate side facing the player. Rail (2): With rail clamp and more posts than rails (3) and (4). The clamp side facing the player. Rail (3): With rail clamp and less posts than rail (2). The clamp side facing the audience. Rail (4): With YAMAHA logo. Logo side facing the audience. Post Low Sound Side Name Plate Rail Clamp Audience Side High Sound Side Player Side * The illustration shows model YV-3710 9
-
 1
1 -
2
-
3
-
4
-
5
-
 6
6 -
 7
7 -
 8
8 -
 9
9 -
 10
10 -
 11
11 -
 12
12 -
 13
13 -
 14
14 -
 15
15 -
 16
16 -
17
-
18
-
19
-
20
-
21
-
22
-
23
-
24
-
25
-
26
-
27
-
28
 |
 |