Yamaha YV-1600A Owner's Manual - Page 15
Set the tone bars.
 |
View all Yamaha YV-1600A manuals
Add to My Manuals
Save this manual to your list of manuals |
Page 15 highlights
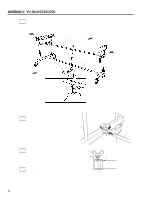
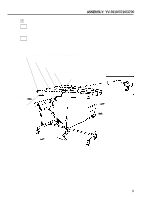
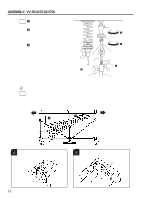
ASSEMBLY: YV-3910/3710/3700 b Set the tone bars. 5-1 (Refer to the illustration of step 3-3 ) Raise the pedal until the knurled part is fully retracted, and fix the center rod by tightening the center rod fixing bolt. 5-2 Engage the rail clamp on rail (2) and rail (3) with rail (1) and rail (4), respectively. Rail (3) Rail (4) Rail Clamp Rail Clamp Rail (1) Rail (2) 5-3 Hold the pedal depressed to keep the sustain damper lowered, and then carefully set the tone bars. Align each tone bar individually, and hook its string onto the corresponding post. Confirm that all strings are secured to their posts, and then hook the two springs at the low sound side into each other. Low Sound Side High Sound Side Springs 13
-
 1
1 -
2
-
3
-
4
-
5
-
6
-
7
-
8
-
9
-
 10
10 -
 11
11 -
 12
12 -
 13
13 -
 14
14 -
 15
15 -
 16
16 -
 17
17 -
 18
18 -
 19
19 -
 20
20 -
21
-
22
-
23
-
24
-
25
-
26
-
27
-
28
 |
 |
5-3
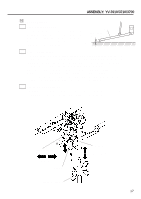
Hold the pedal depressed to keep the sustain damper lowered, and then carefully set
the tone bars.
Align each tone bar individually, and hook its string onto the corresponding post.
Confirm that all strings are secured to their posts, and then hook the two springs at the
low sound side into each other.
b
Set the tone bars.
5-1
(Refer to the illustration of step
3-3 )
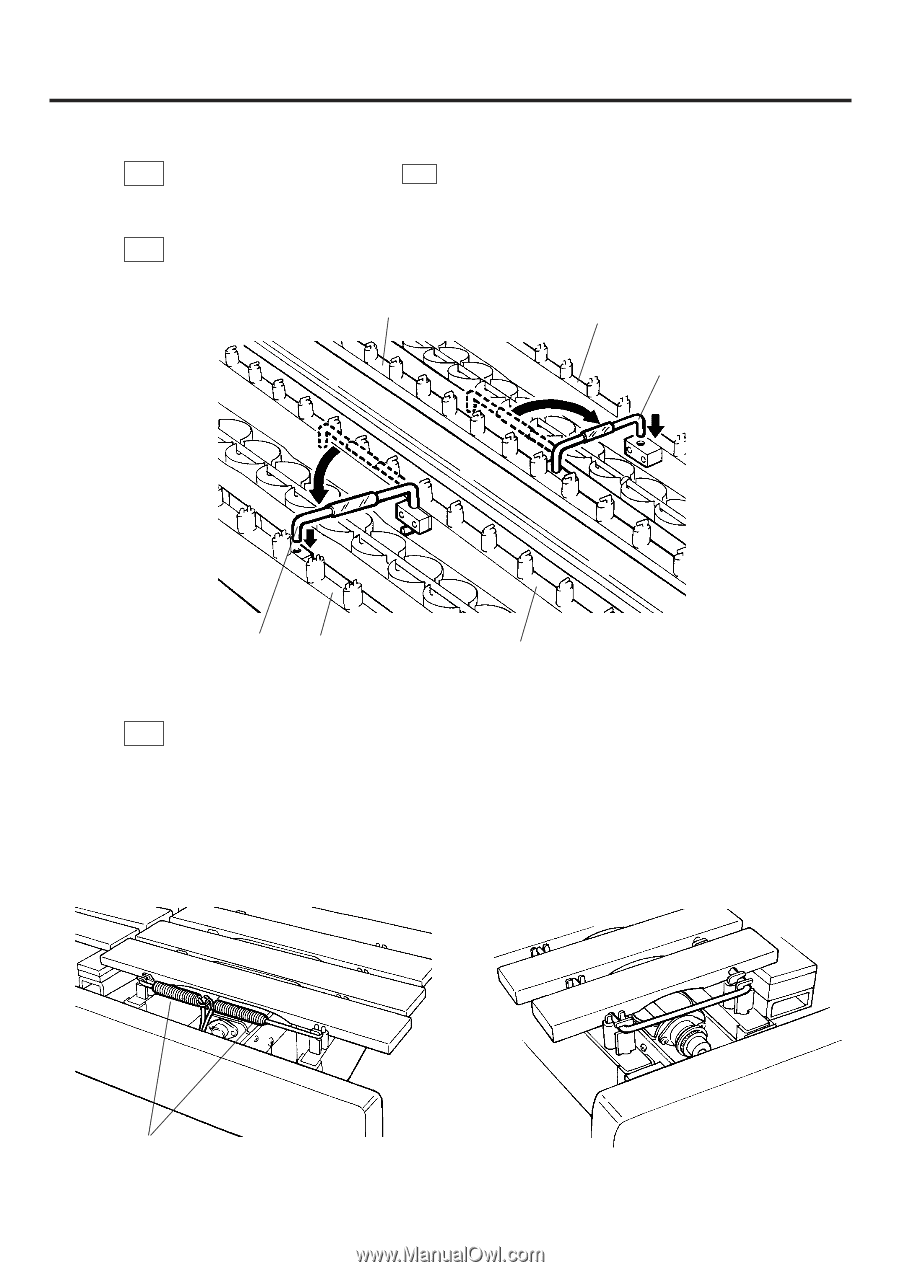
Raise the pedal until the knurled part is fully retracted, and fix the center rod by
tightening the center rod fixing bolt.
5-2
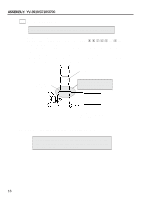
Engage the rail clamp on rail (2) and rail (3) with rail (1) and rail (4), respectively.
Low Sound Side
High Sound Side
Rail (1)
Rail (2)
Rail Clamp
Rail (4)
Rail (3)
Rail Clamp
Springs
13
ASSEMBLY: YV-3910/3710/3700