Yamaha YV-1600A Owner's Manual - Page 23
We recommend to you to assemble the instrument on a soft rug or carpet to avoid scratches in
 |
View all Yamaha YV-1600A manuals
Add to My Manuals
Save this manual to your list of manuals |
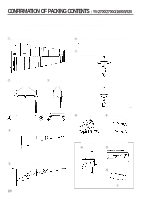
Page 23 highlights
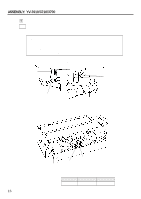
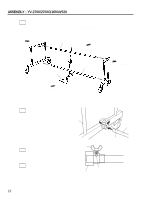
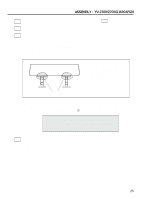
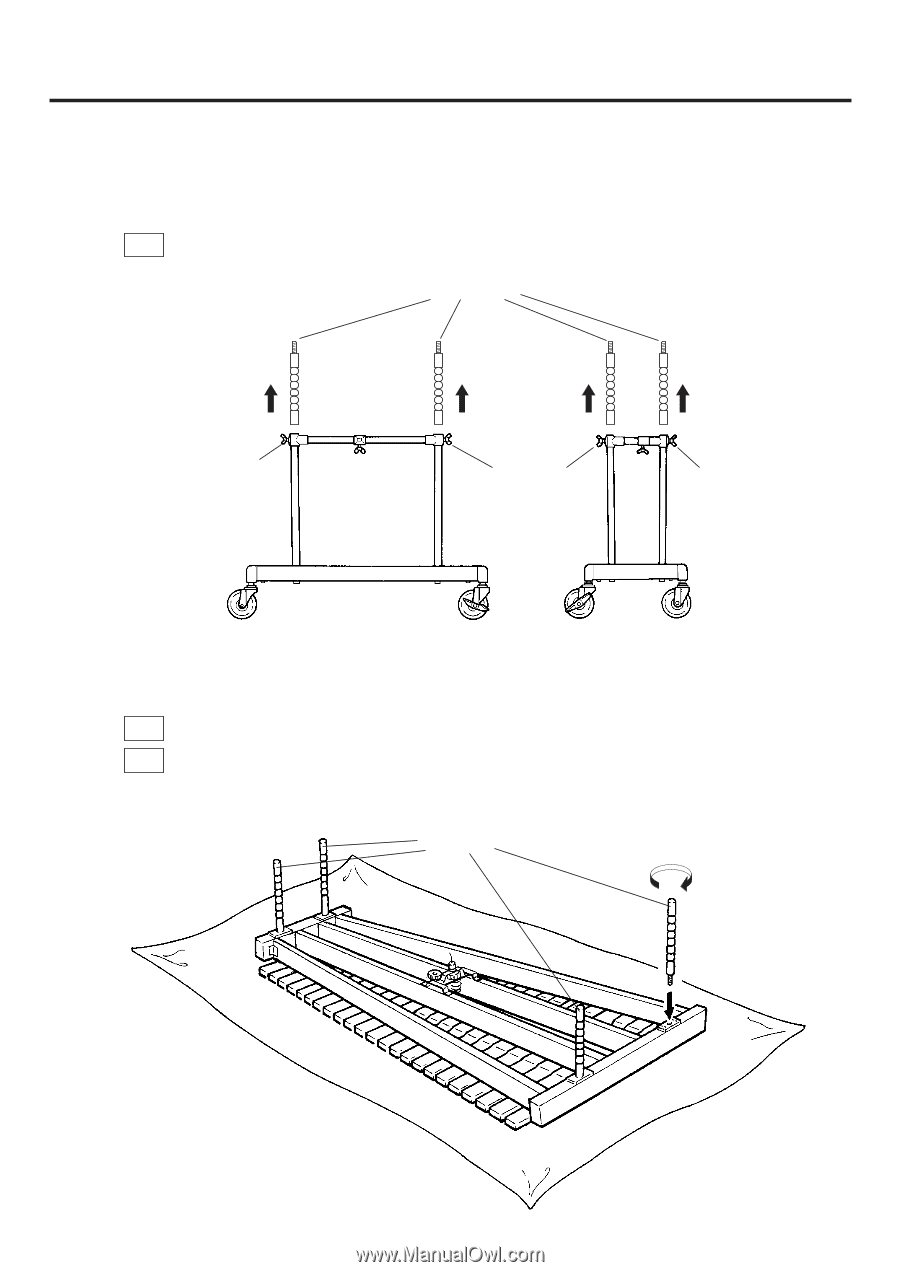
ASSEMBLY : YV-2700/2700G/1600A/520 For safety, assembly should be performed by at least 2 persons in a location with sufficient space. We recommend to you to assemble the instrument on a soft rug or carpet to avoid scratches in the tone bars. 1 Loosen the slide leg fixing bolts of the large and the small leg, and remove the four slide legs. Slide Legs Slide Leg Fixing Bolt Slide Leg Fixing Bolt Slide Leg Fixing Bolt Leg (Large) * The illustrations show model YV-2700/2700G Leg (Small) 2 Place the main unit bottom side up on the floor. 3 Screw each slide leg into the screw hole at the bottom side of the main unit. (All four slide legs are identical.) Slide Legs Tighten 21
-
 1
1 -
2
-
3
-
4
-
5
-
6
-
7
-
8
-
9
-
10
-
11
-
12
-
13
-
14
-
15
-
16
-
17
-
 18
18 -
 19
19 -
 20
20 -
 21
21 -
 22
22 -
 23
23 -
 24
24 -
 25
25 -
 26
26 -
 27
27 -
 28
28
 |
 |
For safety, assembly should be performed by at least 2 persons in a location with sufficient space.
We recommend to you to assemble the instrument on a soft rug or carpet to avoid scratches in the tone
bars.
ASSEMBLY
: YV-2700/2700G/1600A/520
Slide Legs
Slide Legs
Slide Leg
Fixing Bolt
Slide Leg
Fixing Bolt
Slide Leg
Fixing Bolt
* The illustrations show model YV-2700/2700G
1
Loosen the slide leg fixing bolts of the large and the small leg, and remove the four slide
legs.
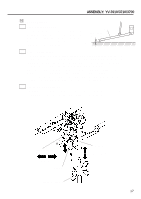
2
Place the main unit bottom side up on the floor.
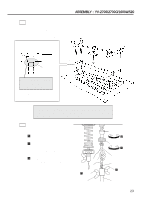
3
Screw each slide leg into the screw hole at the bottom side of the main unit. (All four
slide legs are identical.)
Leg (Large)
Leg (Small)
Tighten
21