1995 Honda Accord Owner's Manual
1995 Honda Accord Manual
1995 Honda Accord manual content summary:
- 1995 Honda Accord | Owner's Manual - Page 1
How to operate the climate control system, the audio system, and other convenience features. Before Driving...105 What gasoline to use, how to break-in your new vehicle, and how to load luggage and other cargo. Driving ...117 The proper way to start the engine, shift the transmission, and park, plus - 1995 Honda Accord | Owner's Manual - Page 2
and useful features. Following the service interval and maintenance recommendations will help keep your driving trouble-free while preserving your investment. Keep this owner's manual in your car so you can refer to it at any time. Please make sure the manual stays with the car if you sell - 1995 Honda Accord | Owner's Manual - Page 3
important. We have provided many important safety messages in this manual and on the vehicle. Please read these messages carefully. don't follow instructions. You CAN be KILLED or SERIOUSLY HURT if you don't follow instructions. You CAN be HURT if you don't follow instructions. Each safety message - 1995 Honda Accord | Owner's Manual - Page 4
...13 How the Driver's Airbag Works...14 How the Passenger's Airbag Works...15 How the SRS Indicator Light Works...16 System Service...16 System Service Precautions...17 Additional Safety Information...18 Seat-back Position...18 Head Restraint Position...18 Door Locks...19 Storing Cargo Safely...19 - 1995 Honda Accord | Owner's Manual - Page 5
your Accord has a Supplemental Restraint System (SRS) with airbags for the driver and a front seat passenger. Two indicator lights are also part of page 20). All doors are closed and locked (see page 19). Seat-backs are upright and head restraints are properly adjusted (see pages 18 and 59). There - 1995 Honda Accord | Owner's Manual - Page 6
/shoulder belt under your arm or behind your back. This could increase the chance of serious injuries in a crash. Do not put shoulder belt pads or other accessories on seat belts. They can reduce the effectiveness of the belts and increase the chance of injury. Not wearing a seat belt increases the - 1995 Honda Accord | Owner's Manual - Page 7
rear seat have lap/shoulder belts. The center position of the rear seat has a lap belt. Your seat belt system also includes a light on the instrument panel a collision or sudden stop, the retractor automatically locks the belt to help restrain your body. The lap belt has one manuallyadjusted belt - 1995 Honda Accord | Owner's Manual - Page 8
seat as far back as is practical while still allowing you to maintain full control of the vehicle. Make sure the seat-back is upright (see page 18 the latch plate across your body and insert it into the buckle. Tug on the belt to make sure the latch is securely locked. 2. Check that the belt is not - 1995 Honda Accord | Owner's Manual - Page 9
: Adjust the belt anchor by squeezing the two buttons and sliding the anchor downward (it has four positions) . Rear seat: Move toward the center of the seat until the belt fits over your collarbone. To unlatch the seat belt, push the red PRESS button on the buckle. Guide the belt across your body - 1995 Honda Accord | Owner's Manual - Page 10
. 2. Position the belt as low as possible across your hips and pelvic bones, not across your stomach. Pull the loose end of the belt to adjust for a snug but comfortable fit. To unlatch the belt, push the red PRESS button on the buckle. Driver and Passenger Safety - 1995 Honda Accord | Owner's Manual - Page 11
seat belts regularly. Pull out each belt fully and look for frays, cuts, burns, and wear. Check that the latches work smoothly and the lap/shoulder belts retract easily. Any belt not in good condition or not working properly should be replaced. If a seat belt is worn during a crash, have your dealer - 1995 Honda Accord | Owner's Manual - Page 12
the head and chest of the driver and front seat passenger during a severe frontal collision. This system does not replace your seat airbag. Be sure you and your passengers always wear seat belts and wear them properly. CONTROL UNIT PASSENGER'S AIRBAG The main components in your SRS are: One airbag - 1995 Honda Accord | Owner's Manual - Page 13
System A sophisticated electronic system that continually monitors the control unit sensors, airbag activators, and all related wiring when the ignition is ON (II). An indicator light on the instrument panel to alert you to a possible problem with the system. Emergency backup power in case your - 1995 Honda Accord | Owner's Manual - Page 14
parked car at 25 mph (40 km/h). Airbags will not inflate in a moderate frontal collision, or during a rear impact, side impact, or rollover - even undercarriage, may not cause extensive body damage but cause the airbags to inflate. Frontal collision range Airbags inflate and deflate only once. - 1995 Honda Accord | Owner's Manual - Page 15
wheel as is practical while still maintaining full vehicle control. If you ever have a severe frontal collision, your airbag will instantly inflate to help protect your head and chest. After the bag completely inflates, it immediately starts deflating so it won't interfere with your visibility - 1995 Honda Accord | Owner's Manual - Page 16
and sit well back in the seat. We strongly recommend that you do not put an infant seat in the front passenger's seat. If the airbag inflates, it can hit the infant seat with great force. The infant seat can be dislodged or struck with enough force to cause very serious - 1995 Honda Accord | Owner's Manual - Page 17
system is virtually maintenance-free. There are no parts you can safely service. You must have the system serviced by an authorized Honda dealer: If your airbags ever inflate, the airbags and control unit must be replaced. Do not try to remove or discard the airbags by yourself. This must be done by - 1995 Honda Accord | Owner's Manual - Page 18
components or wiring. This could cause the airbags to inflate inadvertently, possibly injuring someone very seriously. Tell anyone who works on your car that you have a supplemental restraint system. Failure to follow the procedures and precautions in the official Honda service manual could result - 1995 Honda Accord | Owner's Manual - Page 19
Additional Safety Information The seat belts and airbags are obviously important parts of your occupant protection system. In addition, you should know that sitting upright, adjusting the head restraint properly, locking the doors, and stowing things properly can also increase your safety and - 1995 Honda Accord | Owner's Manual - Page 20
or interfere with your ability to operate the controls. Do not put any items on top of the rear shelf. They can block your view and they larger dog is with a special traveling harness. This harness can be secured to the rear seat with a seat belt. Travel harnesses are available at pet stores. A small - 1995 Honda Accord | Owner's Manual - Page 21
Children Sit? According to accident statistics, children of all sizes and ages are safer when they are properly restrained in the rear seat rather than of the rear seat with the lap belt. We strongly recommend that you do not put an infant seat in the front passenger's seat. If the airbag inflates, - 1995 Honda Accord | Owner's Manual - Page 22
also recommend that any child who is too large to use an infant or toddler seat ride in one of the outside positions of the rear seat. The child should then wear the lap/ shoulder belt properly for protection. Important Safety Reminders Never hold a baby or child on your lap when - 1995 Honda Accord | Owner's Manual - Page 23
child. Check the seat manufacturer's instructions and convertible seat designed for a baby. Because infants must ride in a reclining position, be sure the infant seat always faces the REAR of the car as shown. To properly route a seat belt through a child seat, follow the seat maker's instructions - 1995 Honda Accord | Owner's Manual - Page 24
do not put an infant seat in the front passenger's seat. If the airbag inflates, it can hit the infant seat with great force. The infant seat you decide to put a toddler seat in any other seating position, you must use a locking clip on the car's lap/ shoulder belt (see page 24 ). If you are using - 1995 Honda Accord | Owner's Manual - Page 25
kg (40 Ibs) Put the seat belt on your child and check its fit. The shoulder belt should fit over the collarbone and across style you select, follow the booster seat manufacturer's instructions. Using a Seat Belt Locking Clip Always use a seat belt locking clip when you secure a child seat to your - 1995 Honda Accord | Owner's Manual - Page 26
Child Safety To install a locking clip, do the following: 1. Place the child restraint in the desired position. Route the lap/ shoulder belt through the restraint according to the seat manufacturer's instructions. 2. Insert the latch plate into the buckle. Pull on the shoulder part of the belt to - 1995 Honda Accord | Owner's Manual - Page 27
you can obtain them by writing to: American Honda Motor Co., Inc. Consumer Affairs 1919 Torrance Blvd. an infant seat or other child restraint, either remove it or make sure it is properly secured so washer is on the bottom of the bolt. The supplied anchor plate is designed only for - 1995 Honda Accord | Owner's Manual - Page 28
car requires your full attention and alertness. Traffic conditions change rapidly. You must be able to react cannot get a ride from a friend? Find alternative transportation. Call a taxi. Take a bus. Many communities have transportation services devoted to shuttling people who have been drinking. - 1995 Honda Accord | Owner's Manual - Page 29
parked car, even in an unconfined area, with the engine running, adjust the heating and cooling system as follows: 1. Push the button. 2. Select the mode. 3. Turn the fan on high speed. 4. Set the temperature control to a comfortable setting. Carbon monoxide gas is toxic. Breathing it can cause - 1995 Honda Accord | Owner's Manual - Page 30
4 Cylinder Models These labels are in the locations shown. They warn you of potential hazards that could cause serious injury. Read these labels carefully and don't remove them. If a label comes off or becomes hard to read, contact your Honda dealer for a replacement. RADIATOR CAP BATTERY Driver - 1995 Honda Accord | Owner's Manual - Page 31
Labels 6 Cylinder Models These labels are in the locations shown. They warn you of potential hazards that could cause serious injury. Read these labels carefully and don't remove them. If a label conies off or becomes hard to read, contact your Honda dealer for a replacement. BATTERY RADIATOR CAP - 1995 Honda Accord | Owner's Manual - Page 32
Running Lights...42 Instrument Panel Brightness...43 Turn Signals...43 Windshield Wipers...44 Windshield Washers...45 Hazard Warning...45 Rear Window Defogger...45 Steering Wheel Adjustment...46 Steering Wheel Controls ...48 Cruise Control...48 Horn...51 Keys and Locks...51 Keys...51 Ignition Switch - 1995 Honda Accord | Owner's Manual - Page 33
Control Locations MIRROR CONTROLS (P.65) DIGITAL CLOCK (P.67) HEATING/COOLING CONTROL (P.74) DOOR LOCK SWITCH (P.53) POWER WINDOW SWITCH (P.62) AUDIO SYSTEM (P.81) FUEL FILL DOOR RELEASE (P.108) TRUNK RELEASE HANDLE (P.54) HOOD RELEASE HANDLE (P.109) Instruments and Controls - 1995 Honda Accord | Owner's Manual - Page 34
car for burned-out bulbs or other problems. * The U.S. instrument panel is shown. Differences for the Canadian model are noted in the text. DOOR AND BRAKE LAMP MONITOR MALFUNCTION INDICATOR LAMP/ CHECK ENGINE LIGHT* LOW FUEL INDICATOR ANTI-LOCK BRAKE SYSTEM INDICATOR* SUPPLEMENTAL RESTRAINT SYSTEM - 1995 Honda Accord | Owner's Manual - Page 35
after the engine starts. If this light flashes or stays on when the engine is running, there is a possibility of serious engine damage. Safely pull to the side of the road and shut off the engine as soon as you can. Turn to page 221 for instructions and precautions on checking the engine. Charging - 1995 Honda Accord | Owner's Manual - Page 36
Check Engine Light (Canada 4 cylinder models) US ABS Canada Anti-lock Brake System (ABS) Indicator This light comes on for a few seconds when you turn the ignition switch ON (II). If it comes on at any other time, it indicates one of the engine's emission control systems may have a problem - 1995 Honda Accord | Owner's Manual - Page 37
switch ON (II). If it flashes while driving (in any shift position), it indicates a possible problem in the transmission. Avoid rapid acceleration and have the transmission checked by an authorized Honda dealer as soon as possible. DRL Only on cars equipped with Cruise Control System This lights - 1995 Honda Accord | Owner's Manual - Page 38
Canada) to disconnect, reset, or alter the odometer with the intent to change the number of miles or kilometers indicated. Trip Meter This meter shows the Models Tachometer The tachometer shows the engine speed in revolutions per minute (rpm). To protect the engine from damage, never drive with the - 1995 Honda Accord | Owner's Manual - Page 39
severe driving conditions, such as very hot weather or a long period of uphill driving, the pointer may rise to the upper white mark. If it reaches the red " H " (Hot) mark, pull safely to the side of the road. Turn to page 219 for instructions and precautions on checking the engine's cooling system - 1995 Honda Accord | Owner's Manual - Page 40
panel brightness. The lever on the underside of the steering column allows you to tilt the steering wheel. CRUISE CONTROL INSTRUMENT PANEL BRIGHTNESS REAR WINDOW DEFOGGER WINDSHIELD WIPERS/WASHERS MOONROOF SWITCH HEADLIGHTS/ TURN SIGNALS TILT ADJUSTMENT HAZARD WARNING LIGHTS Instruments - 1995 Honda Accord | Owner's Manual - Page 41
the left lever controls the lights. Turning this switch to the first position " " turns on the parking lights, taillights, instrument panel lights, side-marker lights, and rear license plate lights. Turning the switch to the second position " " turns on the headlights. To change between low beams - 1995 Honda Accord | Owner's Manual - Page 42
SIGNAL LEVER The knob on the dashboard to the left of the instrument panel controls the brightness of the instrument panel lights. Push the knob to get it to pop out. Turn the knob to adjust the brightness. Signal a turn or lane change with this lever. Push down on the lever to signal a left turn - 1995 Honda Accord | Owner's Manual - Page 43
the wipers in mist mode, push the control lever down. The wipers run at high speed until you release the lever. This gives you a quick way to clear the windshield. On 6 cylinder models In intermittent, the wipers operate every few seconds. You can adjust this delay by turning the INT TIME ring - 1995 Honda Accord | Owner's Manual - Page 44
Windshield Washers Hazard Warning Rear Window Defogger To clean the windshield, pull back on the wiper control lever. The washers spray instrument panel to flash. Use the hazard warning lights if you need to park in a dangerous area near heavy traffic, or if your car is disabled. The rear window - 1995 Honda Accord | Owner's Manual - Page 45
Controls Near the Steering Wheel Make sure the rear window is clear and you have good visibility before starting to drive. The defogger wires on the inside of the rear window can be accidentally damaged. When cleaning the glass, always wipe side to side. Steering Wheel Adjustment You can adjust the - 1995 Honda Accord | Owner's Manual - Page 46
to the desired position. Position the wheel so you can see all the instrument panel gauges and warning lights. Push the lever up to lock the steering wheel in that position. 4. Make sure you have securely locked the steering wheel in place by trying to move it up and down. Instruments and Controls - 1995 Honda Accord | Owner's Manual - Page 47
of the car under those conditions. Using the Cruise Control Improper use of the cruise control can lead to a crash. Use the cruise control only when traveling on open highways in good weather. CRUISE CONTROL MASTER SWITCH 1. Push in the Cruise Control Master Switch to the left of the steering - 1995 Honda Accord | Owner's Manual - Page 48
Steering Wheel Controls Changing the Set Speed RESUME/ accel You can increase the set . Release the button when you reach the desired speed. Tap the brake or clutch pedal lightly with your foot. The CRUISE CONTROL light on the instrument panel will go out. When the car slows to the desired speed, - 1995 Honda Accord | Owner's Manual - Page 49
the SET/decel and RESUME/accel buttons at the same time. Press the Cruise Control Master Switch. When you tap the brake or clutch pedal, or press the SET and RESUME buttons at the same time, the CRUISE CONTROL light on the instrument panel will go out and the car will begin to slow down. You can use - 1995 Honda Accord | Owner's Manual - Page 50
spokes to sound the horn. Your car comes with two kinds of keys: a master key and a valet key. The master key fits all locks on your car: Ignition Doors Trunk Trunk release handle Rear seat trunk access Glove box When replacing keys, use only Honda-approved key blanks. Instruments and Controls - 1995 Honda Accord | Owner's Manual - Page 51
wheel to release the anti-theft lock. To switch from ACCESSORY to LOCK, you must push the key in slightly as you turn it. If your car has an automatic transmission, it must also be in Park. The anti-theft lock will lock the steering column when you remove the key. ACCESSORY (I) - In this position - 1995 Honda Accord | Owner's Manual - Page 52
the door. On LX, LX V-6, EX and EX V-6 models in the U.S., and EX, EX V-6, EX-R and EX-R V-6 models in Canada Each front door has a master door lock switch. Either switch locks and unlocks all doors. Push the switch down to lock all doors, and up to unlock them. CONTINUED Instruments and Controls - 1995 Honda Accord | Owner's Manual - Page 53
open the door, pull the lock tab up and use the outside door handle. You can open the trunk in two ways: Pull the trunk release handle to the left of the driver's seat. Use the master key to open the trunk lock. The valet key does not work in this lock. Instruments and Controls - 1995 Honda Accord | Owner's Manual - Page 54
with the master key. 2. Give the person the valet key. Open the glove box by pulling the bottom of the handle. Close it with a firm push. Lock or unlock the glove box with the master key. The glove box light comes on only when the instrument panel lights are on. CONTINUED Instruments and Controls - 1995 Honda Accord | Owner's Manual - Page 55
while driving. Adjust the seat before you start driving. To adjust the seat forward and backward, pull up on the lever under the seat cushion's front edge. Move the seat to the desired position and release the lever. Try to move the seat to make sure it is locked in position. To change the angle - 1995 Honda Accord | Owner's Manual - Page 56
to adjust the distance to the steering wheel and pedals. On EX and EX V-6 models in the U.S.. and EX-R and EX-R V-6 models in Canada The height of your driver's seat is power adjustable. Pull up the switch to raise the seal. Push it down to lower the seat. CONTINUED Instruments and Controls - 1995 Honda Accord | Owner's Manual - Page 57
push down on the rear of the switch to move the rear of the seat bottom up or down. Pull the center of the horizontal switch up to raise the seat. Push it down to lower the seat. Adjust the seat-back angle by pushing the rear switch in the direction you want to move. Instruments and Controls - 1995 Honda Accord | Owner's Manual - Page 58
On EX, EX V-6models in the U.S., and EX-R, EX-R V-6 models in Canada Vary the lumbar support by moving the lever on the right side of the seat-back. Pivot the lever forward until it stops, then let it return. Doing this several times adjusts the lumbar support through its full range. Head Restraints - 1995 Honda Accord | Owner's Manual - Page 59
Seat Adjustments To remove a head restraint for cleaning or repair, pull it up as far as it will go. Press the release button and pull the restraint out of the seatback. Folding Rear Seat MASTER KEY Pull Driving your car without head restraints can lead to serious injury to you and your passenger - 1995 Honda Accord | Owner's Manual - Page 60
and the trunk lid open. See Carbon Monoxide Hazard on page 28. Rear Seat Armrest On LX, LX V-6, EX and EX V-6 models in the U.S., and EX, EX V-6, EX-R and EX-R V-6 models in Canada The rear seat armrest is located at the center of the rear seat. Pivot it down to use it. Instruments and Controls - 1995 Honda Accord | Owner's Manual - Page 61
the window to stop. Close the window by pushing the switch up and holding it. The master control panel also contains these extra features: AUTO - To open the driver's window fully, push the window switch firmly down and release it. The window automatically goes all the way down. To stop the window - 1995 Honda Accord | Owner's Manual - Page 62
switch controls power to the passengers' windows. With this switch off, the passengers' windows cannot be raised or lowered. The MAIN switch does not affect the driver's window. Keep the MAIN switch SWITCH On EX, EX V-6models in the U.S., and EX-R, EX-R V-6 models in Canada Use the switch on - 1995 Honda Accord | Owner's Manual - Page 63
the moonroof. You must close it manually. TAB Keep the inside and outside mirrors clean and adjusted for best visibility. Be sure to adjust the mirrors before you start driving. The inside mirror has day covered with snow or ice, you can damage the moonroof panel or motor. Instruments and Controls - 1995 Honda Accord | Owner's Manual - Page 64
Mirrors Manual Door Mirrors Adjusting the Power Mirrors SELECTOR SWITCH ADJUSTMENT SWITCH Only on U.S. DX and Canadian LX models The outside mirrors can be adjusted by moving the knob located on each front door. On U.S. LX, LX V-6, EX and EX V-6 models, and Canadian EX, EX V-6, EX-R and EX-R V-6 - 1995 Honda Accord | Owner's Manual - Page 65
the lever. The parking brake light on use it to judge the distance of things the instrument panel should go out behind you. when the parking brake is fully released (see page 36). If you try to drive the car without releasing the parking brake, the ABS cannot work properly. Instruments and Controls - 1995 Honda Accord | Owner's Manual - Page 66
forward to 2:00. H M RESET The digital clock displays the time with the ignition switch ON (II). To see the time with the ignition off, press and hold the wide button under the clock. To set the clock: 1. Turn the ignition switch ON (II) to display the time. 2. Swing down the front cover of - 1995 Honda Accord | Owner's Manual - Page 67
CONSOLE COMPARTMENT On LX, LX V-6, EX and EX V-6 models in the U.S., and EX, EX V-6, EX-R and EX-R V-6 models in Canada To open around corners. Instruments and Controls Be careful when you are using the cup holder. Spilled liquids can damage the upholstery, carpeting, and electrical components - 1995 Honda Accord | Owner's Manual - Page 68
and EX, EX V-6, EX-R, and EX-R V-6 models in Canada To use the vanity mirror, pull down the passenger's sun visor. To use the vanity mirror, pull down either sun visor and swing down the cover. The light beside the mirror comes on only when the light switch is turned on. Instruments and Controls - 1995 Honda Accord | Owner's Manual - Page 69
ASHTRAY ASHTRAY The ignition switch must be in ACCESSORY (I) or ON (II rear end of the center console. Open the ashtray by swinging the upper edge of the lid down. To remove the ashtray for emptying, open it then lift up and out. NOTICE Use the ashtray only for cigarettes, cigars and other smoking - 1995 Honda Accord | Owner's Manual - Page 70
, the ceiling light stays on continuously. Only 6 cylinder models Turn on the spotlight by pushing the button next to each light. Push the button again to turn it off. You can use the spotlights at all times. On LX, LX V-6, EX and EX V-6 models in the U.S., and EX, EX V-6, EX-R and EX-R V-6 models - 1995 Honda Accord | Owner's Manual - Page 71
in all weather conditions. * Air conditioning is optional on U.S. DX and Canadian LX models. The audio sound system* is very versatile. To get the most from this system, take the time to learn what the controls do. Some models have an anti-theft audio system that requires a code number to enable - 1995 Honda Accord | Owner's Manual - Page 72
Heating and Cooling This system has full heating, ventilation, and air conditioning* capabilities. You can adjust the system controls to mix these in various combinations. The air flows into the interior at three possible levels, which you can select. (U.S. DX and Canadian LX models) If you - 1995 Honda Accord | Owner's Manual - Page 73
Heating and Cooling Comfort and Convenience Features - 1995 Honda Accord | Owner's Manual - Page 74
direction of air flow. The indicator light shows which button is controlling air flow. Air Conditioning (A/C) Switch This switch turns the air conditioning ON and OFF. The indicator above the switch lights when the A/C is ON. RECIRCULATION/ FRESH AIR BUTTON AIR CONDITIONING SWITCH FAN CONTROL DIAL - 1995 Honda Accord | Owner's Manual - Page 75
out smoke and dust. Leaving the system in the recirculation mode with the A / C off can cause the windows to fog up. Switch to mode as soon as the interior reaches a comfortable temperature or the outside smoky, dusty condition clears. The engine must be running for the heater and air conditioning - 1995 Honda Accord | Owner's Manual - Page 76
If it moves near the red zone, turn off the air conditioning until the gauge reads normally. To Heat To warm the interior: 1. Start the engine. 2. Select and 3. Switch the fan to the desired speed. 4. Adjust the warmth of the air with the temperature control dial. Comfort and Convenience Features - 1995 Honda Accord | Owner's Manual - Page 77
with Air Conditioning Air conditioning removes moisture from the air as it operates. When used in combination with the heater, it makes the interior warm and dry. 1. Switch the fan on. 2. Turn on the air conditioning. 3. Select and any desired mode button. 4. Adjust the temperature control dial - 1995 Honda Accord | Owner's Manual - Page 78
from the inside of the windows: 1. Switch the fan on. 2. Turn on the air conditioning. 3. Select and 4. Adjust the temperature control dial so the air flow from the defroster vents feels warm. 5. Turn on the rear window defogger to help clear the rear window. To remove exterior frost or ice from the - 1995 Honda Accord | Owner's Manual - Page 79
Audio System AM/FM/Cassette Stereo Audio System For Canadian LX model only Your Honda audio system is easy to use, and will give clear A M / F M reception. The preset buttons allow you to select six stations on each band. The cassette player features autoreverse for continuous play. CASSETTE SLOT - 1995 Honda Accord | Owner's Manual - Page 80
Audio System Operating the Radio The ignition switch must be in ACCESSORY (I) or ON (II) to operate the audio system. Turn the system on by turning the ON/VOL knob clockwise. The radio comes on and displays the frequency of the station it was last tuned to. Adjust the volume by turning the ON - 1995 Honda Accord | Owner's Manual - Page 81
front-toback. Use the Tone control to adjust the bass and treble to your liking. The radio panel illumination comes on with the instrument panel lights, even with the radio off. You can turn off this illumination even with the radio on by pulling the Balance control knob out. Check this knob if the - 1995 Honda Accord | Owner's Manual - Page 82
Audio System Radio Frequencies Your Honda's radio can time in all frequencies in both the AM and FM bands. Those bands cover these frequencies: AM band: 530 kilohertz to 1,710 kilohertz FM band: 87.7 megahertz to 107.9 megahertz Radio stations on the AM band are assigned frequencies at least 10 - 1995 Honda Accord | Owner's Manual - Page 83
to play. The or will light to show you which side of remove the cassette from the drive, press the EJECT button. The system automatically ejects the cassette whenever you turn off the system or the ignition switch problems. See page 101 for information on cassette care and - 1995 Honda Accord | Owner's Manual - Page 84
stations on FM. (US:LX, LX V-6, Canada: EX, EX V-6) ON/OFF/VOL KNOB CASSETTE SLOT TUNE/SEEK FF/REW/TMS SWITCH AM/FM BUTTON PRESET BUTTONS CASSETTE SLOT ON/OFF/VOL KNOB (US: EX, EX V-6, Canada: EX-R, EX-R V-6) TUNE/SEEK FF/REW/TMS SWITCH AM/FM BUTTON PRESET BUTTONS Comfort and Convenience - 1995 Honda Accord | Owner's Manual - Page 85
and adjusts accordingly. On U.S. EX, EX V-6 and Canadian EX-R. EX-R V-6 models (US: LX, LX V-6, Canada: EX, EX V-6) ON/OFF/VOL KNOB CASSETTE SLOT The Anti-theft feature disables the system if it is disconnected from the car's battery. To get the system working again, you must enter a code number - 1995 Honda Accord | Owner's Manual - Page 86
tuned to. The antenna extends automatically. The system turns off and the antenna retracts when you turn the ignition switch to LOCK (0). Adjust the volume by turning Canada: EX, EX V-6) ON/OFF/VOL KNOB STEREO INDICATOR AM/FM BUTTON (US: EX, EX V-6, ON/OFF/VOL KNOB Canada: EX-R, EX-R V-6) - 1995 Honda Accord | Owner's Manual - Page 87
. Push the TUNE/ SEEK switch up to change to a higher frequency, and down to change to a lower frequency. To change the frequency up or down LX V-6, Canada: EX, EX V-6) TUNE/SEEK SWITCH PRESET BUTTONS (US: EX, EX V-6, Canada: EX-R, EX-R V-6) TUNE/SEEK SWITCH PRESET BUTTONS Comfort and - 1995 Honda Accord | Owner's Manual - Page 88
to store a total of six stations on AM and twelve on FM. TUNE/SEEK SWITCH AM/FM BUTTON PRESET BUTTONS AUTO SELECT BUTTON (US: LX, LX V-6, Canada: EX, EX V-6) TUNE/SEEK AM/FM BUTTON SWITCH PRESET BUTTONS AUTO SELECT LIGHT (US: EX, EX V-6, Canada: EX-R, EX-R V-6) Comfort and Convenience Features - 1995 Honda Accord | Owner's Manual - Page 89
button to tune to it. If you want to change any preset button's selection, store another frequency as described. The frequencies you preset will be lost if your car's battery goes dead or is disconnected. On U.S. EX, EX V-6 and Canadian EX-R. EX-R V-6 models The AUTO SELECT function allows you to - 1995 Honda Accord | Owner's Manual - Page 90
illumination even with the radio on. Push the control knob so it pops out, then pull it out slightly further. Check this control if the control panel lights do not come on with the instrument panel lights. Use the Bass and Treble controls to adjust the tone quality to your liking. Push on the knob - 1995 Honda Accord | Owner's Manual - Page 91
in their advertising, so your radio will show a frequency of 100.9 even though the announcer may call the station "FM101." (US: LX, LX V-6, Canada: EX, EX V-6) STEREO INDICATOR AM/FM BUTTON (US: EX, EX V-6, Canada: EX-R, EX-R V-6) STEREO INDICATOR AM/FM BUTTON Comfort and Convenience Features - 1995 Honda Accord | Owner's Manual - Page 92
in the rest of the way and begin to play. The or will light to show you which side of the cassette is playing. The indicates the an Auto-reverse feature. It will automatically reverse direction when it reaches the end of the cassette. (US: LX, LX V-6, Canada: EX, EX V-6) ON/OFF/VOL KNOB CASSETTE TAPE - 1995 Honda Accord | Owner's Manual - Page 93
it off by pressing the button. To remove the cassette from the drive, press the EJECT button. The system automatically ejects the cassette whenever you turn off the system or the ignition switch. (US: LX, LX V-6, Canada: EX, EX V-6) FF/REW/TMS SWITCH EJECT BUTTON PROG BUTTON PLAY DOLBY BUTTON - 1995 Honda Accord | Owner's Manual - Page 94
switch up then release it. You will see FF displayed. To stop rewind or fast forward, press the PLAY button. If the system reaches the end of the cassette while in fast forward or rewind, it automatically the drive or cause other problems. See page 102 for information on cassette care and protection. - 1995 Honda Accord | Owner's Manual - Page 95
magazine in the changer according to the instructions that came with the unit. Your dealer has Genuine Honda accessory in-dash CD players available that are operated by the radio controls. If you have one of these units, use the directions in this section (except for multi-disc selection) to operate - 1995 Honda Accord | Owner's Manual - Page 96
Audio System (US: LX, LX V-6, Canada: EX, EX V-6) ON/OFF/VOL KNOB RPT INDICATOR TUNE/SEEK SWITCH CD BUTTON REPEAT BUTTON A. SELECT INDICATOR RPT INDICATOR (US: EX, EX V-6, Canada: EX-R, EX-R V-6) ON/OFF/VOL KNOB TUNE/SEEK SWITCH CD BUTTON A. SELECT/ REPEAT BUTTON Comfort and Convenience - 1995 Honda Accord | Owner's Manual - Page 97
Push the switch again to turn off the REPEAT mode. On U.S. EX, EX V-6 and Canadian EX-R. EX-R V-6 models disc. When the system has played all the tracks on that disc, it loads the next disc and starts change modes to radio or tape while a CD is playing, then change back to CD mode, the same disc and - 1995 Honda Accord | Owner's Manual - Page 98
Audio System CD Error Indications If you see an error indication on the display, find the cause in the chart to the right. If you cannot clear the error indication, take the car to your Honda dealer. Comfort and Convenience Features - 1995 Honda Accord | Owner's Manual - Page 99
eventually become impossible to remove the deposits with a normal cleaning kit. CLEAN LIGHT CLEAN The cassette player automatically ejects cassettes that do the tape is wound unevenly. It should play normally after being manually rewound. Use 100-minute or shorter cassettes. Cassettes longer than - 1995 Honda Accord | Owner's Manual - Page 100
EX and EX V-6 models, and Canadian EX, EX V-6, EX-R and EX-R V-6 models CLEAN INDICATOR see CLEAN flashing to remove the deposits with a normal cleaning kit. The cassette player automatically ejects cassettes . It should play normally after being manually rewound. Use 100-minute or shorter - 1995 Honda Accord | Owner's Manual - Page 101
system's serial number in this Owner's Manual. If you should happen to lose both cards, you must obtain the code number from your Honda dealer. To do the five-digit code. If it is entered correctly, the radio will start playing. If you make a mistake entering the code, do not start over or try to - 1995 Honda Accord | Owner's Manual - Page 102
. Break-in Period...106 Gasoline...106 Oxygenated Fuels...106 Driving in Foreign Countries...107 Service Station Procedures ...108 Filling the Fuel Tank...108 Opening the Hood...109 Fuel Economy...113 Vehicle Condition...113 Driving Habits...113 Accessories...114 Loading Cargo...115 Before Driving - 1995 Honda Accord | Owner's Manual - Page 103
starts and rapid acceleration. If you need to add oil, use the engine oil recommended in this owner's manual. Avoid hard braking. New brakes need engine deposits. Using gasoline containing lead will damage your car's emission controls. This contributes to air pollution and can void certain parts - 1995 Honda Accord | Owner's Manual - Page 104
starting and/or performance problems. It may also damage metal, rubber and plastic parts of your fuel system. If you notice any undesirable operating symptoms, try another service station or switch model of your car. U.S. Owners: American Honda Motor Co., Inc. Consumer Affairs 1919 Torrance Blvd. - 1995 Honda Accord | Owner's Manual - Page 105
on the inside of the door as shown. 4. Stop filling the lank after the fuel pump automatically clicks off. Do not try to "top off" the tank, leave some room for the fuel to expand with temperature changes. 5. Screw the fuel fill cap back on, tighten it until it clicks more than twice - 1995 Honda Accord | Owner's Manual - Page 106
HANDLE SUPPORT ROD LATCH 1. Shift to Park or Neutral and set the parking brake. releases the hood. Lift the hood. 4 cylinder models 3. Pull the support rod out of its clip and insert the , lift it up slightly to remove the support rod from the hole. Put the support rod back into its holding clip - 1995 Honda Accord | Owner's Manual - Page 107
Service Station Procedures Oil Check 4 cylinder models DIPSTICK 6 cylinder models DIPSTICK 6 cylinder models 3. Lift the hood up most of the way. The hydraulic supports will lift it up the rest of the way and hold it up. To close the hood, lower it and press down firmly with your hands. Check - 1995 Honda Accord | Owner's Manual - Page 108
Service Station Procedures 4 cylinder models 6 cylinder models 2. Wipe the dipstick with a clean cloth or paper towel. 3. Insert it all the way back in its tube. Before Driving - 1995 Honda Accord | Owner's Manual - Page 109
Service Station Procedures Engine Coolant Check MAX RESERVE TANK MAX RESERVE TANK UPPER MARK LOWER MARK 4 cylinder models MIN 6 cylinder models MIN 4. Remove it again and check the level. It should be between the upper and lower marks. If it is near or below the lower mark, see page 149 for - 1995 Honda Accord | Owner's Manual - Page 110
better fuel economy. To cut down on the number of "cold starts," try to combine several short trips into one. The air conditioning puts an extra load on the engine which makes it use more fuel. Turn off the A/C to cut down on air conditioning use. Use the flow-through ventilation when the outside - 1995 Honda Accord | Owner's Manual - Page 111
suspension problems which would not be covered by your warranty. Improperly-designed accessories can adversely affect your car's handling and stability. Your car has several computercontrolled systems, including the SRS system, the engine's fuel injection, and the Anti-lock brake system. Strong - 1995 Honda Accord | Owner's Manual - Page 112
Ibs). It includes the total weight of all passengers and their belongings, any accessories, and the tongue weight of a trailer. This 385 kg (850 Ibs) figure the trunk lid, be aware that exhaust gas can enter the interior. See Carbon Monoxide Hazard on page 28 . Never place items on the shelf behind - 1995 Honda Accord | Owner's Manual - Page 113
Driving This section gives you tips on starting the engine under various conditions, and how to operate the manual and automatic transmissions. It also includes important information on your car's braking system and facts you need if you are planning to tow a trailer. Preparing to Drive...118 - 1995 Honda Accord | Owner's Manual - Page 114
7. Check the adjustment of the steering wheel (see page 46). 8. Make sure the doors are securely closed and locked. 9. Fasten your seat belt. Check that your passengers have fastened their seat belts (see page 7 ). 10. Turn the ignition ON (II). Check the indicator lights in the instrument panel. 11 - 1995 Honda Accord | Owner's Manual - Page 115
Starting the Engine 5-speed Manual Transmission 1. Apply the parking brake. 2. In cold weather, turn off all electrical accessories to reduce the drain on the battery. 3. Push the clutch pedal down all the way. START (III) does not function unless the clutch pedal is depressed. 4. Without touching - 1995 Honda Accord | Owner's Manual - Page 116
meters/ 8,000 feet) An engine is harder to start in cold weather. The thinner air found at high altitude above 2,400 meters (8,000 feet) adds to the problem. Use the following procedure: 1. Turn off all electrical accessories to reduce the drain on the battery. 2. Push the accelerator pedal halfway - 1995 Honda Accord | Owner's Manual - Page 117
engine run and accelerate smoothly. This will give you the best fuel economy and effective emissions control. The following shift points are recommended: The manual transmission clutch pedal. This can cause your clutch to wear out faster. Rapid slowing or speeding-up can cause loss of control on - 1995 Honda Accord | Owner's Manual - Page 118
RPM below the red zone. (US: DX, LX, Canada: LX, EX) (US: EX, Canada: EX-R) Automatic Transmission Your Honda's transmission has four forward speeds, and is electronically controlled for smoother shifting. It also has a "lock-up" torque converter for better fuel economy. You may feel what seems like - 1995 Honda Accord | Owner's Manual - Page 119
shift lever. It also indicates a possible problem in the transmission if the "D4" indicator light flashes. The shift lever has seven positions. It must be in Park or Neutral to start the engine. When you are stopped in D4, D3, 2 , 1 , N or R, press firmly on the brake pedal and keep your foot off - 1995 Honda Accord | Owner's Manual - Page 120
Automatic Transmission Park (P) - This position mechanically locks the transmission. Use Park whenever you are turning off or starting the engine. To shift out of Park, you must press on the brake pedal and have your foot off the accelerator pedal. Press the release button on the side of the shift - 1995 Honda Accord | Owner's Manual - Page 121
of the shift lever. This position locks the transmission in second gear. It does not downshift to first gear when you come to a stop. Second gives you more power when climbing, and increased engine braking when going down steep hills. Use second gear when starting out on a slippery surface or in - 1995 Honda Accord | Owner's Manual - Page 122
button and move the shift lever out of Park to Neutral. 5. Remove the key from the Shift Lock Release slot. Depress the brake pedal and restart the engine. If you need to use the Shift Lock Release, it could mean your car is developing a problem. Have the car checked by your Honda dealer. Driving - 1995 Honda Accord | Owner's Manual - Page 123
, be extra cautious and alert in your driving. Brake Wear Indicators The front disc brakes on all cars have audible brake wear indicators. They are also on the rear brakes of cars equipped with ABS. When the brake pads need replacing, you will hear a distinctive metallic "screeching" sound when - 1995 Honda Accord | Owner's Manual - Page 124
all conditions, the ABS is helping to prevent the wheels from locking so you can retain steering control. You should continue to press on the brake pedal with the same force. You may feel a slight movement of the brake pedal just after you start the engine. This is the ABS working. ABS INDICATOR - 1995 Honda Accord | Owner's Manual - Page 125
. Abrupt steering wheel movements or sudden, hard application of the brakes can cause loss of control in wet weather. Be extra cautious for the first few miles of driving while you adjust to the change in driving conditions. This is especially true in snow. A person can forget some snow-driving - 1995 Honda Accord | Owner's Manual - Page 126
washer reservoir full of the proper fluid. Have the windshield wiper blades replaced if they start to streak the windshield or leave parts unwiped. Use the defrosters and air conditioning to keep the windows from fogging up on the inside (see page 80). Traction - Check your tires frequently for wear - 1995 Honda Accord | Owner's Manual - Page 127
Ibs). Adjust the the trailer's cargo to change the tongue load. Start by putting approximately 60% of the cargo toward the front and 40% toward the rear. Never label. It tells you the maximum load for the front and rear axles. It is possible that your towing package does not exceed the - 1995 Honda Accord | Owner's Manual - Page 128
. Trailer Hitches Your Honda dealer, or the Honda Customer Relations Zone Office, can give you advice on the proper hitch for your car. Never use a hitch that mounts only to the rear bumper. The bumper is not designed to handle that type of load. The hitch should bolt to the underbody of the car and - 1995 Honda Accord | Owner's Manual - Page 129
laws requiring special outside mirrors when you are towing a trailer. Check the laws in your area. You may want to install mirrors kg (1,000 Ibs) do not have their own braking system. If you are thinking of getting a trailer that does have brakes, make sure they are electrically-operated. There are - 1995 Honda Accord | Owner's Manual - Page 130
SIGNAL (GREEN/BLUE) RIGHT TURN SIGNAL (GREEN/YELLOW) BRAKE LIGHT (GREEN/WHITE) TAILLIGHT (RED/BLACK) Your car has a trailer lighting connector in the trunk. To use the connector, remove the left cover by unscrewing the knob. Refer to the drawing above for the wiring color code and purpose of - 1995 Honda Accord | Owner's Manual - Page 131
it gets near the hot area, turn off the air conditioning (if it is on). If this does not reduce the heat, it may be necessary to pull to the side of the road and wait for the engine to cool. If the automatic transmission shifts frequently between 3rd and 4th gears, put it in - 1995 Honda Accord | Owner's Manual - Page 132
hill, be sure to follow all the normal precautions. Turn your front wheels into the curb, set the parking brake firmly, and put the transmission in 1st or Reverse (manual) or Park (automatic). In addition, place wheel chocks at each of the trailer's tires. Backing up with a trailer is difficult and - 1995 Honda Accord | Owner's Manual - Page 133
Transmission...163 5-speed Manual Transmission...165 Brake and Clutch Fluid...165 Brake System...166 Anti-lock Brake System...166 Clutch System...167 Power Steering...167 Air Cleaner...168 Spark Plugs...171 Replacement...171 Specification...172 Battery...175 Windshield Wipers...178 Air Conditioning - 1995 Honda Accord | Owner's Manual - Page 134
safety of your passengers. It will also reward you with more economical, trouble-free driving and help reduce air pollution. This section includes instructions for simple maintenance tasks, such as checking and adding oil. Any service items not detailed in this section should be performed by a Honda - 1995 Honda Accord | Owner's Manual - Page 135
potential hazards: Carbon monoxide poisoning from engine exhaust. Be sure there is adequate ventilation whenever you operate the engine. Burns from hot parts. Let the engine and exhaust system cool before touching any parts. Injury from moving parts. Do not run the engine unless instructed to do so - 1995 Honda Accord | Owner's Manual - Page 136
, and emission control performance. The services and time or distance intervals shown in the maintenance schedule assume you will use your car as normal transportation. You should: Avoid exceeding your car's load limit. This puts excess stress on the engine, brakes, and many other parts of your car - 1995 Honda Accord | Owner's Manual - Page 137
of their perfomance and durability. U.S. Cars: Maintenance, replacement or repair of emission control devices and systems may be done by any automotive repair establishment or individual using parts that are "certified" to EPA standards. According to state and federal regulations, failure to perform - 1995 Honda Accord | Owner's Manual - Page 138
required maintenance that you should perform to ensure the troublefree operation of your vehicle. Due to regional and climatic differences, some additional servicing may be required. Please consult your warranty handbook for a more detailed description. * 1 : For 4 cylinder models only. Maintenance - 1995 Honda Accord | Owner's Manual - Page 139
than 8 km (5 miles) per trip or, in freezing temperatures, driving less than 16 km (10 miles) per trip. Driving in extremely hot [over 90°F (32°C)] conditions. Extensive idling or long periods of stop-and-go driving. Trailer towing, driving with a car-top carrier, or driving in mountainous - 1995 Honda Accord | Owner's Manual - Page 140
Required Maintenance Record Have your servicing dealer record all Required Maintenance below. Keep receipts for all work done on your car. Maintenance - 1995 Honda Accord | Owner's Manual - Page 141
Non-Scheduled Maintenance Record Record additional maintenance for severe driving conditions or non-scheduled maintenance on this page (see page 143). Maintenance - 1995 Honda Accord | Owner's Manual - Page 142
162 . Automatic transmission - Check the fluid level monthly. See page 163. Brakes, clutch and power steering - Check the fluid level monthly. See page 166 . Tires - Check the tire pressure monthly. Examine the tread for wear and foreign objects. See page 181. Battery - Check its condition and the - 1995 Honda Accord | Owner's Manual - Page 143
4 Cylinder Models BRAKE FLUID (Gray cap) (5-M/T only) CLUTCH FLUID (Gray cap) ENGINE OIL FILL CAP COOLANT RESERVOIR ENGINE OIL DIPSTICK (Orange loop) ANTI-LOCK BRAKE RESERVOIR (Gray cap) AUTOMATIC TRANSMISSION FLUID DIPSTICK (Yellow loop) POWER STEERING FLUID (Red cap) WASHER FLUID (Blue cap - 1995 Honda Accord | Owner's Manual - Page 144
Fluid Locations 6 Cylinder Models ENGINE OIL FILL CAP BRAKE FLUID (Gray cap) ANTI-LOCK BRAKE RESERVOIR COOLANT RESERVOIR POWER STEERING FLUID (Red cap) AUTOMATIC TRANSMISSION FLUID DIPSTICK (Yellow loop) ENGINE OIL DIPSTICK (Orange loop) Maintenance - 1995 Honda Accord | Owner's Manual - Page 145
Engine Oil Checking Engine Oil UPPER MARK LOWER MARK 4 cylinder models DIPSTICK 6 cylinder models DIPSTICK Check the engine oil a couple of minutes after shutting off the engine. This will allow the oil to drain down to the bottom of the engine. Make sure the car is parked on level ground. 1. Pull - 1995 Honda Accord | Owner's Manual - Page 146
's performance and longevity. Always use a premium-grade detergent oil. 4 cylinder models 6 cylinder models To add oil, unscrew and remove the engine oil fill cap on top of the valve cover. Pour in the oil, and replace the engine oil fill cap. Tighten it securely. Wait a few minutes and recheck - 1995 Honda Accord | Owner's Manual - Page 147
to help your engine use less fuel. The API Service label also tells you the service classification of the oil. Always use an oil that says "API Service SG or SH." This service rating may also include other designations, such as CD. These additional classifications are not a problem, as long as - 1995 Honda Accord | Owner's Manual - Page 148
not need any oil additives. Purchasing additives for the engine or transmission will not increase your car's performance or longevity. It only increases the cost of operating your car. Oil and Filter Changes Always change the oil and filter according to the time and distance recommendations in the - 1995 Honda Accord | Owner's Manual - Page 149
wrench (available from your Honda dealer) is required to remove the filter. 4. Install a new oil filter according to instructions that come with it. 5. Put a new washer on the drain bolt with the flat side toward the engine, then reinstall the drain bolt. Tighten it to: 44 N.m (4.4 kg-m , 32 Ib-ft - 1995 Honda Accord | Owner's Manual - Page 150
Engine Oil 7. Replace the engine oil fill cap. Start the engine. The oil pressure indicator light should go out within five seconds. If it does not, turn off the engine and reinspect your work. 8. Let the engine run for several minutes and check the drain bolt and oil filter for leaks. 6 cylinder - 1995 Honda Accord | Owner's Manual - Page 151
. Some antifreeze, even though labeled as safe for aluminum parts, may not provide adequate protection. MAX 4 cylinder models MIN 6 cylinder models MAX MIN Check the level of the engine coolant by looking at the radiator reserve tank next to the battery. If the level is at or below the MIN line - 1995 Honda Accord | Owner's Manual - Page 152
also check the coolant level in the radiator. Removing the radiator cap while the engine is hot can cause the coolant to spray out, seriously scalding you. Always let the engine and radiator cool down before removing the radiator cap. 1. Make sure the engine and radiator are cool. 4 cylinder models - 1995 Honda Accord | Owner's Manual - Page 153
engine components. Replacing Engine Coolant The cooling system should be completely drained and refilled with new coolant according you should have this maintenance done by a skilled mechanic. 4 cylinder models RESERVE TANK 6 cylinder models RESERVE TANK 4. The coolant level should be up to the - 1995 Honda Accord | Owner's Manual - Page 154
System 4 cylinder models 6 cylinder models 4 cylinder models 4 cylinder models DRAIN BOLT DRAIN PLUG 1. Start the engine. Turn the heater temperature control dial to maximum heat and turn off the engine. Open the hood. Make sure the engine and radiator are cool to the touch. 2. Remove the - 1995 Honda Accord | Owner's Manual - Page 155
TANK CAP 6 cylinder models DRAIN BOLTS 4 cylinder models HOLDER 6 cylinder models HOLDER 6 cylinder models 3. Loosen the drain plug on the bottom of the radiator. The coolant will drain through the splash guard. Remove the drain bolts from the engine block. 4. Remove the reserve tank - 1995 Honda Accord | Owner's Manual - Page 156
tighten it to the first stop. Start the engine and let it run until it warms up (the radiator cooling fan comes on at least twice). 5.4 5.3 6.8 (1.43 US g a l , 1.19 Imp gal) (1.40 US g a l , 1.17 Imp gal) (1.80 US g a l , 1.50 Imp gal) With automatic transmission: 6 cylinder models Maintenance - 1995 Honda Accord | Owner's Manual - Page 157
Cooling System BLEEDER BOLT RESERVE TANK RESERVE TANK 6 cylinder models 4 cylinder models 6 cylinder models 10. Turn off the engine. Check the level in the radiator, add coolant if needed. Install the radiator cap, tighten it fully. 11. Fill the reserve tank to the MAX mark. - 1995 Honda Accord | Owner's Manual - Page 158
is located behind the headlight. 4 cylinder models LEVEL GAUGE Check the reservoir's fluid level by removing the cap and looking at the level gauge attached to the cap. 6 cylinder models 4 cylinder models 6 cylinder models FLOAT NOTICE Do not use engine antifreeze or a vinegar/water solution - 1995 Honda Accord | Owner's Manual - Page 159
24,000 km (15,000 miles) under severe driving conditions (see page 143 ). DIPSTICK Check the fluid level with the engine at normal operating temperature. 1. Park the car on level ground. Shut off the engine. 2. Remove the dipstick (yellow loop) from the transmission and wipe it with a clean cloth - 1995 Honda Accord | Owner's Manual - Page 160
000 miles) under severe driving conditions (see page 143). UPPER MARK LOWER MARK DIPSTICK Check the fluid level with the engine at normal operating temperature. 1. Park the car on level ground. Shut off the engine. 2. Remove the dipstick (yellow loop) from the transmission and wipe it with a clean - 1995 Honda Accord | Owner's Manual - Page 161
brake fluid in the brake and Anti-lock brake systems should be replaced every 2 years or 48,000 km (30,000 miles), whichever comes first. Correct level Check the oil level a couple of minutes after shutting off the engine. Make sure the car is on level ground. Remove the transmission filler bolt - 1995 Honda Accord | Owner's Manual - Page 162
and Clutch Fluid Brake System MAX MAX MAX MIN Anti-lock Brake System 4 cylinder models MIN 6 cylinder models MIN 4 cylinder models The fluid should be between the MIN and MAX marks on the side of the reservoir. If the level is at or below the MIN mark, it is an indication that your brake - 1995 Honda Accord | Owner's Manual - Page 163
or DOT4 brake fluid from a sealed container specified for the brake system. Low fluid level can indicate a leak in the clutch system. Have this system inspected as soon as possible. You should check the fluid level in the power steering reservoir monthly. Check the level when the engine is cold - 1995 Honda Accord | Owner's Manual - Page 164
have access to compressed air (such as a gas station), ask your Honda dealer to do this service. Follow the replacement procedure for removal and reinstallation. 6 cylinder models LOWER LEVEL A low power steering fluid level can indicate a leak in the system. Check the fluid level frequently and - 1995 Honda Accord | Owner's Manual - Page 165
Air Cleaner (4 Cylinder Models) DUCT BOLTS AIR CLEANER ELEMENT The air cleaner element is inside the box on the passenger's side of the engine compartment. To replace it: 1. Remove the duct by pulling it straight out. 2. Loosen the screws from the battery set plate and push it away from the air - 1995 Honda Accord | Owner's Manual - Page 166
Air Cleaner (6 Cylinder Models) The air cleaner element is inside the box on the driver's side of the engine compartment. To replace it: 1. Loosen the screws from the battery set plate and push it away from the air cleaner. BOLTS AIR CLEANER ELEMENT 2. Loosen the four bolts and remove the air - 1995 Honda Accord | Owner's Manual - Page 167
(4 Cylinder Models) The original spark plugs in your car need to be replaced every 2 years or 48,000 km (30,000 miles), whichever comes first. Replacement SPARK PLUG CAP 1. Clean up any dirt and oil around the spark plug caps. 2. Remove the spark plug cap by pulling it straight out. 3. Remove the - 1995 Honda Accord | Owner's Manual - Page 168
) NOTICE Tighten the spark plugs carefully. A spark plug that is too loose can overheat and damage the engine. Overtightening can cause damage to the threads in the cylinder head. Specifications: NGK: Nippondenso: ZFR5F-11 KJ16CR-L11 Spark Plug Gap: 1.1 mm (0.04 in) 6. Install the spark plug - 1995 Honda Accord | Owner's Manual - Page 169
(6 Cylinder Models) The original spark plugs in your car need to be replaced every 2 years or 48,000 km (30,000 miles), whichever comes first. Replacement SPARK PLUG CAP 1. Clean up any dirt and oil around the spark plug caps. 2. Remove the spark plug cap by pulling it straight out. 3. Remove the - 1995 Honda Accord | Owner's Manual - Page 170
) NOTICE Tighten the spark plugs carefully. A spark plug that is too loose can overheat and damage the engine. Overtightening can cause damage to the threads in the cylinder head. Specifications: NGK: Nippondenso: ZFR5F-11 KJ16CR-L11 Spark Plug Gap: 1.1 m m (0.04 in) 6. Install the spark plug cap - 1995 Honda Accord | Owner's Manual - Page 171
Battery Check the condition of your car's battery monthly. You should check for proper electrolyte level and corrosion on the terminals. Emergency Procedures The battery protection when working near the battery. Eyes - Flush with water physician or 911. Skin - Remove contaminated clothing. Flush the - 1995 Honda Accord | Owner's Manual - Page 172
WINDOW 4 cylinder models 6 cylinder models 4 cylinder models Check the battery condition by looking at the test indicator window on the battery. The label on the battery explains the test indicator's colors. Check the battery terminals for corrosion (a white or yellowish powder). To remove it - 1995 Honda Accord | Owner's Manual - Page 173
display. Use the Preset buttons to enter the five-digit code (see page 103 ). Charging the battery with the cables connected can seriously damage your car's electronic controls. Detach the battery cables before connecting the battery to a charger. 6 cylinder models If you need to connect the - 1995 Honda Accord | Owner's Manual - Page 174
Wipers Check the condition of the windshield wiper blades at least every six months. Look for signs of cracking in the rubber, or areas that are getting hard. Replace the blades if you find these signs, or they leave streaks and unwiped areas when used. WIPER ARMS LOCK TAB To replace: 1. Raise - 1995 Honda Accord | Owner's Manual - Page 175
5. Slide the new wiper blade into the holder until the tabs lock. 6. Slide the new blade assembly onto the wiper arm. Make sure it locks in place. 7. Lower the wiper arm down against the windshield. REINFORCEMENT BLADE BLADE 3. Remove the blade from its holder by grasping the tabbed end of the - 1995 Honda Accord | Owner's Manual - Page 176
light spray from a hose or a soft brush to remove them. If the air conditioning does not get as cold as before, have your dealer check the system. Recharge the system with Refrigerant HFC-134a (R-134a). (See Specifications on page 234.) NOTICE Whenever you have the air conditioning system serviced - 1995 Honda Accord | Owner's Manual - Page 177
give more detailed information on how and when to check air pressure, how to inspect your tires for damage, and what to do when your tires need to be replaced. 4 cylinder models ALTERNATOR BELT 6 cylinder models ALTERNATOR BELT Check the condition of the two drive belts. Examine the edges of - 1995 Honda Accord | Owner's Manual - Page 178
air pressure at least once a month. If you think a tire might be low, check it immediately. Remember to check the spare tire at the same time you check all the other tires. Check the recommended cold tire pressures for most normal driving conditions and speeds. Tire pressures for high speed driving - 1995 Honda Accord | Owner's Manual - Page 179
punctures if a tire starts losing pressure. Inspection Every time you check inflation, you should also examine the tires for damage, foreign objects, and wear. You should look for: Bumps or bulges in the tread or side of the tire. Replace the tire if you find either of these conditions. Cuts, splits - 1995 Honda Accord | Owner's Manual - Page 180
need to be rebalanced at some time before they are worn out. Have your dealer check the tires if you feel a consistent vibration while driving. A tire should always be rebalanced if it is removed from the wheel for repair. Make sure the installer balances the wheels when you have new tires installed - 1995 Honda Accord | Owner's Manual - Page 181
time. If that is not possible or necessary, then replace the two front tires or the two rear tires as a pair. Replacing just one tire can seriously affect your car's handling. The ABS works by comparing the speed of the wheels. When replacing tires, use the same size originally supplied with the - 1995 Honda Accord | Owner's Manual - Page 182
slow down until it stops. Remove the chains as soon as you begin driving on cleared roads. NOTICE Chains of the wrong size or that are improperly installed can damage your car's brake lines, suspension, body, and wheels. Stop driving if you hear the chains hitting any part of the car. Maintenance - 1995 Honda Accord | Owner's Manual - Page 183
create an unsafe condition by reducing your car's visibility and the ability to signal your intentions to other drivers. Check the following: Headlights (low and high beam) Parking lights Taillights Brake lights High-mount brake light Turn signals Back-up lights Hazard light function License plate - 1995 Honda Accord | Owner's Manual - Page 184
Lights NOTICE Halogen headlight bulbs get very hot when lit. Oil, perspiration, the radiator reserve tank. 1. Open the hood. If you need to change a bulb on the passenger's side, remove the radiator reserve tank. 2. Remove the electrical connector from the bulb by squeezing the connector to unlock - 1995 Honda Accord | Owner's Manual - Page 185
Lights Replacing a Front Turn Signal Light Bulb TURN SIGNAL ASSEMBLY 6. Push the bulb holder into the turn signal assembly and turn it clockwise until it locks. 7. Test the lights to make sure the new bulb is working. 8. Put the turn signal assembly into the bumper. Make sure the tabs on the turn - 1995 Honda Accord | Owner's Manual - Page 186
Lights Replacing Front Side Marker and Parking Light Bulbs SCREW 5. Put the bulb holder back into its hole in the lens, and turn it clockwise until it locks. 6. Turn on the parking lights and check that the new bulb is working. 7. Put the side marker assembly back into the body. Push on the front - 1995 Honda Accord | Owner's Manual - Page 187
Lights Replacing Rear Bulbs KNOB COVER 5. Install the new bulb in the socket. 6. Reinstall the socket into the light assembly. 7. Test the lights to make sure the new bulb is working. 8. Reinstall the taillight assembly cover. 1. Open the trunk and remove the taillight cover by turning the knob. - 1995 Honda Accord | Owner's Manual - Page 188
socket in the assembly. Turn it clockwise to lock it in place. 6. Reinstall the side marker assembly in the fender. Tighten the mounting screw securely. SCREW 1. Use a Phillips-head screwdriver to loosen the side marker assembly mounting screw. 2. Remove the assembly from the fender by pulling out - 1995 Honda Accord | Owner's Manual - Page 189
Lights Replacing a High-mount Brake Light Bulb 3. Install the new bulb and reinstall the socket. Make sure the new bulb is working. Replacing a Rear License Bulb BULB 1. Open the trunk and remove the socket from the light assembly by turning it one-quarter turn counterclockwise. 2. Remove the - 1995 Honda Accord | Owner's Manual - Page 190
in place. Reinstall the two screws and tighten them securely. Replacing Bulbs in the Interior Lights The ceiling light, door light and vanity mirror light come apart the same way. They do not all use the same bulb. 1. Remove the lens by carefully prying on the edge of the lens with a fingernail - 1995 Honda Accord | Owner's Manual - Page 191
Only on U.S. LX V-6 and EX V-6 models. and Canadian EX V-6 and EX-R V-6 models SPOTLIGHT On U.S. LX, LX V-6, EX and EX V-6 models, and Canadian EX, EX V-6, EX-R and EX-R V-6 models DOOR LIGHT On U.S. LX, LX V-6, EX and EX V-6 models, and Canadian EX, EX V-6, EX-R and EX-R V-6 models SUN VISOR - 1995 Honda Accord | Owner's Manual - Page 192
Lights Replacing a Trunk Light Bulb TRUNK 1. Remove the lens by carefully prying on the edge of the lens with a fingernail file or a small flat-tip screwdriver. Do not pry on the edge of the housing around the lens. 2. Remove the bulb by pulling it straight out of its metal tabs. 3. Push the new - 1995 Honda Accord | Owner's Manual - Page 193
. Clean the interior. Make sure the carpeting, floor mats, etc. are completely dry. Leave the parking brake off. Put the transmission in Reverse (manual) or Park (automatic). Block the rear wheels. If the car is to be stored for a longer period, it should be supported on jackstands so the tires are - 1995 Honda Accord | Owner's Manual - Page 194
Care...200 Washing...200 Power Antenna Cleaning...200 Waxing...201 Aluminum Wheels...201 Paint Touch-up...202 Interior Care...203 Carpeting...203 Fabric...203 Vinyl...203 Leather...203 Seat Belts...204 Windows...204 Air Fresheners...204 Corrosion Protection...205 Body Repairs...206 Appearance Care - 1995 Honda Accord | Owner's Manual - Page 195
or soft towel. Letting it air-dry will cause dulling and water spots. As you dry the car, inspect it for chips and scratches that could allow corrosion to start. Repair them with touch-up paint (see page 202 ). Power Antenna Cleaning Twice a year, clean the antenna mast with a dry cloth and mild - 1995 Honda Accord | Owner's Manual - Page 196
Apply it according to the instructions on the air pollution, etc. You should use a wax on your Honda when it is new. Polishes - Polishes and cleaner/ waxes can restore the shine to paint that has oxidized and lost some of its shine. They normally contain mild abrasives and solvents that remove - 1995 Honda Accord | Owner's Manual - Page 197
-up Your dealer has touch-up paint to match your car's color. The color code is printed on a sticker on the driver's doorjamb. Take this code to your dealer so you are sure to get the correct color. Examine the chip or scratch closely before repairing it. If it does not go down to bare metal - 1995 Honda Accord | Owner's Manual - Page 198
Carpeting Vacuum the carpeting frequently to remove dirt. Ground-in dirt will make the carpet wear out faster. Periodically shampoo the carpet to keep it looking new. Use one of the foam-type carpet cleaners on the market. Follow the instructions for the U.S. EX and EX V-6 models Vacuum dirt - 1995 Honda Accord | Owner's Manual - Page 199
. You can also use a mixture of one part white vinegar to ten parts water. This will remove the haze that builds up on the inside of the windows. Use a soft cloth or paper towels to clean all glass and clear plastic surfaces. NOTICE The rear window defogger wires are bonded to the inside of the - 1995 Honda Accord | Owner's Manual - Page 200
body. Check the floor coverings for dampness. Carpeting and floor mats may remain damp for a long time, especially in winter. This dampness can eventually cause the floor panels good idea in humid climates and areas subject to salt air. Cars equipped with ABS have a sensor and wiring at each wheel. - 1995 Honda Accord | Owner's Manual - Page 201
your car's resistance to corrosion. If your car needs repairs after a collision, pay close attention to the parts used in the repair and the quality of the work. Make sure the repair facility uses genuine Honda replacement body parts. Some companies make sheetmetal pieces that seem to duplicate the - 1995 Honda Accord | Owner's Manual - Page 202
215 The Starter Operates Normally...216 Jump Starting...216 If Your Engine Overheats...219 Low Oil Pressure...221 Charging System Indication...222 Malfunction Indicator Lamp/ Check Engine Light...223 Closing the Moonroof...224 Fuses...225 Checking and Replacing...226 Towing...230 Taking Care of the - 1995 Honda Accord | Owner's Manual - Page 203
tire that takes up less space. Use this spare tire as a temporary replacement only. Get your regular tire repaired or replaced and put back on your car as soon as you can. Check the inflation pressure of the compact spare tire every time you check the other tires. It should be inflated to: 420 kPa - 1995 Honda Accord | Owner's Manual - Page 204
car when it is supported only by the jack. SPARE TIRE JACK 1. Park the car on firm, level ground away from traffic. Turn on the hazard warning lights and turn the ignition to LOCK (0). 2. Put the transmission in Park (automatic) or Reverse (manual). Set the parking brake. CONTINUED Taking Care - 1995 Honda Accord | Owner's Manual - Page 205
, then pulling on the cover. CENTER CAP JACK SCREWDRIVER 7. Turn the jack's end bracket counterclockwise to loosen it, then remove the jack. 8. (US: EX, Canada: EX-R) Remove the center cap from the wheel with a screwdriver (not included in tool kit) or coin. Taking Care of the Unexpected - 1995 Honda Accord | Owner's Manual - Page 206
Changing a Flat Tire WHEEL NUTS EXTENSION JACKING POINT WHEEL WRENCH 9. Loosen the four wheel nuts 1/2 turn with the wheel wrench. 10. Find the jacking point nearest the wheel you are removing. Place the jack under the jacking point. Turn the end bracket clockwise until the top of the jack - 1995 Honda Accord | Owner's Manual - Page 207
Changing a Flat Tire BRAKE HUB 12. Remove the wheel nuts and flat tire. Temporarily place the the spare tire. Put the wheel nuts back on finger-tight, then tighten them in a crisscross pattern with the wheel wrench until the wheel is firmly against the hub. Do not try to tighten them fully - 1995 Honda Accord | Owner's Manual - Page 208
Changing a Flat Tire WING BOLT SPACER CONE 4 cylinder models 15. Lower the car to the ground and remove the jack. 16. Tighten the wheel nuts securely in the same crisscross pattern. Have the wheel nut torque checked at the nearest automotive service facility. Tighten the wheel nuts to: 110 N.m - 1995 Honda Accord | Owner's Manual - Page 209
Changing a Flat Tire SPACER CONE WING BOLT 6 cylinder models 2 0. Store the jack in its holder. Turn the jack's end bracket to lock it in place. Replace the cover. Store the tool kit. 21. Store the wheel cover or center cap in the trunk. Make sure it does not get scratched or damaged. Taking - 1995 Honda Accord | Owner's Manual - Page 210
starter will not operate. With an automatic transmission, it must be in Park or Neutral. Turn the ignition switch to ON (II). Turn on the headlights and check their brightness. If the headlights are very dim or don't light at all, the battery is discharged. See Jump Starting on page 216 . Turn the - 1995 Honda Accord | Owner's Manual - Page 211
sits in extreme cold, the electrolyte inside can freeze. Attempting to jump start with a frozen battery can cause it to rupture or explode. 2. Turn off all the electrical accessories: climate control, stereo system, lights, etc. Put the transmission in Neutral or Park and set the parking brake. - 1995 Honda Accord | Owner's Manual - Page 212
jumper cable to the negative (-) terminal on the booster battery. Connect the other end to the grounding strap as shown. Do not connect this jumper cable to any other part of the engine. 5. If the booster battery is in another car, have an assistant start that car and run it at a fast idle. Taking - 1995 Honda Accord | Owner's Manual - Page 213
Jump Starting 6 cylinder models 4 cylinder models BOOSTER BATTERY 6 cylinder models BOOSTER BATTERY 6. Start your car. If the starter motor still operates slowly, check the jumper cable connections to make sure they have good metal-tometal contact. 7. Once your car is running, disconnect the - 1995 Honda Accord | Owner's Manual - Page 214
, you should take immediate action. 1. Safely pull to the side of the road. Put the transmission in neutral or park and set the parking brake. Turn off the heating and cooling system and all other accessories. Turn on the hazard warning indicators. 2. If you see steam and/or spray coming from under - 1995 Honda Accord | Owner's Manual - Page 215
and turn it until it comes off. 10.Start the engine and set the temperature control dial to maximum. Add coolant to the radiator up engine and watch the temperature gauge. If it goes back to the red mark, the engine needs repair. (See Towing on page 230 .) 12.If the temperature stays normal, check - 1995 Honda Accord | Owner's Manual - Page 216
seconds, turn off the engine. There is a mechanical problem that needs to be repaired before you can continue driving. (See Towing on page 230 .) The low oil pressure indicator should never come on when the engine is running. If this light flashes or stays on with the engine running, take immediate - 1995 Honda Accord | Owner's Manual - Page 217
off all electrical accessories: radio, heater, A/C, rear defogger, cruise control, etc. Try not to use other electrically-operated controls such as the power windows. Keep the engine running and take extra care not to stall it. Starting the engine will discharge the battery rapidly. By eliminating - 1995 Honda Accord | Owner's Manual - Page 218
lamp/check engine light on, you can damage your car's emission controls and engine. Those repairs may not be covered by your car's warranties. MALFUNCTION INDICATOR LAMP/ CHECK ENGINE LIGHT* * U.S. indicator shown If this indicator comes on while driving, there is a problem with your engine or - 1995 Honda Accord | Owner's Manual - Page 219
is blown, replace it with one of the same or lower rating. 2. Try closing the moonroof. If the new fuse blows immediately or the moonroof motor still does not operate, you can close the moonroof manually. 3. Get the tool kit out of the trunk. 4. Use a screwdriver or coin to remove the round plug - 1995 Honda Accord | Owner's Manual - Page 220
underneath the dashboard on the driver's side. To open, turn the knob as shown. The underhood fuse box is located in the front of the engine compartment on the passenger's side. To open, push the tab as shown. CONTINUED Taking Care of the Unexpected - 1995 Honda Accord | Owner's Manual - Page 221
Replace any blown fuses and check the component's operation. 1. Turn the ignition switch to LOCK (0). Make sure the headlights and all other accessories are off. 2. Remove the cover from the fuse box. ABS FUSE BOX BLOWN Cars equipped with ABS have a third fuse box for the ABS. It is in the engine - 1995 Honda Accord | Owner's Manual - Page 222
with a lower rating. 4. Check the smaller fuses in the underhood fuse box and all the fuses in the interior fuse box by pulling out each fuse with the fuse puller provided in the interior fuse box. 5. Look for a burned wire inside the fuse. If it is burned out, replace it with one of - 1995 Honda Accord | Owner's Manual - Page 223
Fuses UNDERHOOD FUSE BOX * 1: On Canadian cars * 2 : US: EX, LX V-6 and EX V-6, Canada: EX-R, EX V-6, EX-R V-6 * 3 : US: LX V-6, EX V-6, Canada: EX V-6, EX-R V-6 * 4 : US: EX V-6, Canada: EX-R V-6 Taking Care of the Unexpected - 1995 Honda Accord | Owner's Manual - Page 224
Fuses ABS FUSE BOX INTERIOR FUSE BOX Taking Care of the Unexpected - 1995 Honda Accord | Owner's Manual - Page 225
front wheels on the ground, do the following: 5-speed Manual Transmission Release the parking brake. Shift the transmission to Neutral. Automatic Transmission Release the parking brake. Start the engine. Shift to D4, then to N. Turn off the engine. NOTICE Improper towing preparation will damage the - 1995 Honda Accord | Owner's Manual - Page 226
...234 Anti-lock Brake System...236 Tire Information...237 Tire Size Designation...237 Wheel Size Designation...237 Tire Speed Ratings...237 Tire Pressure Adjustment For High Speed Driving...238 DOT Tire Quality Grading...238 Treadwear...238 Traction...239 Temperature...239 Emission Controls...240 - 1995 Honda Accord | Owner's Manual - Page 227
the windshield on the driver's side. It is also on the Certification label attached to the driver's doorjamb, and is stamped on the engine compartment bulkhead. The VIN is also provided in bar code on the Certification label. VEHICLE IDENTIFICATION NUMBER CERTIFICATION LABEL Technical Information - 1995 Honda Accord | Owner's Manual - Page 228
is stamped into the engine block. It is on the front. The Transmission Number is on a label on top of the transmission. 4 Cylinder Models AUTOMATIC TRANSMISSION NUMBER MANUAL TRANSMISSION NUMBER ENGINE NUMBER 6 Cylinder Models ENGINE NUMBER AUTOMATIC TRANSMISSION NUMBER Technical Information - 1995 Honda Accord | Owner's Manual - Page 229
EX-R *1 * 2 : US: DX, LX, Canada: LX, EX * 3 : 6 cylinder models the coolant in the reserve tank and that remaining in the * 1 : Including engine. Reserve tank capacity: 0.6 (0.16 US g a l , 0.13 Imp gal) 2 : Excluding the oil remaining in the engine. * * 3 : US: EX, Canada: EX-R * * 4 : 6 cylinder - 1995 Honda Accord | Owner's Manual - Page 230
Specifications pages 172 and 174 . page 229 page 228 1 : US: DX, LX, Canada: LX, EX *2 EX, Canada: EX-R * 3 :: US: US: LX with ABS, EX, Canada: EX with ABS, EX-R *4 : 6 * cylinder models - 1995 Honda Accord | Owner's Manual - Page 231
of the wheel sensors, solenoids, pump, and electronics. If the control unit detects any faults, it shuts off power to the pump motor and solenoids. The light on the instrument panel comes on. The brakes then work like a conventional system without anti-lock capabilities. Technical Information - 1995 Honda Accord | Owner's Manual - Page 232
code associated with the maximum load the tire can carry. S - Speed Rating Symbol. See the speed rating chart in this section for additional information. Wheel Size Designation Wheels are also marked with important information that you need if you ever have to replace rating symbol is part of the - 1995 Honda Accord | Owner's Manual - Page 233
limits and conditions allow. If you decide it is safe to drive at high speeds, be sure to adjust the cold tire pressures as shown below. If you do not adjust the tire pressure, excessive heat can build up and cause sudden tire failure. (US: LX V-6, EX V-6, Canada: EX V-6, EX-R V-6) The following - 1995 Honda Accord | Owner's Manual - Page 234
braking (straight ahead) traction tests and does not include cornering (turning) traction. The temperature grades are A (the highest), B, and C, representing the tire's resistance to the generation of heat and its ability to dissipate heat when tested under controlled conditions Motor Vehicle - 1995 Honda Accord | Owner's Manual - Page 235
). Gasoline evaporating from the tank also produces hydrocarbons. Controlling the production of NOx, CO, and HC is important to the environment. Under certain conditions of sunlight and climate, NOx and HC react to form photochemical "smog." Carbon monoxide does not contribute to smog creation, but - 1995 Honda Accord | Owner's Manual - Page 236
The Engine Control Module (ECM) uses various sensors to determine how much air is going into the engine. It then controls how much fuel to inject under all operating conditions. Ignition Timing Control System Warm-up Three Way Catalytic Converter (For some types) This system constantly adjusts the - 1995 Honda Accord | Owner's Manual - Page 237
, dry leaves, or other flammables. THREE WAY CATALYTIC CONVERTER Keep the engine tuned-up. Have your car diagnosed and repaired if it is misfiring, backfiring, stalling, or otherwise not running properly. A defective three way catalytic converter contributes to air pollution, and can impair your - 1995 Honda Accord | Owner's Manual - Page 238
Warranty and Customer Relations Warranty Coverages...244 Customer Relations Information ...245 U.S. Zone Office Map...246 Canada Zone Office Map...247 Reporting Safety Defects...248 Authorized Manuals...249 Warranty and Customer Relations - 1995 Honda Accord | Owner's Manual - Page 239
two warranties cover your car's emissions control systems. Time, mileage, and coverage are conditional. Please read the warranty manual for exact information. Original Equipment Battery Limited Warranty - this warranty gives up to 100% credit toward a replacement battery. Seat Belt Limited Warranty - 1995 Honda Accord | Owner's Manual - Page 240
Customer Relations Information Honda dealership personnel are trained professionals. They should be able to answer all your questions. If you encounter a problem that your dealership does not solve to your satisfaction, please discuss it with the dealership's management. The Service Manager or - 1995 Honda Accord | Owner's Manual - Page 241
Heights, Illinois 60004 (708) 870-5600 New England Zone 555 Old County Road Windsor Locks, Connecticut 06096 (203) 623-3310 See Zone 5 for: NYC Metro area and addresses and telephone numbers are subject to change. If you cannot reach your Zone office, ask your Honda dealer for the current - 1995 Honda Accord | Owner's Manual - Page 242
Inc. 1750 rue Eiffel Boucherville, Quebec J4B 7W1 (514) 655-6161 Atlantic Zone Honda Canada Inc. 800 Windmill Road Dartmouth, N.S. B3B 1L1 (902) 468-4416 Customer Relations - 1995 Honda Accord | Owner's Manual - Page 243
defect exists in a group of vehicles, it may order a recall and remedy campaign. However, NHTSA cannot become involved in individual problems between you, your dealer, or American Honda Motor Co., Inc. To contact NHTSA, you may either call the Auto Safety Hotline toll-free at 1-800-424-9393 (or 366 - 1995 Honda Accord | Owner's Manual - Page 244
...19 Additives, Engine Oil...152 Adjustments Mirrors...65 Head Restraints...59 Battery Charging System Eight...36 Jump Starting...216 Maintenance...175 Specifications...235 Before Driving...105 Belts, Seat...5 Beverage Holder...68 Body Repair...206 Brakes Anti-lock System (ABS)...128 Break-in - 1995 Honda Accord | Owner's Manual - Page 245
209 Changing Engine Coolant...157 Charging System Indicator...36, 222 Check Engine Light...37 Checking Automatic Transmission Fluid...163 Battery Condition...175 Brake Fluid...166 Clutch Fluid...167 Drive Belts...181 Engine Coolant...155 Engine Oil...149 Fuses...225 Manual Transmission Fluid ...165 - 1995 Honda Accord | Owner's Manual - Page 246
II Automatic Transmission Fluid...163 Dimensions...234 Dimming the Headlights ...42 Dipstick Automatic Transmission ..163, 164 Economy, Fuel...113 Emergencies on the Road...207 Battery, Jump Starting...216 Changing a Flat Tire...209 Charging System Indicator...222 Check Engine Light...223 Checking - 1995 Honda Accord | Owner's Manual - Page 247
Gear, Shifting...121 5-speed Manual Transmission, Checking Fluid Level...165 5-speed Manual Transmission, Shifting the...121 Flashers, Hazard Warning...45 Flat Tire, Changing a...209 Fluids Automatic Transmission ..163, 164 Brake...166 Clutch...167 Manual Transmission...165 Power Steering...167 - 1995 Honda Accord | Owner's Manual - Page 248
Starting...216 Label, Certification...232 Lane Change, Signaling...43 Lap Belt...6 Lap/Shoulder Belts...6 Leaking of Exhaust into Car...28 Lighter, Cigarette...70 Lights Bulb Replacement...187 Indicator...35 Parking...42 Turn Signal...43 Loading Cargo...115 LOCK (Ignition Key Position)...52 Locks - 1995 Honda Accord | Owner's Manual - Page 249
...142 Checking Engine...149 Pressure Indicator...36 Selecting Proper Viscosity Chart...151 ON (Ignition Key Position)...52 Opening the Hood...109 Operation in Foreign Countries...107 Outside Mirrors...64 Overheating, Engine...219 Panel Brightness Control...43 Park Gear Position...124 Parking Brake - 1995 Honda Accord | Owner's Manual - Page 250
, Adjusting the...56 Serial Number...232 Service Intervals...142 Service Manual...249 Service Station Procedures ...108 Setting the Clock...67 Shifting The Automatic Transmission...123 The 5-speecl Manual Transmission...121 Shift Lever Position Indicator...123 Side Marker Lights, Bulb Replacement in - 1995 Honda Accord | Owner's Manual - Page 251
...181 Inspection...183 Replacing...184 Rotating...184 Snow...186 Specifications...235 Tools, Tire Changing...209 Torn Seat Belts...10 Towing A Trailer...131 Emergency Wrecker...230 Transmission Checking Fluid Level, Automatic...163, 164 Checking Fluid Level, Manual...165 Fluid Selection ...163, 164 - 1995 Honda Accord | Owner's Manual - Page 252
Index Defroster...80 Wipers, Windshield Changing Blades...178 Operation...44 Worn Tires...183 Wrecker, Emergency Towing...230 - 1995 Honda Accord | Owner's Manual - Page 253
cars with ABS) T125/70D 15 (6 cylinder cars) T135/90D15 Other Tire Information: See label on the driver's doorjamb. 5-speed Manual Transmission Oil: SAE 10W-30 or 10W-40 viscosity API SF or SG grade recommended Capacity: 1.9 l (2.0 US q t , 1.7 Imp qt) Automatic Transmission Fluid: Honda Premium
-
 1
1 -
 2
2 -
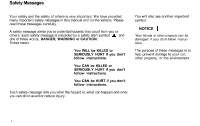 3
3 -
 4
4 -
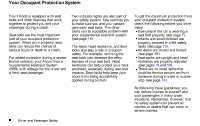 5
5 -
 6
6 -
 7
7 -
8
-
9
-
10
-
11
-
12
-
13
-
14
-
15
-
16
-
17
-
18
-
19
-
20
-
21
-
22
-
23
-
24
-
25
-
26
-
27
-
28
-
29
-
30
-
31
-
32
-
33
-
34
-
35
-
36
-
37
-
38
-
39
-
40
-
41
-
42
-
43
-
44
-
45
-
46
-
47
-
48
-
49
-
50
-
51
-
52
-
53
-
54
-
55
-
56
-
57
-
58
-
59
-
60
-
61
-
62
-
63
-
64
-
65
-
66
-
67
-
68
-
69
-
70
-
71
-
72
-
73
-
74
-
75
-
76
-
77
-
78
-
79
-
80
-
81
-
82
-
83
-
84
-
85
-
86
-
87
-
88
-
89
-
90
-
91
-
92
-
93
-
94
-
95
-
96
-
97
-
98
-
99
-
100
-
101
-
102
-
103
-
104
-
105
-
106
-
107
-
108
-
109
-
110
-
111
-
112
-
113
-
114
-
115
-
116
-
117
-
118
-
119
-
120
-
121
-
122
-
123
-
124
-
125
-
126
-
127
-
128
-
129
-
130
-
131
-
132
-
133
-
134
-
135
-
136
-
137
-
138
-
139
-
140
-
141
-
142
-
143
-
144
-
145
-
146
-
147
-
148
-
149
-
150
-
151
-
152
-
153
-
154
-
155
-
156
-
157
-
158
-
159
-
160
-
161
-
162
-
163
-
164
-
165
-
166
-
167
-
168
-
169
-
170
-
171
-
172
-
173
-
174
-
175
-
176
-
177
-
178
-
179
-
180
-
181
-
182
-
183
-
184
-
185
-
186
-
187
-
188
-
189
-
190
-
191
-
192
-
193
-
194
-
195
-
196
-
197
-
198
-
199
-
200
-
201
-
202
-
203
-
204
-
205
-
206
-
207
-
208
-
209
-
210
-
211
-
212
-
213
-
214
-
215
-
216
-
217
-
218
-
219
-
220
-
221
-
222
-
223
-
224
-
225
-
226
-
227
-
228
-
229
-
230
-
231
-
232
-
233
-
234
-
235
-
236
-
237
-
238
-
239
-
240
-
241
-
242
-
243
-
244
-
245
-
246
-
247
-
248
-
249
-
250
-
251
-
252
-
253
 |
 |

1995 Accord Sedan Online Reference Owner's Manual
Use these links (and links throughout this manual) to navigate through this reference.
For a printed owner's manual, click on authorized manuals or go to www.helminc.com.
Contents
Introduction
.........................................................................................................................................
i
A Few Words About Safety
.................................................................................................................
ii
Driver and Passenger Safety
..............................................................................................................
3
Proper use and care of your vehicle's seat belts, and Supplemental Restraint System.
Instruments and Controls
.................................................................................................................
33
Instrument panel indicator and gauge, and how to use dashboard and steering column controls.
Comfort and Convenience Features
.............................................................................................. .
73
How to operate the climate control system, the audio system, and other convenience features.
Before Driving
..................................................................................................................................
105
What gasoline to use, how to break-in your new vehicle, and how to load luggage and other cargo.
Driving
..............................................................................................................................................
117
The proper way to start the engine, shift the transmission, and park, plus towing a trailer.
Maintenance
.....................................................................................................................................
137
The Maintenance Schedule shows you when you need to take your vehicle to the dealer.
Appearance Care
..............................................................................................................................
199
Tips on cleaning and protecting your vehicle. Things to look for if your vehicle ever needs body repairs.
Taking Care of the Unexpected
......................................................................................................
207
This section covers several problems motorists sometimes experience, and how to handle them.
Technical Information
.....................................................................................................................
231
ID numbers, dimensions, capacities, and technical information.
Warranty and Customer Relations (U.S. and Canada)
................................................................
243
A summary of the warranties covering your new Acura, and how to contact us.
Authorized Manuals (U.S. only)
......................................................................................................
249
How to order manuals and other technical literature.
Index
......................................................................................................................................................
I
Gas Station Information
Information you need when you pull up to the fuel pump.
Owner's Identification Form