2005 Honda Civic Owner's Manual - Page 190
2005 Honda Civic Manual

Page 190 highlights
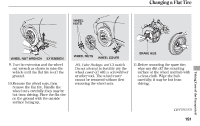
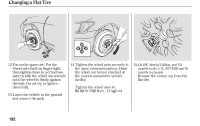
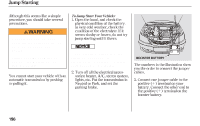
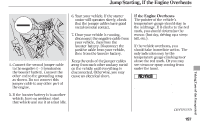
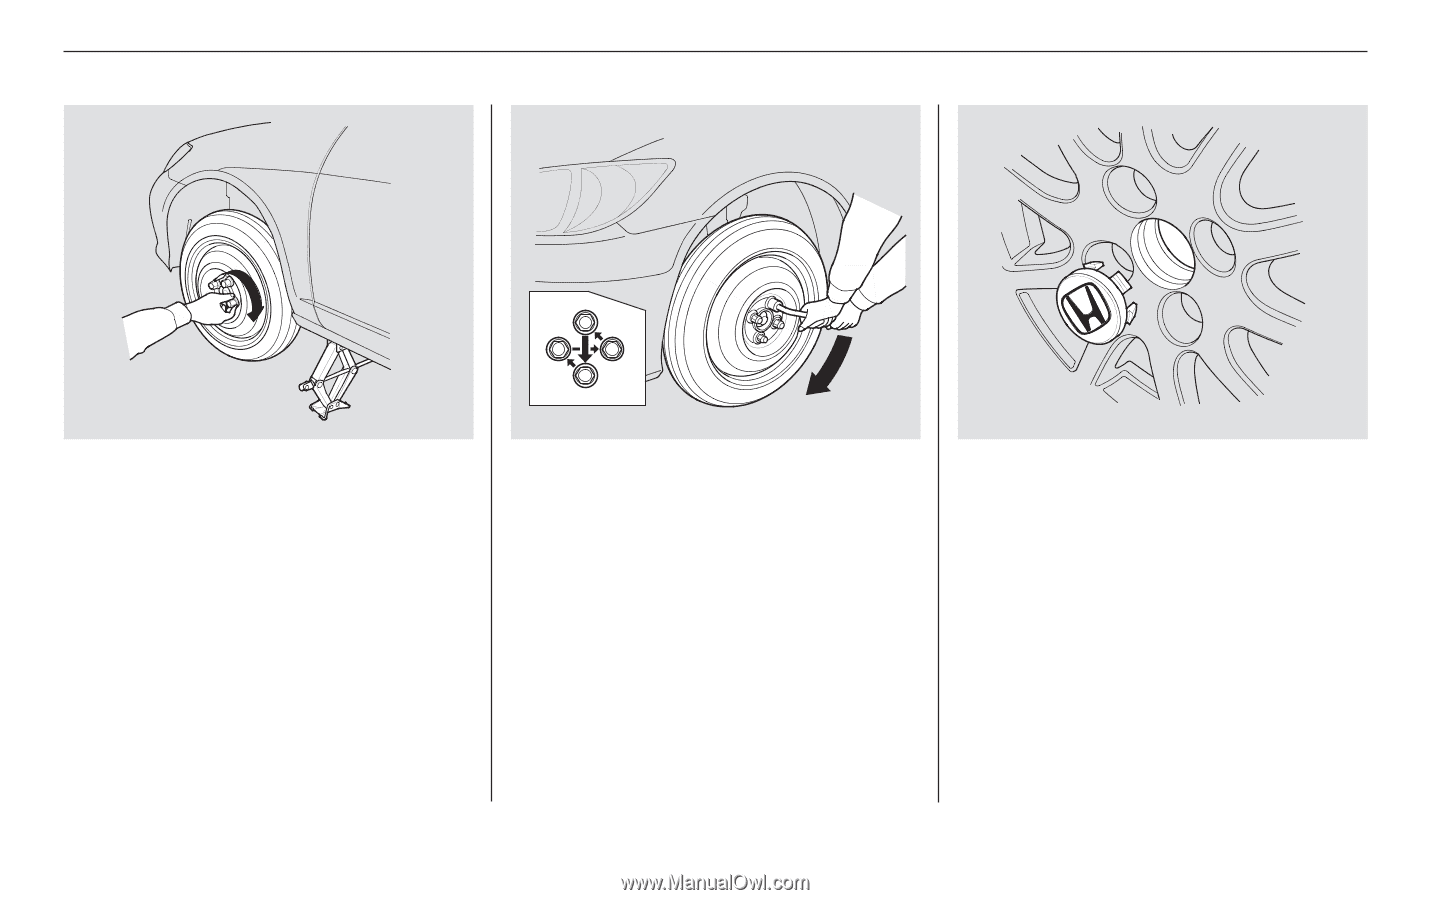
Changing a Flat Tire 12.Put on the spare tire. Put the wheel nuts back on finger-tight, then tighten them in a crisscross pattern with the wheel nut wrench until the wheel is firmly against the hub. Do not try to tighten them fully. 13.Lower the vehicle to the ground and remove the jack. 14.Tighten the wheel nuts securely in the same crisscross pattern. Have the wheel nut torque checked at the nearest automotive service facility. Tighten the wheel nuts to: 80 lbf·ft (108 N·m , 11 kgf·m) 15. On HX, Special Edition, and EX models in the U.S., REVERB and Si models in Canada Remove the center cap from the flat tire. 192
-
 1
1 -
2
-
3
-
4
-
5
-
6
-
7
-
8
-
9
-
10
-
11
-
12
-
13
-
14
-
15
-
16
-
17
-
18
-
19
-
20
-
21
-
22
-
23
-
24
-
25
-
26
-
27
-
28
-
29
-
30
-
31
-
32
-
33
-
34
-
35
-
36
-
37
-
38
-
39
-
40
-
41
-
42
-
43
-
44
-
45
-
46
-
47
-
48
-
49
-
50
-
51
-
52
-
53
-
54
-
55
-
56
-
57
-
58
-
59
-
60
-
61
-
62
-
63
-
64
-
65
-
66
-
67
-
68
-
69
-
70
-
71
-
72
-
73
-
74
-
75
-
76
-
77
-
78
-
79
-
80
-
81
-
82
-
83
-
84
-
85
-
86
-
87
-
88
-
89
-
90
-
91
-
92
-
93
-
94
-
95
-
96
-
97
-
98
-
99
-
100
-
101
-
102
-
103
-
104
-
105
-
106
-
107
-
108
-
109
-
110
-
111
-
112
-
113
-
114
-
115
-
116
-
117
-
118
-
119
-
120
-
121
-
122
-
123
-
124
-
125
-
126
-
127
-
128
-
129
-
130
-
131
-
132
-
133
-
134
-
135
-
136
-
137
-
138
-
139
-
140
-
141
-
142
-
143
-
144
-
145
-
146
-
147
-
148
-
149
-
150
-
151
-
152
-
153
-
154
-
155
-
156
-
157
-
158
-
159
-
160
-
161
-
162
-
163
-
164
-
165
-
166
-
167
-
168
-
169
-
170
-
171
-
172
-
173
-
174
-
175
-
176
-
177
-
178
-
179
-
180
-
181
-
182
-
183
-
184
-
 185
185 -
 186
186 -
 187
187 -
 188
188 -
 189
189 -
 190
190 -
 191
191 -
 192
192 -
 193
193 -
 194
194 -
 195
195 -
196
-
197
-
198
-
199
-
200
-
201
-
202
-
203
-
204
-
205
-
206
-
207
-
208
-
209
-
210
-
211
-
212
-
213
-
214
-
215
-
216
-
217
-
218
-
219
-
220
-
221
-
222
-
223
-
224
-
225
-
226
-
227
-
228
-
229
-
230
-
231
-
232
-
233
-
234
 |
 |
Put on the spare tire. Put the
wheel nuts back on finger-tight,
then tighten them in a crisscross
pattern with the wheel nut wrench
until the wheel is firmly against
the hub. Do not try to tighten
them fully.
Lower the vehicle to the ground
and remove the jack.
Remove the center cap from the
flat tire.
Tighten the wheel nuts securely in
the same crisscross pattern. Have
the wheel nut torque checked at
the nearest automotive service
facility.
Tighten the wheel nuts to:
12.
13.
14.
15.
On HX, Special Edition, and EX
models in the U.S., REVERB and Si
models in Canada
Changing a Flat Tire
192
80 lbf·ft (108 N·m , 11 kgf·m)