1996 Lexus GS 300 Owners Manual - Page 158
1996 Lexus GS 300 Manual

Page 158 highlights
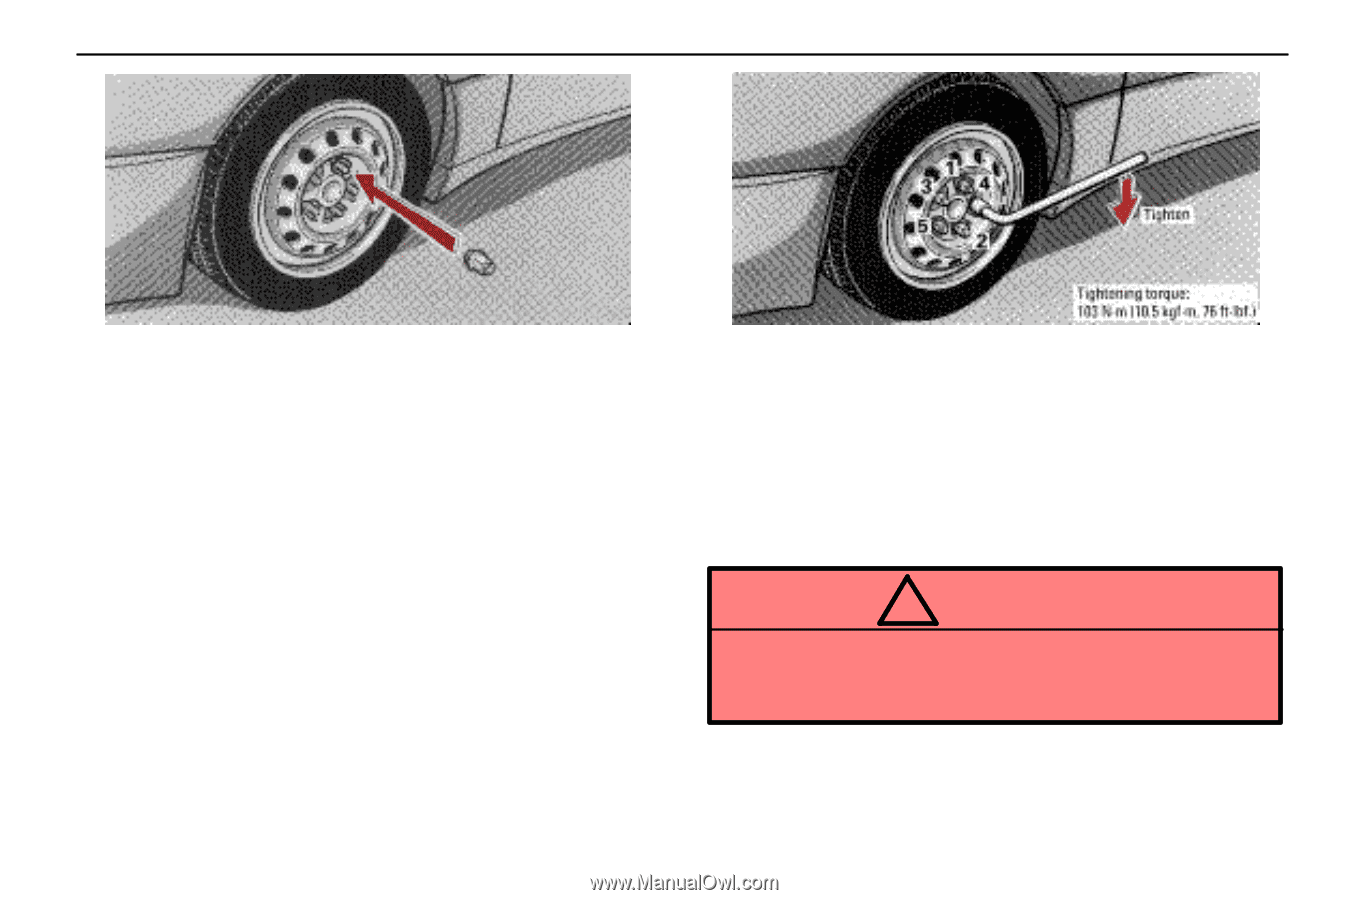
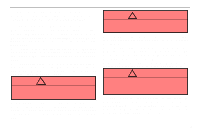
IN CASE OF AN EMERGENCY 8. Reinstall all the wheel nuts finger tight. Align the holes in the wheel with the bolts. Then lift up the wheel and get at least the top bolt started through its hole. Wiggle the tire and press it back over the other bolts. Reinstall the wheel nuts and tighten them as much as you can by hand. Press the tire back and see if you can tighten them more. 9. Lower the vehicle completely and tighten the wheel nuts. Turn the jack handle counterclockwise to lower the vehicle. Use only the wheel nut wrench to tighten the nuts. Do not use other tools or any additional leverage other than your hands, such as a hammer, pipe or your foot. Make sure the wrench is securely engaged over the nut. Tighten each nut a little at a time in order shown. Repeat the process until all the nuts are tight. ! CAUTION As soon as possible after changing wheels, have the wheel nuts tightened by torque wrench at 103 N·m (10.5 kgf·m, 76 ft·lbf). 10. After changing the wheel, check the air pressure of the replaced tire. Stow all the tools, jack and flat tire securely. 144
-
 1
1 -
2
-
3
-
4
-
5
-
6
-
7
-
8
-
9
-
10
-
11
-
12
-
13
-
14
-
15
-
16
-
17
-
18
-
19
-
20
-
21
-
22
-
23
-
24
-
25
-
26
-
27
-
28
-
29
-
30
-
31
-
32
-
33
-
34
-
35
-
36
-
37
-
38
-
39
-
40
-
41
-
42
-
43
-
44
-
45
-
46
-
47
-
48
-
49
-
50
-
51
-
52
-
53
-
54
-
55
-
56
-
57
-
58
-
59
-
60
-
61
-
62
-
63
-
64
-
65
-
66
-
67
-
68
-
69
-
70
-
71
-
72
-
73
-
74
-
75
-
76
-
77
-
78
-
79
-
80
-
81
-
82
-
83
-
84
-
85
-
86
-
87
-
88
-
89
-
90
-
91
-
92
-
93
-
94
-
95
-
96
-
97
-
98
-
99
-
100
-
101
-
102
-
103
-
104
-
105
-
106
-
107
-
108
-
109
-
110
-
111
-
112
-
113
-
114
-
115
-
116
-
117
-
118
-
119
-
120
-
121
-
122
-
123
-
124
-
125
-
126
-
127
-
128
-
129
-
130
-
131
-
132
-
133
-
134
-
135
-
136
-
137
-
138
-
139
-
140
-
141
-
142
-
143
-
144
-
145
-
146
-
147
-
148
-
149
-
150
-
151
-
152
-
 153
153 -
 154
154 -
 155
155 -
 156
156 -
 157
157 -
 158
158 -
 159
159 -
 160
160 -
 161
161 -
 162
162 -
 163
163 -
164
-
165
-
166
-
167
-
168
-
169
-
170
-
171
-
172
-
173
-
174
-
175
-
176
-
177
-
178
-
179
-
180
-
181
-
182
-
183
-
184
-
185
-
186
-
187
-
188
-
189
-
190
-
191
-
192
-
193
-
194
-
195
-
196
-
197
-
198
-
199
-
200
-
201
-
202
-
203
-
204
-
205
-
206
-
207
-
208
-
209
-
210
-
211
-
212
-
213
-
214
-
215
-
216
-
217
-
218
-
219
-
220
-
221
-
222
-
223
-
224
-
225
-
226
-
227
-
228
 |
 |