1999 Mercury Villager Owner's Manual - Page 147
1999 Mercury Villager Manual
Page 147 highlights
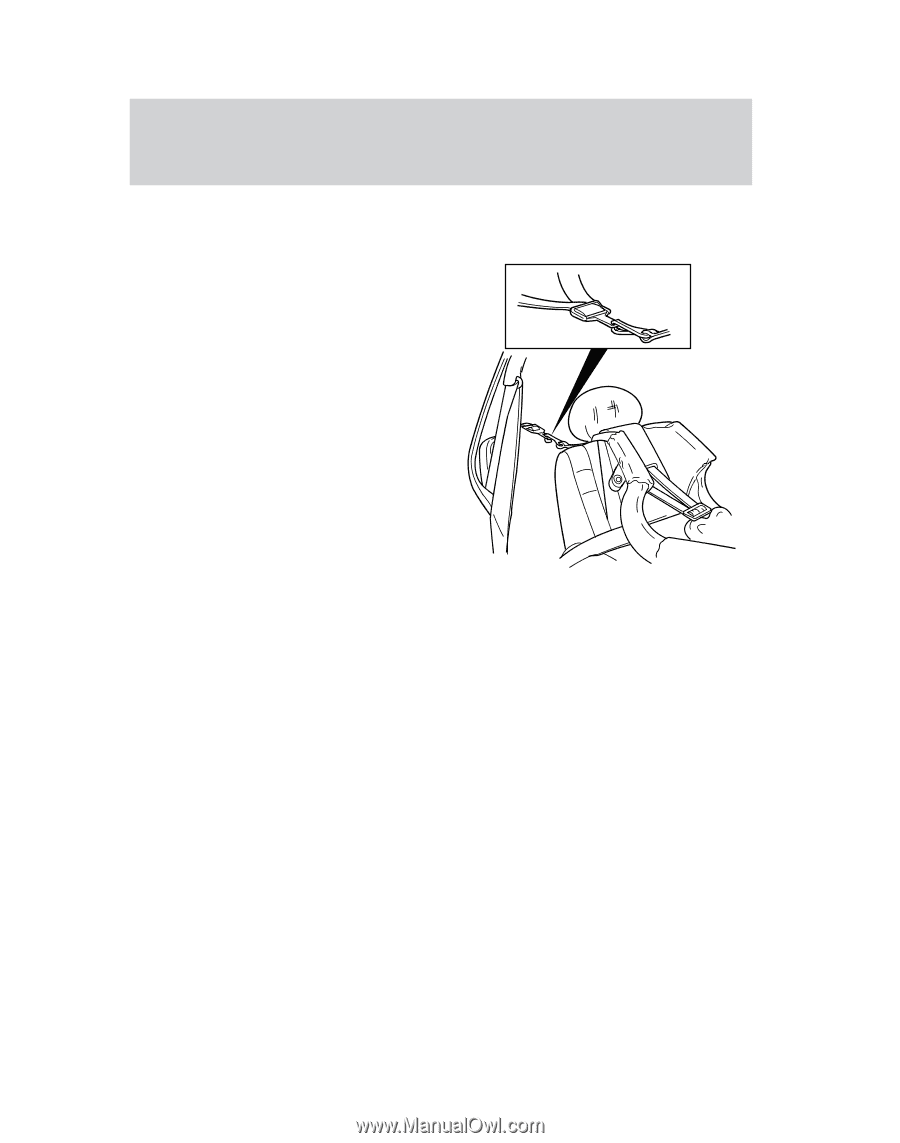
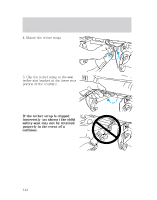
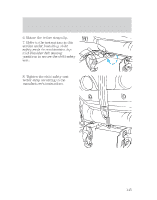
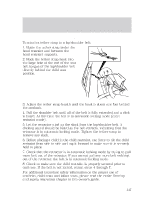
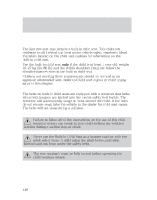
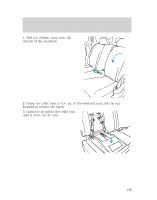
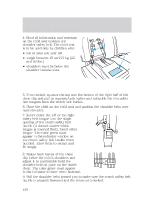
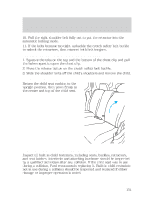
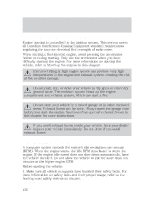
Seating and safety restraints Third row bench in second row position To attach a tether strap to a lap/shoulder belt: 1. Route the tether strap under the head restraint and between the head restraint supports. 2. Hook the tether strap hook into the large hole at the end of the seat belt tongue of the lap/shoulder belt directly behind the child seat position. 3. Adjust the tether strap length until the hook is about one foot behind the seatback. 4. Pull the shoulder belt until all of the belt is fully extended and a click is heard. At this time the belt is in automatic locking mode (child restraint mode). 5. Let the retractor wind up the slack from the lap/shoulder belt. A clicking sound should be heard as the belt retracts, indicating that the retractor is in automatic locking mode. Tighten the tether strap to remove any slack. 6. Before placing a child in the child restraint, use force to tilt the child restraint from side to side and tug it forward to make sure it is securely held in place. 7. Check that the retractor is in automatic locking mode by trying to pull more belt out of the retractor. If you cannot pull any more belt webbing out of the retractor, the belt is in automatic locking mode. 8. Check to make sure the child restraint is properly secured prior to each use. If the belt is not locked, repeat steps 4 through 7. For additional important safety information on the proper use of seatbelts, child seats and infant seats, please read the entire Seating and safety restraints chapter in this owner's guide. 147
-
 1
1 -
2
-
3
-
4
-
5
-
6
-
7
-
8
-
9
-
10
-
11
-
12
-
13
-
14
-
15
-
16
-
17
-
18
-
19
-
20
-
21
-
22
-
23
-
24
-
25
-
26
-
27
-
28
-
29
-
30
-
31
-
32
-
33
-
34
-
35
-
36
-
37
-
38
-
39
-
40
-
41
-
42
-
43
-
44
-
45
-
46
-
47
-
48
-
49
-
50
-
51
-
52
-
53
-
54
-
55
-
56
-
57
-
58
-
59
-
60
-
61
-
62
-
63
-
64
-
65
-
66
-
67
-
68
-
69
-
70
-
71
-
72
-
73
-
74
-
75
-
76
-
77
-
78
-
79
-
80
-
81
-
82
-
83
-
84
-
85
-
86
-
87
-
88
-
89
-
90
-
91
-
92
-
93
-
94
-
95
-
96
-
97
-
98
-
99
-
100
-
101
-
102
-
103
-
104
-
105
-
106
-
107
-
108
-
109
-
110
-
111
-
112
-
113
-
114
-
115
-
116
-
117
-
118
-
119
-
120
-
121
-
122
-
123
-
124
-
125
-
126
-
127
-
128
-
129
-
130
-
131
-
132
-
133
-
134
-
135
-
136
-
137
-
138
-
139
-
140
-
141
-
 142
142 -
 143
143 -
 144
144 -
 145
145 -
 146
146 -
 147
147 -
 148
148 -
 149
149 -
 150
150 -
 151
151 -
 152
152 -
153
-
154
-
155
-
156
-
157
-
158
-
159
-
160
-
161
-
162
-
163
-
164
-
165
-
166
-
167
-
168
-
169
-
170
-
171
-
172
-
173
-
174
-
175
-
176
-
177
-
178
-
179
-
180
-
181
-
182
-
183
-
184
-
185
-
186
-
187
-
188
-
189
-
190
-
191
-
192
-
193
-
194
-
195
-
196
-
197
-
198
-
199
-
200
-
201
-
202
-
203
-
204
-
205
-
206
-
207
-
208
-
209
-
210
-
211
-
212
-
213
-
214
-
215
-
216
-
217
-
218
-
219
-
220
-
221
-
222
-
223
-
224
-
225
-
226
-
227
-
228
-
229
-
230
-
231
-
232
-
233
-
234
-
235
-
236
-
237
-
238
-
239
-
240
-
241
-
242
-
243
-
244
-
245
-
246
-
247
-
248
-
249
-
250
-
251
-
252
-
253
-
254
-
255
-
256
-
257
-
258
-
259
-
260
-
261
-
262
-
263
-
264
 |
 |