3Com 3CR16708-91 Getting Started Guide
3Com 3CR16708-91 - OfficeConnect Managed Switch 9 Manual
 |
UPC - 662705487151
View all 3Com 3CR16708-91 manuals
Add to My Manuals
Save this manual to your list of manuals |
3Com 3CR16708-91 manual content summary:
- 3Com 3CR16708-91 | Getting Started Guide - Page 1
OfficeConnect® Managed Switch 9 and Switch 9 FX Getting Started Guide 3CR16708-91 3CR16709-91 http://www.3com.com/ Part No. DUA1670-8AAA01 Published March 2005 - 3Com 3CR16708-91 | Getting Started Guide - Page 2
only such rights as are provided in 3Com's standard commercial license for the Software. Technical data is provided with limited rights with, this User Guide. Unless otherwise indicated, 3Com registered trademarks are registered countries, licensed exclusively through X/Open Company, Ltd. Netscape - 3Com 3CR16708-91 | Getting Started Guide - Page 3
CONTENTS ABOUT THIS GUIDE Before You Start 7 About Your CD-ROM 7 Conventions 8 Related Documentation 9 TX/ 1000BASE-T Port 17 SFP Port 17 100BASE-FX Port 18 Console Port 18 Power Socket 18 Default Settings 19 2 INSTALLING THE SWITCH Package Contents 22 Choosing a Suitable Site 22 Placing Units On Top - 3Com 3CR16708-91 | Getting Started Guide - Page 4
Cement Walls 24 Mounting Instructions for Wood Walls 25 Management 36 Manually Configuring IP Information 37 Connecting to the Console Port 37 Viewing Automatically Configured IP Information 40 Using 3Com Network Supervisor Pre-requisites 48 Default Users and Passwords 48 Changing Default Passwords 48 - 3Com 3CR16708-91 | Getting Started Guide - Page 5
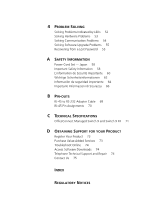
SPECIFICATIONS OfficeConnect Managed Switch 9 and Switch 9 FX 71 D OBTAINING SUPPORT FOR YOUR PRODUCT Register Your Product 73 Purchase Value-Added Services 73 Troubleshoot Online 74 Access Software Downloads 74 Telephone Technical Support and Repair 74 Contact Us 75 INDEX REGULATORY NOTICES - 3Com 3CR16708-91 | Getting Started Guide - Page 6
- 3Com 3CR16708-91 | Getting Started Guide - Page 7
default state. ■ OfficeConnect Managed Switch 9 (3CR16708-91) ■ OfficeConnect Managed Switch 9 FX (3CR16709-91) All procedures described in this guide ■ 3Com Network Supervisor - a powerful and easy-to-use network management platform. ■ A number of other useful applications. Most user guides and - 3Com 3CR16708-91 | Getting Started Guide - Page 8
password, use the following syntax: system management password Commands In this example, you must supply a password for . word "enter" in this guide, you must type something, and then press Return or Enter. Do not press Return or Enter when an instruction simply says "type." - 3Com 3CR16708-91 | Getting Started Guide - Page 9
and Switch 9 FX Management Quick Reference Guide This guide contains: ■ a list of the features supported by the Switch. ■ a summary software release, including new features, modifications, and known problems. There are other publications you may find useful, such as: ■ Documentation accompanying 3Com - 3Com 3CR16708-91 | Getting Started Guide - Page 10
Managed Switch 9 and Switch 9 FX Getting Started Guide ■ Part Number DUA1670-8AAA01 ■ Page 21 Please note that we can only respond to comments and questions about 3Com product documentation at this e-mail address. Questions related to technical support or sales should be directed in the first - 3Com 3CR16708-91 | Getting Started Guide - Page 11
chapter contains introductory information about the Switch 9 and Switch 9 FX and how they can be used in your network. It covers summaries of hardware and software features and also the following topics: ■ About the Switch ■ Switch - Front View Detail ■ Switch - Rear View Detail - 3Com 3CR16708-91 | Getting Started Guide - Page 12
The corresponding 100BASE-FX port is disabled when an SFP module is present. The Switch supports Power over Ethernet on ports 1, 2, 5 and 6. If you plug in a on these ports by default. Summary of Hardware Features Table 3 summarizes the hardware features that are supported by the Switch. Table - 3Com 3CR16708-91 | Getting Started Guide - Page 13
Switch - Front View Detail 13 Switch - Front View Detail Alert LED Power LED Port Status LEDS PoE Status LEDS PoE Status 3CR16708-91 GbE 678 6 Duplex On = Delivering Power Link/Activity Blue = 1000M, Green = 100M, Yellow = 10M, Flash = Activity Alert Duplex : On = Full OfficeConnect - 3Com 3CR16708-91 | Getting Started Guide - Page 14
on the front of the Switch, and how to read their status according to color. For information on using the LEDs for problem solving, see "Solving Problems Indicated by LEDs" on page 52. Table 4 LED behavior LED Color Indicates 10BASE-T/100BASE-TX Port Status LEDs Link/ Green Activity Yellow - 3Com 3CR16708-91 | Getting Started Guide - Page 15
flashing The Switch is starting up or the Switch software is being upgraded. Orange The Switch is reporting a fault (see Chapter 4, "Problem Solving"), or a user-configured alert condition has occurred (see the Implementation Guide for information on configuring alert conditions). Off The Switch - 3Com 3CR16708-91 | Getting Started Guide - Page 16
16 CHAPTER 1: INTRODUCING THE OFFICECONNECT MANAGED SWITCH 9 AND SWITCH 9 FX Switch - Rear View Detail Power Socket Console Port Power LED 1000BASE-T Port 10BASE-T/100BASE-TX Ports 12VDC 3.5A MAX Figure 3 Switch 9 - rear view Power Socket Console Port SFP Port Power LED 100BASE-FX Port - 3Com 3CR16708-91 | Getting Started Guide - Page 17
automatically provides the appropriate connection. The default state for the 10/100/1000 control modes are negotiated. Alternatively, you can manually set these ports to 10BASE-T half duplex, one SFP (Small Form Factor Pluggable) port that supports Gigabit Ethernet short-wave (SX) or long-wave - 3Com 3CR16708-91 | Getting Started Guide - Page 18
RJ-45 to DB-9 null modem cable (supplied with the Switch) and is set to 19200 baud, 8 data bits, no parity and 1 stop bit. The default configuration automatically detects any of the following baud rates: 1200, 2400, 4800, 9600, 19200, 38400, 57600, 115200. However, you must set the baud rate on - 3Com 3CR16708-91 | Getting Started Guide - Page 19
-negotiated (half duplex or full duplex at 10/100 Mbps, full duplex only at 1000 Mbps) ■ 100BASE-FX port defaults to 100 Mbps full-duplex mode (100 FD) and must be manually set to half-duplex mode (100 HD) if required. Power over Ethernet Enabled (ports 1, 2,5 and 6) Flow Control ■ Disabled in - 3Com 3CR16708-91 | Getting Started Guide - Page 20
initialize in the Command Line Interface, the following settings are retained to allow you to connect to and manage the Switch: ■ IP Address ■ Subnet Mask ■ Default Gateway - 3Com 3CR16708-91 | Getting Started Guide - Page 21
any components from the Switch or carrying out any maintenance procedures, you must read the safety information provided in Appendix A of this guide. AVERTISSEMENT: Consignes de sécurité. Avant d'installer ou d'enlever tout composant du Switch ou d'entamer une procédure de maintenance, lisez les - 3Com 3CR16708-91 | Getting Started Guide - Page 22
l'utente. Package Contents ■ Switch unit ■ CD-ROM ■ Getting Started Guide (this guide) ■ Management Quick Reference Guide ■ Release Notes ■ Warranty Information ■ Power Adapter ■ Console Cable (RJ vents in the side of the Switch. 3Com recommends that you provide a minimum of 25mm (1in.) clearance. - 3Com 3CR16708-91 | Getting Started Guide - Page 23
Placing Units On Top of Each Other 23 ■ Air temperature around the Switch does not exceed 50 °C (122 °F). If the Switch is stacked with other OfficeConnect units its local air temperature may be greater than room ambient temperature. ■ The air is as free from dust as possible. ■ The unit is - 3Com 3CR16708-91 | Getting Started Guide - Page 24
. When wall mounting the unit, ensure that the rubber feet are not fixed. Mounting To wall mount the unit on a cement wall, follow these instructions: Instructions for Cement Walls 1 Make two holes 150 mm (5.9 in.) apart and insert two nylon or similar screw anchors that are suitable for the wall - 3Com 3CR16708-91 | Getting Started Guide - Page 25
The Power-up Sequence 25 Mounting To wall mount the unit on a wood wall, follow these instructions: Instructions for Wood Walls 1 Make two holes 150 mm (5.9 in.) apart. 2 Fix two suitable screws directly into the wall, leaving their heads 3 mm (0.12 in.) clear - 3Com 3CR16708-91 | Getting Started Guide - Page 26
with the Power Supply Unit. The Switch is starting up or the Switch software is being upgraded. The Switch is reporting a fault (see Chapter 4, "Problem Solving"). Normal operation. If there is evidence of a problem, see "Solving Problems Indicated by LEDs" on page 52. CAUTION The Switch has no ON - 3Com 3CR16708-91 | Getting Started Guide - Page 27
■ 3Com NJ90 (3CNJ90) ■ 3Com NJ95 (3CNJ95 ■ 3Com NJ100 (3CNJ100, 3CNJ100-CRM) ■ 3Com NJ105 - 3CNJ105 ■ 3Com NJ105 + forwarding (3CNJ105) ■ 3Com NJ200 (3CNJ200, 3CNJ200-CRM) ■ 3Com NJ200 + forwarding (3CNJ200) ■ 3Com NJ205 (3CNJ205) ■ 3Com NJ205 + forwarding (3CNJ205) For the latest list of supported - 3Com 3CR16708-91 | Getting Started Guide - Page 28
Control" in the Switch Implementation Guide supplied on the CD-ROM straight-through cable. See Table 7. WARNING: The Switch supports Power over Ethernet on rear ports 1, 2, 5 and can be used for Ethernet wiring between buildings. 3Com recommends that you use Category 5e twisted pair cable - - 3Com 3CR16708-91 | Getting Started Guide - Page 29
SFP (1000BASE-T) To access the latest list of approved SFP transceivers for the Switch on the 3Com Corporation World Wide Web site, enter this URL into your internet browser: http://www.3com.com Inserting an SFP To be recognized as valid, the SFP transceiver must have the following Transceiver - 3Com 3CR16708-91 | Getting Started Guide - Page 30
-pair cable with RJ-45 connectors. If the SFP transceiver is faulty, it will not operate within the Switch. See "Solving Hardware Problems" on page 53. Use of non-3Com SFPs is not recommended. If the SFP transceiver is invalid it will not be recognized by the Switch. Use the following sequence - 3Com 3CR16708-91 | Getting Started Guide - Page 31
to ensure that it is operating correctly. Refer to "LEDs" on page 14 for more information. Removing an SFP If you wish to remove a 3Com transceiver (it is not necessary to Transceiver power-down your Switch): 1 Disconnect the cable from the transceiver. 2 Move the wire release lever downwards until - 3Com 3CR16708-91 | Getting Started Guide - Page 32
32 CHAPTER 2: INSTALLING THE SWITCH The above procedure will release a 3Com SFP transceiver. To release a transceiver from another manufacturer see the documentation supplied with your SFP transceiver. - 3Com 3CR16708-91 | Getting Started Guide - Page 33
topics: ■ Setting Up Overview ■ Manually Configuring IP Information ■ Viewing Automatically Configured IP Information ■ Methods of Managing a Switch ■ Setting Up Command Line Interface Management ■ Setting Up Web Interface Management ■ Setting Up SNMP Management ■ Default Users and Passwords - 3Com 3CR16708-91 | Getting Started Guide - Page 34
and ready for management when it is in its default state. The whole setup process is summarized in Figure See page 35 Do you want to manually Yes configure the IP information? No How do to view the automatically configured IP information? Use 3Com Network Supervisor (3NS). See page 40 Connect - 3Com 3CR16708-91 | Getting Started Guide - Page 35
and changing default passwords, see "Default Users and Passwords" on page 48. IP Configuration You can use one of the following methods to allocate IP information to your Switch (essential if you wish to manage your Switch across the network). Manual IP Configuration You can choose to configure - 3Com 3CR16708-91 | Getting Started Guide - Page 36
to the Implementation Guide on the CD-ROM that accompanies your Switch or on the 3Com Web site. You IP address, instead of you having to manually reconfigure the Switch. If you use line interface commands and problem solving, refer to the "Switch Management Interface Reference Guide" on the CD-ROM - 3Com 3CR16708-91 | Getting Started Guide - Page 37
Switch. You can then manually enter IP information using the command line interface Console Port To set up your Switch manually you can make a connection to the emulation software installed, such as Microsoft Hyperterminal. This software allows supplied with the terminal emulation software. ■ The RJ-45 to - 3Com 3CR16708-91 | Getting Started Guide - Page 38
screws on the RS-232 connector to prevent it from being loosened. 2 Open your terminal emulation software and configure the COM port settings to which you have connected the cable. The settings should be set to match the default settings for the Switch, which are: ■ Any of the following baud rates - 3Com 3CR16708-91 | Getting Started Guide - Page 39
password. 3Com recommends that you change your password from its default blank setting. 2 At the login and password prompts, enter admin as your user name and enter your password at the password . At the Enter configuration method prompt enter manual. The screen prompts you to enter IP information - 3Com 3CR16708-91 | Getting Started Guide - Page 40
be prompted to enter system information, change passwords, and then given the option to carry out cable and close the terminal emulator software. Viewing Automatically Configured IP Information the IP information in two ways: ■ Using 3Com Network Supervisor - This application will auto-discover - 3Com 3CR16708-91 | Getting Started Guide - Page 41
-232 cable as shown in Figure 10. Figure 10 Connecting a workstation to the Switch via the console port Switch Workstation (with terminal emulation software installed) Standard Null Modem Cable Console Port Connection To connect the cable: a Attach the RJ-45 to RS-232 cable to the console port - 3Com 3CR16708-91 | Getting Started Guide - Page 42
42 CHAPTER 3: SETTING UP FOR MANAGEMENT 2 Open your terminal emulation software and configure the COM port settings to which you have connected the cable. The settings should be set to match the default settings for the Switch, which are: ■ Any of the following baud rates: 1200, 2400, 4800, 9600, - 3Com 3CR16708-91 | Getting Started Guide - Page 43
Example top-level command line interface menu Menu options 3Com OfficeConnect Switch 9 bridge - Administer bridge-wide Switch, you can logout, disconnect the serial cable and close the terminal emulator software. Methods of Managing a Switch Once you have completed the initial set up of - 3Com 3CR16708-91 | Getting Started Guide - Page 44
12 CLI management via the console port Switch Workstation (with terminal emulation software installed) Standard Null Modem Cable Figure 13 CLI management over the network 15. For example, you can use the 3Com Network Supervisor software that is provided on the CD-ROM that accompanies your Switch. - 3Com 3CR16708-91 | Getting Started Guide - Page 45
Setting Up Command Line Interface Management 45 Figure 15 SNMP management over the network Refer to "Setting Up SNMP Management" on page 47. Setting Up Command Line Interface Management This section describes how you can set up command line interface management using a local console port - 3Com 3CR16708-91 | Getting Started Guide - Page 46
opening a Telnet session via third party software you will need to enter the IP address in the format suitable for that software. 5 At the login and password prompts, enter admin as your user name and enter your password at the password combinations: Table 8 Supported Web Browsers and Platforms - 3Com 3CR16708-91 | Getting Started Guide - Page 47
the Switch is powered up. 3 Open your web browser and enter the password prompts, enter admin as your user name and enter your password at the password prompt (or just press Return if you have not yet set a password Default VLAN). By default, all ports on the Switch are in VLAN 1. You can use the 3Com - 3Com 3CR16708-91 | Getting Started Guide - Page 48
Documentation supplied with the SNMP network management application software. To manage your Switch using an SNMP Guide" for more information. Default Users and Passwords If you intend to manage the Switch using the web interface or the command line interface, or to change the default passwords - 3Com 3CR16708-91 | Getting Started Guide - Page 49
Default Users and Passwords 49 For more information about default users and passwords, refer to the "Switch Management Interface Reference Guide" on the Switch CD-ROM. - 3Com 3CR16708-91 | Getting Started Guide - Page 50
50 CHAPTER 3: SETTING UP FOR MANAGEMENT - 3Com 3CR16708-91 | Getting Started Guide - Page 51
by LEDs ■ Solving Hardware Problems ■ Solving Communication Problems ■ Solving Software Upgrade Problems ■ Recovering from a Lost Password If you experience a problem that is not listed here, it may be included in the Support section of the Switch Management Interface Reference Guide on the CD-ROM - 3Com 3CR16708-91 | Getting Started Guide - Page 52
may have a faulty power cord or an internal fault. Check the power cord by: ■ testing it in another device ■ connecting a working power cord to the 'problem' device Then contact your supplier for advice. On powering-up, the Alert LED remains orange This indicates that a port has failed and has been - 3Com 3CR16708-91 | Getting Started Guide - Page 53
power is not being supplied" on page 53 for troubleshooting procedures. Solving Hardware Problems In the rare event of your Switch unit experiencing a not been exceeded. If the power budget has been exceeded, then by default, the powered device connected to the Power over Ethernet port with the - 3Com 3CR16708-91 | Getting Started Guide - Page 54
imposed upon it. If you experience communication problems with the Switch, ensure that: ■ The management application by a router, ensure that the default gateway IP address within the Switch is the in your network management application (such as 3Com Network Supervisor). The following is a brief - 3Com 3CR16708-91 | Getting Started Guide - Page 55
long as it is not being used by another device on your network. 3Com suggests you use addresses in the range 192.168.0.0 to 192.168.255 problems with your software upgrade, refer to the Problem Solving section in the Management Interface Reference Guide. Recovering from a Lost Password The password - 3Com 3CR16708-91 | Getting Started Guide - Page 56
56 CHAPTER 4: PROBLEM SOLVING ■ Reset power to the Switch within 30 seconds by removing the power cord from the Switch and then re-connecting it. ■ When the Switch restarts, enter a new password for the Administrator. ■ Log onto the Switch with the user name "admin" and the new password you just - 3Com 3CR16708-91 | Getting Started Guide - Page 57
A SAFETY INFORMATION You must read the following safety information before carrying out any installation or removal of components, or any maintenance procedures on the Switch. WARNING: Warnings contain directions that you must follow for your personal safety. Follow all directions carefully. You - 3Com 3CR16708-91 | Getting Started Guide - Page 58
58 APPENDIX A: SAFETY INFORMATION Power Cord Set - Japan Important Safety Information WARNING: Installation and removal of the unit must be carried out by qualified personnel only. WARNING: The unit must be earthed (grounded). Connect the unit to an earthed power supply to ensure compliance with - 3Com 3CR16708-91 | Getting Started Guide - Page 59
Important Safety Information 59 WARNING: The socket outlet must be near to the unit and easily accessible. You can only remove power from the unit by disconnecting the power cord from the outlet. WARNING: This unit operates under SELV (Safety Extra Low Voltage) conditions according to IEC 60950. The - 3Com 3CR16708-91 | Getting Started Guide - Page 60
60 APPENDIX A: SAFETY INFORMATION WARNING: The Switch supports Power over Ethernet on rear ports 1, 2, 5 and 6. These ports should only be used for Ethernet wiring within the same building. L'information de Sécurité Importante AVERTISSEMENT: L' - 3Com 3CR16708-91 | Getting Started Guide - Page 61
L'information de Sécurité Importante 61 AVERTISSEMENT: La prise secteur doit se trouver à proximité de l'appareil et son accès doit être facile. Vous ne pouvez mettre l'appareil hors circuit qu'en débranchant son cordon électrique au niveau de cette prise. AVERTISSEMENT: L'appareil fonctionne à une - 3Com 3CR16708-91 | Getting Started Guide - Page 62
62 APPENDIX A: SAFETY INFORMATION présent document risque d'entraîner l'exposition à des rayonnements laser dangereux. AVERTISSEMENT: Le commutateur prend en charge l'alimentation sur Ethernet sur les ports arrière 1, 2, 5 et 6. Ces ports doivent être utilisés pour la connectique Ethernet à l'inté - 3Com 3CR16708-91 | Getting Started Guide - Page 63
Información de seguridad importante 63 die Verbindung der Einheit mit einem traditionellem privatem oder öffentlichem Telefonnetzwerk gebraucht werden. Nur RJ-45-Datenanscluße, Telefonnetzsysteme or Netztelefone an diese Steckdosen anschließen. Entweder geschützte oder ungeschützte Buchsen dürfen an - 3Com 3CR16708-91 | Getting Started Guide - Page 64
64 APPENDIX A: SAFETY INFORMATION ADVERTENCIA: conjunto de cables eléctricos: debe estar homologado para el país donde se utilice: EE.UU. y Canadá Sólo para el Reino Unido Sólo para Europa Dinamarca Suiza ■ El conjunto de cables debe estar homologado por UL y tener la certificación CSA. ■ La - 3Com 3CR16708-91 | Getting Started Guide - Page 65
Información de seguridad importante 65 ADVERTENCIA: sólo para Francia y Perú: esta unidad no puede recibir corriente de fuentes IT†. Si las fuentes de suministro de corriente son de tipo IT, esta unidad debe recibir 230 V (2P+T) a través de un transformador aislador con relación 1:1, con el punto de - 3Com 3CR16708-91 | Getting Started Guide - Page 66
66 APPENDIX A: SAFETY INFORMATION Importanti Informazioni di Sicurezza AVVERTENZA: le operazioni di installazione e rimozione dell'unità devono essere eseguite esclusivamente da personale qualificato. AVVERTENZA: l'unità deve disporre di messa a terra. per rispettare gli standard di sicurezza, è - 3Com 3CR16708-91 | Getting Started Guide - Page 67
Importanti Informazioni di Sicurezza 67 AVVERTENZA: la presa deve trovarsi vicino all'unità ed essere facilmente accessibile. L'unico modo per rimuovere l'alimentazione dall'unità consiste nello scollegare il cavo di alimentazione dalla presa. AVVERTENZA: questa unità funziona alle condizioni SELV ( - 3Com 3CR16708-91 | Getting Started Guide - Page 68
68 APPENDIX A: SAFETY INFORMATION AVVERTENZA: l'esecuzione di procedure o regolazioni non previste dalle istruzioni fornite in questa guida può provocare emissioni laser nocive. AVVERTENZA: Lo switch supporta l'alimentazione su Ethernet sulle porte posteriori 1, 2, 5 e 6. Tali porte devono essere - 3Com 3CR16708-91 | Getting Started Guide - Page 69
B PIN-OUTS RJ-45 to RS-232 Adapter Cable An RJ-45 to DB-9 adapter cable is provided with the Switch for connecting a management device to the RJ-45 console port on the rear panel. The pinout is shown below. Table 10 Pin assignments RJ-45 Pin 1 2 3 4 5 6 7 8 Signal RTS DTR TxD DCD Ground RxD DSR - 3Com 3CR16708-91 | Getting Started Guide - Page 70
70 APPENDIX B: PIN-OUTS RJ-45 Pin Assignments Pin assignments are identical for 10BASE-T and 100BASE-TX RJ-45 connectors. Table 11 Pin assignments Pin Number 10BASE-T/100BASE-TX Ports configured as MDI 1 Transmit Data + 2 Transmit Data - 3 Receive Data + 4 Not assigned 5 Not assigned - 3Com 3CR16708-91 | Getting Started Guide - Page 71
kg (approx) 0 ° to 50 °C (32 ° to 122 °F) -40 ° to +70 °C (-40 ° to 158 °F) 10-95% relative humidity, non-condensing EN60068 to 3Com schedule (Package testing: paras 2.1, 2.2, 2.30, and 2.32. Operational testing: paras 2.1, 2.2, 2.30 and 2.13). UL60950-1, EN60950-1, CSA 22.2 No. 60950-1, IEC 60950 - 3Com 3CR16708-91 | Getting Started Guide - Page 72
72 APPENDIX C: TECHNICAL SPECIFICATIONS Standards Supported SNMP SNMP protocol (RFC 1157) MIB-II (RFC 1213) Bridge MIB (RFC 1493) RMON MIB (RFC 2819, Groups 1, 2, 3, 7, 8, 9) RMON MIB II (RFC 2021) Remote Monitoring - 3Com 3CR16708-91 | Getting Started Guide - Page 73
trouble registering your product, please contact 3Com Global Services for assistance. To enhance response times or extend warranty benefits, contact 3Com or your authorized 3Com reseller. Value-added services like 3Com ExpressSM and GuardianSM can include 24x7 telephone technical support, software - 3Com 3CR16708-91 | Getting Started Guide - Page 74
site at http://www.3com.com/ 3Com Knowledgebase helps you troubleshoot 3Com products. This query-based interactive tool is located at http://knowledgebase.3com.com and contains thousands of technical solutions written by 3Com support engineers. Access Software Downloads Software Updates are the - 3Com 3CR16708-91 | Getting Started Guide - Page 75
.com/. First time users will need to apply for a user name and password. Contact Us 3Com offers telephone, e-mail and internet access to technical support and repair services. To access these services for your region, use the appropriate telephone number, URL or e-mail address from the list below - 3Com 3CR16708-91 | Getting Started Guide - Page 76
speakers, enter the URL: http://lat.3com.com/lat/support/form.html Portuguese speakers, enter the URL: http://lat.3com.com/br/support/form.html English speakers in Latin America should send e-mail to: [email protected] US and Canada Telephone Technical Support and Repair 1 800 876 3266 - 3Com 3CR16708-91 | Getting Started Guide - Page 77
, 34 manual setup console port 37 MDI configuration 28 MDIX configuration 28 P passwords of default users 48 pin assignments console port 69 RJ45 70 ports console 18 power over Ethernet using 26 power socket 18 powering-up a Switch 25 problem solving 51 communication problems 54 hardware problems 53 - 3Com 3CR16708-91 | Getting Started Guide - Page 78
71 features 12 installation 21, 22 power socket 18 powering-up 25 rack mounting 24 size 71 stacking clip 23 weight 71 system specifications 71 T troubleshooting 51 W Web browsers choosing 46 web interface choosing a browser 46 web interface management 44 setting up 46 - 3Com 3CR16708-91 | Getting Started Guide - Page 79
and used in accordance with the instructions, may cause harmful interference to radio How to Identify and Resolve Radio-TV Interference Problems This booklet is available from the U.S. Government measures. You must only insert a 3Com approved SFP transceiver into the Switch. These are - 3Com 3CR16708-91 | Getting Started Guide - Page 80
-
 1
1 -
 2
2 -
 3
3 -
 4
4 -
 5
5 -
 6
6 -
 7
7 -
8
-
9
-
10
-
11
-
12
-
13
-
14
-
15
-
16
-
17
-
18
-
19
-
20
-
21
-
22
-
23
-
24
-
25
-
26
-
27
-
28
-
29
-
30
-
31
-
32
-
33
-
34
-
35
-
36
-
37
-
38
-
39
-
40
-
41
-
42
-
43
-
44
-
45
-
46
-
47
-
48
-
49
-
50
-
51
-
52
-
53
-
54
-
55
-
56
-
57
-
58
-
59
-
60
-
61
-
62
-
63
-
64
-
65
-
66
-
67
-
68
-
69
-
70
-
71
-
72
-
73
-
74
-
75
-
76
-
77
-
78
-
79
-
80
 |
 |

Part No. DUA1670-8AAA01
Published March 2005
OfficeConnect
®
Managed
Switch 9 and Switch 9 FX
Getting Started Guide
3CR16708-91
3CR16709-91