3Com 3CRWDR300A-73-US User Guide
3Com 3CRWDR300A-73-US - ADSL Wireless 11n Firewall Router Manual
 |
UPC - 662705532424
View all 3Com 3CRWDR300A-73-US manuals
Add to My Manuals
Save this manual to your list of manuals |
3Com 3CRWDR300A-73-US manual content summary:
- 3Com 3CRWDR300A-73-US | User Guide - Page 1
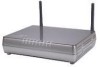
Wireless 11n ADSL Firewall Router User Guide WL-603 3CRWDR300A-73 3CRWDR300B-73 http://www.3Com.com/ Part No. 10016794 Rev AA Published July 2008 - 3Com 3CRWDR300A-73-US | User Guide - Page 2
at any time. If there is any software on removable media described in this documentation, it in conjunction with, this User Guide. Unless otherwise indicated, 3Com registered trademarks are registered other countries, licensed exclusively through X/Open Company, Ltd. Netscape Navigator is - 3Com 3CRWDR300A-73-US | User Guide - Page 3
Naming Convention 7 Conventions 8 Feedback About This User Guide 9 Related Documentation 9 INTRODUCING THE ROUTER Wireless 11n the Rubber Feet 22 Wall Mounting 22 Mounting Instructions for Cement Walls 22 Mounting Instructions for Wood Walls 23 Powering Up the Router 23 Connecting the Router 23 - 3Com 3CRWDR300A-73-US | User Guide - Page 4
Windows Vista 29 Windows XP 30 Macintosh 30 Disabling PPPoE and PPTP Client Software 31 Disabling Web Proxy 31 RUNNING THE SETUP WIZARD Accessing the Router using the 3Com Detect Application 33 Running the 3Com Detect Application 33 Accessing the Setup Wizard 35 Wizard - Change Password 38 Wizard - - 3Com 3CRWDR300A-73-US | User Guide - Page 5
99 URL Filter 100 Advanced 101 Security 101 VLAN 104 Static Routes 106 RIP 108 DDNS 110 SNMP 111 Syslog 112 Proxy ARP 113 QoS Settings 114 Traffic Mapping 115 VPN 117 System Tools 124 Restart Router 124 Configuration 124 Upgrade 125 Time Zone 126 Ping 127 Traceroute 128 DNS Lookup 129 Diagnostic 129 - 3Com 3CRWDR300A-73-US | User Guide - Page 6
/Feedback 134 Support 134 Feedback 134 TROUBLESHOOTING Basic Connection Checks 135 Browsing to the Router Configuration Screens 136 Connecting to the Internet 136 Forgotten Password and Reset to Factory Defaults 138 Wireless Networking 139 Recovering from Corrupted Software 140 Power Adapter 141 - 3Com 3CRWDR300A-73-US | User Guide - Page 7
SAFETY INFORMATION END USER SOFTWARE LICENSE AGREEMENT OBTAINING SUPPORT FOR YOUR 3COM PRODUCTS Register Your Product to Gain Service Benefits 160 Solve Problems Online 160 Purchase Extended Warranty and Professional Services 160 Access Software Downloads 161 Contact Us 161 Telephone Technical - 3Com 3CRWDR300A-73-US | User Guide - Page 8
- 3Com 3CRWDR300A-73-US | User Guide - Page 9
the 3Com Wireless 11n ADSL Firewall Router (3CRWDR300A-73, 3CRWDR300B-73). This guide is intended for use by those responsible for installing and setting up network equipment; consequently, it assumes a basic working knowledge of LANs (Local Area Networks) and Internet Routers. This manual covers - 3Com 3CRWDR300A-73-US | User Guide - Page 10
the word "enter" in this guide, you must type something, and then press Return or Enter. Do not press Return or Enter when an instruction simply says "type." If you must text. ■ Identify menu names, menu commands, and software button names. Examples: From the Help menu, select Contents. Click OK. - 3Com 3CRWDR300A-73-US | User Guide - Page 11
page) ■ Page number (if appropriate) Example: ■ 3Com Wireless 11n ADSL Firewall Router User Guide ■ Part Number 10016794 Rev. AA ■ Page 24 Do not use this e-mail address for technical support questions. For information about contacting Technical Support, please refer to Appendix E. In addition to - 3Com 3CRWDR300A-73-US | User Guide - Page 12
10 ABOUT THIS GUIDE - 3Com 3CRWDR300A-73-US | User Guide - Page 13
the world of networking with 3Com®. In the modern business advantage. Wireless 11n ADSL Firewall Router The 3Com Wireless 11n ADSL Firewall Router is designed to files or damaging your computers. The Router can also prevent your users from accessing Web sites which you find unsuitable. Figure 1 - 3Com 3CRWDR300A-73-US | User Guide - Page 14
12 CHAPTER 1: INTRODUCING THE ROUTER Figure 1 Example Network Without a Router When you use the Router in your network (Figure 2 and Figure 3), it becomes your connection to the Internet. Connections can be made directly to the Router, or to an OfficeConnect Switch or Hub, expanding the number of - 3Com 3CRWDR300A-73-US | User Guide - Page 15
Wireless 11n ADSL Firewall Router 13 Figure 3 Example Network Using a Firewall Router (without splitter) - 3Com 3CRWDR300A-73-US | User Guide - Page 16
Web, FTP, and other services on your network ■ 3CRWDR300A-73 version) ■ One Ethernet cable (Two Ethernet cables in 3CRWDR300B-73 version) ■ One CD-ROM containing this user guide, copies of the quick install guide in various languages and the 3Com Detect application. ■ Installation guide ■ Support - 3Com 3CRWDR300A-73-US | User Guide - Page 17
Requirements Your Router requires that the computer(s) and components in your network be configured with the following: ■ A computer with an operating system that supports TCP/IP networking protocols (for example Windows 2000/XP,/Vista, Unix, Mac OS 8.5 or higher). ■ An Ethernet 10 Mbps or 10/100 - 3Com 3CRWDR300A-73-US | User Guide - Page 18
power adapter connections. Refer to Chapter 6 Troubleshooting. 2 Alert LED Amber Fast flash during self test. If self test fails the LED will remain on. Fast flash during software upgrade. Fast flash for software Router, or there is a problem. Refer to Chapter 6 Troubleshooting. 6 LAN Status LEDs (4 - 3Com 3CRWDR300A-73-US | User Guide - Page 19
Physical Features 17 7 WPS LED Blue WiFi Protected Setup (WPS) is a standard for easy and secure establishment of a wireless network, allowing wireless clients to connect securely to routers and access points. The WPS LED shows the status of the WPS function. It has a number of modes to help monitor - 3Com 3CRWDR300A-73-US | User Guide - Page 20
port, four LAN ports, one WiFi on/off button, a reset button, one power adapter socket, and one WPS button. Figure 5 Router - Rear Panel 1 Wireless may cause damage. 2 ADSL Port RJ-11 port (3CRWDR300A-73)/ RJ-45 port (3CRWDR300B-73), connect this port with the telephone socket. 3 Ethernet Ports - 3Com 3CRWDR300A-73-US | User Guide - Page 21
you may use this button. Refer to Forgotten Password and Reset to Factory Defaults on page 138 for further details. 6 Power Adapter Socket Only use the power adapter that is supplied with this Router. Do not use any other adapter. 7 WPS button Press this button for 3 seconds when making WPS setup - 3Com 3CRWDR300A-73-US | User Guide - Page 22
20 CHAPTER 1: INTRODUCING THE ROUTER - 3Com 3CRWDR300A-73-US | User Guide - Page 23
2 INSTALLING THE ROUTER Introduction This chapter will guide you through a basic installation of the Router, including: ■ Connecting the Router to the Internet. ■ Connecting the Router to your network. ■ Setting up your computers for - 3Com 3CRWDR300A-73-US | User Guide - Page 24
and through the vents in the side of the case is not restricted. 3Com recommends you provide a minimum of 25 mm (1 in.) clearance. Using reach of the power outlet. When wall mounting the unit, ensure that the rubber feet are not fixed. Mounting To wall mount the unit: Instructions for Cement Walls - 3Com 3CRWDR300A-73-US | User Guide - Page 25
Powering Up the Router 23 Mounting To wall mount the unit: Instructions for Wood Walls 1 Make two holes 98 mm (3.9 in.) apart. 2 Fix two suitable screws directly into the wall, leaving their heads 3 mm (0.12 in.) clear - 3Com 3CRWDR300A-73-US | User Guide - Page 26
ROUTER Figure 6 Connecting the Router (with splitter) Figure 7 Connecting the Router (without splitter) 1 Run the provided telephone cable from the wall jack providing ADSL service to the ADSL port on your Router. When inserting an ADSL RJ-11(Annex A) or RJ-45 (Annex B) plug, be sure the tab on the - 3Com 3CRWDR300A-73-US | User Guide - Page 27
connect your phones and computer directly to the splitter as shown below (Figure 8): or ■ If you are using a splitterless (G.lite) connection, then your service provider will attach the outside ADSL line directly to your phone system. In this case you can connect your phones and computer directly to - 3Com 3CRWDR300A-73-US | User Guide - Page 28
of your Router. Next you need to set up your computers so that they can make use of the Router to communicate with the Internet. 3Com recommends that you perform the initial Router configuration from a computer that is directly connected to one of the LAN ports. If you configure the Router - 3Com 3CRWDR300A-73-US | User Guide - Page 29
computers need to be configured correctly for this to take place. To change the configuration of your computers to allow this, follow the instructions in this chapter. Obtaining an IP Address Automatically Windows 2000 If you are using a Windows 2000-based computer, use the following procedure to - 3Com 3CRWDR300A-73-US | User Guide - Page 30
28 CHAPTER 3: SETTING UP YOUR COMPUTERS Figure 10 Local Area Properties Screen 6 Ensure that the options Obtain an IP address automatically, and Obtain DNS server address automatically are both selected as shown in Figure 11. Click OK. Figure 11 Internet Protocol (TCP/IP) Properties Screen 7 Restart - 3Com 3CRWDR300A-73-US | User Guide - Page 31
Obtaining an IP Address Automatically 29 Windows Vista 1 From the Windows Start Menu, select Settings > Network. 2 Click on Organize. Select Properties. 3 Click on Manage network > Connections. 4 Double click Local Area Connection. Select Properties and click continue. 5 A screen similar to Figure - 3Com 3CRWDR300A-73-US | User Guide - Page 32
30 CHAPTER 3: SETTING UP YOUR COMPUTERS Windows XP 1 From the Windows Start Menu, select Control Panel. 2 Click on Network and Internet Connections. 3 Click on the Network Connections icon. 4 Double click on LAN or High Speed Connection icon. A screen titled Local Area Connection Status will appear. - 3Com 3CRWDR300A-73-US | User Guide - Page 33
be displayed. 4 Select the Never dial a connection option. Figure 14 Internet Properties Screen Disabling Web Proxy You may want to remove the PPPoE client software from your computer to free resources, as it is not required for use with the Router. Ensure that you do not have a web proxy enabled - 3Com 3CRWDR300A-73-US | User Guide - Page 34
32 CHAPTER 3: SETTING UP YOUR COMPUTERS - 3Com 3CRWDR300A-73-US | User Guide - Page 35
drive. If you have autorun enabled, you will be presented with a menu showing the contents of the CD-ROM. Select the 3Com Detect Application link to install the utility. Follow the onscreen instructions. If the auto-run program does not start, you should browse to your CD-ROM drive, go to the - 3Com 3CRWDR300A-73-US | User Guide - Page 36
34 CHAPTER 4: RUNNING THE SETUP WIZARD Figure 15 3Com Detect Application If the computer has multiple network adapters, select the 18). Select the Router to which you want to connect and click Open. Your default Web browser will launch and connect to the home page of the Router, see Figure 20. - 3Com 3CRWDR300A-73-US | User Guide - Page 37
Figure 18 Router List Screen Accessing the Setup Wizard 35 Accessing the Setup Wizard The Router setup program is Web-based, which means that it is accessed through your Web browser (Netscape Navigator 4.7 or higher, Internet Explorer 6.0 or higher, or Mozilla 1.2.1 or higher, or Apple's Safari). - 3Com 3CRWDR300A-73-US | User Guide - Page 38
the drop-down menu, and click Apply. 1. To comply with US FCC regulations, operation for any country is limited to channels from 1 to 11. 2. Customers outside of the US, Canada or Taiwan can download the firmware from the 3Com website (www.3com.com) which will enable operation on channels 12-13. You - 3Com 3CRWDR300A-73-US | User Guide - Page 39
will then launch automatically (refer to Figure 24). You will be guided step by step through a basic setup procedure. ■ if the Wizard. Figure 22 Welcome Screen ■ Go to the Notice Board tab to see the current software information. To view the Web help, click the Help button. ■ Go to the Password - 3Com 3CRWDR300A-73-US | User Guide - Page 40
38 CHAPTER 4: RUNNING THE SETUP WIZARD Figure 23 Password Screen 1 To change the current password, enter the password in the Current Password field. 2 Enter the new password in the New Password field, and enter it again in the Confirm New Password field. 3 Enter the time period in Login Timeout to - 3Com 3CRWDR300A-73-US | User Guide - Page 41
Accessing the Setup Wizard 39 Wizard - Time and The Time and Time Zone screen allows you to set up the time for the Time Zone Router. Figure 25 Time and Time Zone Screen 1 Select the correct base date and time. 2 If you want to automatically synchronize the Router with a public time server, check - 3Com 3CRWDR300A-73-US | User Guide - Page 42
40 CHAPTER 4: RUNNING THE SETUP WIZARD Wizard - Connection The Connection Type screen allows you to set up the Router for the type Type of Internet connection you have. Before setting up your connection type, have your account information from your ISP ready. Figure 26 Connection Type Screen Select - 3Com 3CRWDR300A-73-US | User Guide - Page 43
connection. To set up the Router for use with a PPPoE (PPP over Ethernet) connection, use the following procedure: Figure 27 PPPoE Screen 1 Enter your user name in the Username field. 2 Enter your password in the Password field. 3 Re-type your password in the Retype Password field. 4 Enter your VPI - 3Com 3CRWDR300A-73-US | User Guide - Page 44
WIZARD PPPoA To set up the Router for use with a PPP over ATM (PPPoA) connection, use the following procedure: Figure 28 PPPoA Screen 1 Enter your user name in the Username field. 2 Enter your password in the Password field. 3 Re-type your password in the Retype Password field. 4 Enter your VPI and - 3Com 3CRWDR300A-73-US | User Guide - Page 45
Accessing the Setup Wizard 43 Bridge Mode (for a single PC) Selecting the Bridge mode sets the device into 1483 bridging mode in which the device connects LANs and WAN together. It operates as a Data Link Layer device that acts to limit the traffic between two network segments by filtering the data - 3Com 3CRWDR300A-73-US | User Guide - Page 46
44 CHAPTER 4: RUNNING THE SETUP WIZARD Routing Mode over ATM The Routing Mode over ATM uses fixed/static IP addresses, which are provided by your ISP, to connect to the Internet. Obtain the information on this screen from your ISP. Figure 30 Routing mode over ATM Screen 1 Enter your Internet IP - 3Com 3CRWDR300A-73-US | User Guide - Page 47
Accessing the Setup Wizard 45 Dynamic/Fixed IP in 1483 Bridge Mode (For Multiple PCs) For bridge mode to work, you need to assign an IP address to the Router. You can either configure the Router to obtain an IP address automatically from a DHCP server or assign a fixed or static IP address to it. - 3Com 3CRWDR300A-73-US | User Guide - Page 48
46 CHAPTER 4: RUNNING THE SETUP WIZARD Wizard - LAN Settings The LAN Settings screen allows you to set the default IP address and DHCP client IP range for the Router. Figure 32 The LAN Settings Screen 1 To change the Router's default IP address, enter the new IP address in the IP Address field, and - 3Com 3CRWDR300A-73-US | User Guide - Page 49
Accessing the Setup Wizard 47 Wizard - Wireless The Wireless Settings screen allows you to set up the SSID and radio Setting channel used for the wireless connection. Figure 33 Wireless Setting Screen 1 Select the channel you want to use from the Channel drop-down menu. 2 Specify the SSID to be used - 3Com 3CRWDR300A-73-US | User Guide - Page 50
wireless client devices to use WEP. Figure 35 64-bit WEP Screen To enable 64-bit WEP: 1 You can enter the 64-bit WEP key manually. Enter the WEP key as 5 pairs of hex digits (0-9, A-F). Or you can generate the 64-bit WEP key automatically. Enter a memorable passphrase in the Passphrase - 3Com 3CRWDR300A-73-US | User Guide - Page 51
and wireless client devices to use WEP. Figure 36 128-bit WEP To enable 128-bit WEP: 1 You can enter the 128-bit WEP key manually, enter your WEP key as 13 pairs of hex digits (0-9, A-F). Or you can generate the 128-bit WEP key automatically, enter a memorable passphrase in the - 3Com 3CRWDR300A-73-US | User Guide - Page 52
WPA drop-down menu. 2 Select WPA mode from the drop-down menu, three modes are supported: WPA, WPA2, and Mixed mode. 3 Select Encryption technique from the drop-down menu, for WPA, AES for WPA2". If your wireless client cards can support AES over WPA, we suggest you directly select "AES for both WPA - 3Com 3CRWDR300A-73-US | User Guide - Page 53
Server Screen 1 Select WPA with RADIUS server from the Security Mode drop-down menu. 2 Select WPA mode from the drop-down menu, three modes are supported: WPA, WPA2, and Mixed mode. 3 Select Encryption technique from the drop-down menu, four options are available: TKIP, AES, Auto for WPA AES for - 3Com 3CRWDR300A-73-US | User Guide - Page 54
the Setup Wizard, a configuration summary will appear. Verify the configuration information of the Router and then click Apply to save your settings. 3Com recommends that you print out this page for your records. Figure 39 Configuration Summary Screen Your Router is now configured and ready for - 3Com 3CRWDR300A-73-US | User Guide - Page 55
click on an item from the main menu, the corresponding screen will then appear in the center. Welcome Screen The Welcome screen shows the current software information. Status Figure 40 Welcome Screen - 3Com 3CRWDR300A-73-US | User Guide - Page 56
254. ■ Specify the IP address Lease Time. The default is One day. ■ Specify a local Domain Name. This field is optional. ■ Specify the IP address of 3Com NBX call processor. The Router will also provide a list of all client computers connected to the Router. LAN Settings Unit The LAN Settings unit - 3Com 3CRWDR300A-73-US | User Guide - Page 57
computer. 5 Specify the Local Domain Name for your network (this step is optional). 6 Enter the IP address of the NBX Call Processor in the 3Com NBX Call Processor field (this step is optional). 7 Check all of your settings, and then click Apply. DHCP Clients List The DHCP Clients List provides - 3Com 3CRWDR300A-73-US | User Guide - Page 58
56 CHAPTER 5: CONFIGURING THE ROUTER ■ Host Name - The client machine's host name, if configured. ■ MAC Address - The Media Access Control (MAC) address of the client's network card. ■ Client Type - Whether the client is connected to the Router by wired or wireless connection. ■ Check the Fix - 3Com 3CRWDR300A-73-US | User Guide - Page 59
Wireless Settings 57 Wireless Settings The Wireless Settings screens allow you to configure the settings for the wireless connections. You can enable or disable the wireless connection for your LAN. When disabled, no wireless PCs can gain access to either the Internet or other PCs on your wired or - 3Com 3CRWDR300A-73-US | User Guide - Page 60
computer can select a network. If you disable this SSID broadcast function, you can block this random search, and set the computer's SSID to a specific network (for example, WLAN). This increases network security. If you decide to disable SSID Broadcast, ensure that you know the name of your network - 3Com 3CRWDR300A-73-US | User Guide - Page 61
, or 11b and 11g mixed, select 20 MHz. 8 Select to turn on/off the Protected Mode function. As part of the 802.11g & 802.11n specification, Protected mode ensures proper operation of 802.11g & 802.11n clients and access points when there is heavy 802.11b traffic in the operating environment - 3Com 3CRWDR300A-73-US | User Guide - Page 62
60 CHAPTER 5: CONFIGURING THE ROUTER Encryption This feature prevents any non-authorized party from reading or changing your data over the wireless network. Figure 45 Encryption Screen Select the wireless security mode that you want to use from the drop-down menu, and click Apply. There are five - 3Com 3CRWDR300A-73-US | User Guide - Page 63
setup on your Router and wireless client devices to use WEP. Note that 3Com recommends using WPA/WPA2 to secure your wireless connection. Figure 46 64-bit WEP Screen To setup 64-bit WEP: 1 You can enter the 64-bit WEP key manually: ■ enter the WEP key as 5 pairs of hex digits (0-9, A-F). Or you can - 3Com 3CRWDR300A-73-US | User Guide - Page 64
up on your Router and wireless client devices to use WEP. Note that 3Com recommends using WPA/WPA2 to secure your wireless connection. Figure 47 128-bit WEP Screen To setup 128-bit WEP: 1 You can enter the 128-bit WEP key manually: ■ enter your WEP key as 13 pairs of hex digits (0-9, A-F). Or you - 3Com 3CRWDR300A-73-US | User Guide - Page 65
(no server) Screen 1 Select WPA-PSK (no server) from the WPA drop-down menu. 2 Select WPA mode from the drop-down menu, three modes are supported: WPA, WPA2, and Mixed mode. 3 Select Encryption technique from the drop-down menu, four options are available: TKIP, AES, Auto for WPA AES for WPA2 - 3Com 3CRWDR300A-73-US | User Guide - Page 66
Server) Screen 1 Select WPA with RADIUS server from the Security Mode drop-down menu. 2 Select WPA mode from the drop-down menu, three modes are supported: WPA, WPA2, and Mixed mode. 3 Select Encryption technique from the drop-down menu, four options are available: TKIP, AES, Auto for WPA AES for - 3Com 3CRWDR300A-73-US | User Guide - Page 67
Wireless Settings 65 WPS Wi-Fi Protected Setup (WPS) integrates the new WLAN clients into your wireless network easily. You can enable this function by entering the PIN code via the web UI page or by pressing the WPS button on the rear side of the device. Figure 50 WPS Screen Two methods to - 3Com 3CRWDR300A-73-US | User Guide - Page 68
-PBC 1 Press the WPS button located on the rear of the Router. Note that this setup process will only be active for 2 minutes. Follow the instruction of your WLAN NIC to set up the WPS. The WPS LED shows the status of the WPS function. It has a number of modes to - 3Com 3CRWDR300A-73-US | User Guide - Page 69
Wireless Settings 67 Connection Control This feature is used to filter the clients based on their MAC addresses. Using this function, you can limit the access right of the wireless clients to this Router. Check the Enable MAC Address Filtering checkbox, the Connection Control screen will appear. - 3Com 3CRWDR300A-73-US | User Guide - Page 70
the list of all wireless clients that are connected to the Router. Figure 52 Client List Screen Click Refresh to update the list. WMM Wireless Multimedia (WMM) mode, which supports devices that meet the 802.11E QBSS standard. WMM uses traffic priority based on the four ACs; Voice, Video, Best - 3Com 3CRWDR300A-73-US | User Guide - Page 71
, best effort, and background. These categories correspond to traffic priority levels and are mapped to IEEE 802.1D priority tags. The direct mapping of the four ACs to 802.1D priorities is specifically intended to facilitate inter operability with other wired network QoS policies. While the four - 3Com 3CRWDR300A-73-US | User Guide - Page 72
70 CHAPTER 5: CONFIGURING THE ROUTER CWMin (Minimum Contention Window) - The initial upper limit of the random backoff wait time before wireless medium access can be attempted. The initial wait time is a random value between zero and the CWMin value. Specify the CWMin value in the range 0-15 - 3Com 3CRWDR300A-73-US | User Guide - Page 73
Wireless Settings 71 WDS The Router supports WDS (Wireless Distribution System). WDS enables one or more Access Points to rebroadcast received signals to extend range and reach, though this can affect the - 3Com 3CRWDR300A-73-US | User Guide - Page 74
to the AP MAC Address table, and click Apply. Here is an example of how to setup two units of 3Com Router over WDS. Note that when setting up two units of 3Com Router, you should disable the DHCP function on one of the units. Setting of the first Router: ■ Set the - 3Com 3CRWDR300A-73-US | User Guide - Page 75
Figure 56 First Router Add WDS Screen Wireless Settings 73 Access the Web UI of the second Router, repeat the above steps to add the first Router to the WDS table (see Figure 57). Figure 57 Second Router Add WDS Screen - 3Com 3CRWDR300A-73-US | User Guide - Page 76
you to configure detailed settings for your wireless connection. Please note that you should not change this settings unless you are an expert user. There are six parameters that you can configure: Figure 58 Wireless Advanced Setting Screen ■ Beacon Interval: this represents the amount of time - 3Com 3CRWDR300A-73-US | User Guide - Page 77
Wireless Settings 75 ■ AP Isolation Mode: AP Isolation is a function to prevent wireless clients connected with the device from communicating with one another. When enabled, this creates a separate virtual network for your wireless network, each of your wireless client will be in its own virtual - 3Com 3CRWDR300A-73-US | User Guide - Page 78
76 CHAPTER 5: CONFIGURING THE ROUTER Internet Settings You can configure the settings for your WAN port connection. ATM PVC This feature is used to configure the parameters for your Internet connection. The information necessary to complete these screens should be obtained from your ISP. Check - 3Com 3CRWDR300A-73-US | User Guide - Page 79
Internet Settings 77 Disable Selecting this option means that you do not want your Router to connect to the Internet. Figure 60 Disable Internet Connection Screen PPPoE PPP over Ethernet, provides routing for multiple PCs, this mode is often used for the DSL connection. To configure this function - 3Com 3CRWDR300A-73-US | User Guide - Page 80
address and Subnet mask information. 3 Enter the user name assigned to you by your ISP in or manual from the Connect type drop-down menu. If you have a flat rate service charge for Do not make changes to this setting, unless your ISP specifically requires a different setting other than 1454. 7 IPCP - 3Com 3CRWDR300A-73-US | User Guide - Page 81
delay and delay variation, such as voice and video applications. The consistent availability of a fixed quantity of bandwidth is considered appropriate for CBR service. ■ VBR (variable bit rate): QoS class defined by the ATM Forum for ATM networks. VBR is subdivided into a real time (RT) class and - 3Com 3CRWDR300A-73-US | User Guide - Page 82
the IP address and Subnet mask information. 3 Enter the user name assigned to you by your ISP in the Username connected, auto, or manual from the Connect type drop-down menu. If you have a flat rate service charge for Internet connection, specifically requires a different setting other than 1454. - 3Com 3CRWDR300A-73-US | User Guide - Page 83
LLC. This information should be provided by your ISP. 12 QoS Class: select CBR, UBR or VBR. ■ CBR (constant bit rate): the CBR service class is intended for real-time applications, for example, those requiring tightly constrained delay and delay variation, such as voice and video applications. The - 3Com 3CRWDR300A-73-US | User Guide - Page 84
Mode If your ISP limits access to the Internet to specific computers, this means that traffic to/from these computers only Class: select CBR, UBR or VBR. ■ CBR (constant bit rate): the CBR service class is intended for real-time applications, for example, those requiring tightly constrained delay - 3Com 3CRWDR300A-73-US | User Guide - Page 85
timing relationship between samples, but that still need a guaranteed QoS. Compare with ABR, CBR, and UBR. ■ UBR (unspecified bit rate): the UBR service class is intended for delay-tolerant or non-real-time applications, for example, those which do not require tightly constrained delay and delay - 3Com 3CRWDR300A-73-US | User Guide - Page 86
84 CHAPTER 5: CONFIGURING THE ROUTER Routing Mode over ATM RFC1483/2684 routed encapsulation in routing mode, it carries IP datagrams directly over ATM. DHCP client function can also be enabled to obtain an IP address dynamically. Figure 64 Routing Mode over ATM Screen 1 Select Routing mode over ATM - 3Com 3CRWDR300A-73-US | User Guide - Page 87
delay and delay variation, such as voice and video applications. The consistent availability of a fixed quantity of bandwidth is considered appropriate for CBR service. ■ VBR (variable bit rate): QoS class defined by the ATM Forum for ATM networks. VBR is subdivided into a real time (RT) class and - 3Com 3CRWDR300A-73-US | User Guide - Page 88
86 CHAPTER 5: CONFIGURING THE ROUTER Dynamic/Fixed IP in 1483 Bridge Mode Dynamic/Fixed IP in 1483 Bridge Mode uses the same encapsulation as 1483 Bridging but with bridging function disabled. DHCP client function can also be enabled to obtain an IP address dynamically. Figure 65 Dynamic/Fixed IP in - 3Com 3CRWDR300A-73-US | User Guide - Page 89
This information should be provided to you by your ISP. 10 QoS Class: select CBR, UBR or VBR. ■ CBR (constant bit rate): the CBR service class is intended for real-time applications, for example, those requiring tightly constrained delay and delay variation, such as voice and video applications. The - 3Com 3CRWDR300A-73-US | User Guide - Page 90
based on IP addresses. Every time you use a domain name, a DNS service must translate the name into the corresponding IP address. For example, the are using a static IP connection type, you may need to enter a specific DNS address and secondary DNS address for your connection to work properly. If - 3Com 3CRWDR300A-73-US | User Guide - Page 91
Internet Settings 89 Clone MAC address To configure the hostname and Clone MAC Address information for your Router, select Internet Settings, then go to the Clone MAC address tab. The Hostname and MAC Address screen displays. Figure 67 Hostname and Clone MAC Address Screen 1 Some ISPs require a host - 3Com 3CRWDR300A-73-US | User Guide - Page 92
hacker attacks including Ping of Death (PoD) and Denial of Service (DoS) attacks. You can turn the firewall function off your network completely vulnerable to hacker attacks, but 3Com recommends that you leave the firewall enabled whenever specific port is requested. Figure 68 Firewall Screen - 3Com 3CRWDR300A-73-US | User Guide - Page 93
activity occurs, an alerting email will be sent out to you. Enter the following information to receive the email: ■ Your E-mail Address ■ SMTP Server Address ■ User name ■ Password - 3Com 3CRWDR300A-73-US | User Guide - Page 94
option to configure additional parameters for the firewall. ■ Fragmentation half-open wait - Configures the number of seconds that a packet state for use by another packet. ■ TCP SYN wait - Defines how long the software will wait for a TCP session to synchronize before dropping the session. ■ TCP - 3Com 3CRWDR300A-73-US | User Guide - Page 95
sessions. ■ Total incomplete TCP/UDP sessions LOW - Defines the rate of new unestablished sessions that will cause the software to stop deleting half-open sessions. ■ Incomplete TCP/UDP sessions (per min) HIGH - Maximum number of allowed incomplete TCP/UDP sessions per minute. ■ Incomplete TCP/UDP - 3Com 3CRWDR300A-73-US | User Guide - Page 96
Applications (port triggering) let you choose specific ports to be open for specific applications to work properly with the Network which ports need to be configured. You can manually enter the port information into the Router. To manually enter the port information: 1 Specify the trigger port - 3Com 3CRWDR300A-73-US | User Guide - Page 97
external (Internet) calls for services such as a web server need to configure the Virtual Server function for a specific application, you will need to contact the application drop-down menu, you can manually add the virtual server to the table. To manually configure your virtual servers: 1 Enter - 3Com 3CRWDR300A-73-US | User Guide - Page 98
application properly from behind the firewall, you can open the client up to unrestricted two-way Internet access. This may be necessary if the NAT feature is causing problems with an application such as a game or video conferencing application. Figure 73 DMZ Screen Use this feature on a temporary - 3Com 3CRWDR300A-73-US | User Guide - Page 99
IP Address to 0.0.0.0. In the default setting, (line 1) refer to Figure 73, Public IP address is set to 0.0.0.0 and it is automatically transformed by to restrict access to the Internet, email or other network services at specific days and times. Restriction can be set for a single computer - 3Com 3CRWDR300A-73-US | User Guide - Page 100
5: CONFIGURING THE ROUTER To edit or delete specific existing filtering rules, click on Edit or Delete particular service, check the appropriate Blocking checkbox. If the service to be restricted is not listed here, you can enter a custom range of ports at the bottom of the screen, under User - 3Com 3CRWDR300A-73-US | User Guide - Page 101
Firewall 99 Schedule Rule The Router can be configured to restrict access to the Internet, email or other network services at specific days and times. Define the time in this screen, and define the rules in the PC Privileges screen (see page 97). Figure 76 Schedule Rule - 3Com 3CRWDR300A-73-US | User Guide - Page 102
100 CHAPTER 5: CONFIGURING THE ROUTER URL Filter To configure the URL filter feature, use the table on the URL Filter screen to specify the Web sites (www.somesite.com) and/or keywords you want to filter on your network. For example, entering a keyword of xxx would block/allow access to any URL - 3Com 3CRWDR300A-73-US | User Guide - Page 103
Advanced The Advanced section allows you to set additional parameter details for the Router. You can configure: ■ Security ■ VLAN ■ Static Routes ■ RIP ■ DDNS ■ SNMP ■ Syslog ■ Proxy Arp ■ QoS Settings Security Use the Security screen to set the advanced security settings for the Router. Figure 79 - 3Com 3CRWDR300A-73-US | User Guide - Page 104
This function should only be disabled by advanced users, and if your ISP assigns you multiple IP problems associated with passing IPsec traffic through NAT Routers. For NAT-T to work, both ends of the connection need to support in a specific way to operate properly. This usually requires opening TCP - 3Com 3CRWDR300A-73-US | User Guide - Page 105
the Router. ■ Select Enable administration from a whole Subnet Internet Host, and enter the IP address and subnet mask, to allow PCs from that specific subnet group to use the remote administration. ■ Select Enable administration from any Internet Host, this allows any computer to access the Router - 3Com 3CRWDR300A-73-US | User Guide - Page 106
: With traditional IP networks, network administrators spend much of their time dealing with moves and changes. If users move to a different IP subnet, the IP addresses of each end-station must be updated manually. With a VLAN setup, if an end-station in VLAN 1 is moved to a port in another part of - 3Com 3CRWDR300A-73-US | User Guide - Page 107
Figure 80 VLAN Screen Advanced 105 Click Add VLAN to create a new entry (see Figure 81). Figure 81 VLAN Profile Screen ■ Enter a description for your VLAN in the Description field. ■ Enter the IP Address and subnet mask in the corresponding fields. ■ Select to set the NAT Domain as public or - 3Com 3CRWDR300A-73-US | User Guide - Page 108
routes in this screen. You can setup a static route that will get all traffic with destination to business network to go through VPN tunnel and the rest outside of the VPN tunnel. Figure 82 Static Routes Screen To add a static route entry to the table, click Add (see Figure 83). To change - 3Com 3CRWDR300A-73-US | User Guide - Page 109
Advanced 107 ■ Gateway - the Router used to route data to the network specified by the network address. ■ Interface - select the interface. Note that you should only configure either the Gateway information or select the Interface. After you have finished making changes to the table, click Apply. - 3Com 3CRWDR300A-73-US | User Guide - Page 110
will transmit RIP update information to other RIP-enabled devices. ■ Silent - RIP is enabled, however the Router only receives RIP update messages, it will not transmit any messages itself. 4 In the Version field, select 1 or 2. 3Com recommends that you - 3Com 3CRWDR300A-73-US | User Guide - Page 111
Advanced 109 5 Use the Poison Reverse drop-down menu to enable or disable Poison Reverse on the Router. Enabling Poison Reverse on your Router allows it to indicate to other RIP-enabled devices that they have both routes that point to each other, preventing data loops. 6 Use the Authentication - 3Com 3CRWDR300A-73-US | User Guide - Page 112
to map a static domain name to a dynamic IP address. This function allows you to create a hostname that points to your dynamic IP or static IP address or URL. Before you set up DDNS, you must obtain an account, password or key and static domain name from your DDNS provider. The Router supports five - 3Com 3CRWDR300A-73-US | User Guide - Page 113
Advanced 111 SNMP SNMP (Simple Network Management Protocol) allows remote management of your Router by a PC that has an SNMP management agent installed. Check the Enable SNMP box, the table will appear. Figure 87 SNMP Screen Enter the System Contact, System Name, and System Location information. To - 3Com 3CRWDR300A-73-US | User Guide - Page 114
the Router to send status messages to the SNMP management agent if a problem occurs on the network. To configure SNMP traps: 1 In the IP agent supports. The Router supports V1 and V2c trap messaging. Syslog Using third party syslog software, this Syslog Server tool will automatically download the - 3Com 3CRWDR300A-73-US | User Guide - Page 115
Advanced 113 Proxy ARP Proxy ARP is the technique in which one host, usually a Router, answers ARP requests intended for another machine. By "faking" its identity, the Router accepts responsibility for routing packets to the "real" or intended destination. This heightens the security for your - 3Com 3CRWDR300A-73-US | User Guide - Page 116
, such as VoIP, gaming, and VPN. This QoS function allows you to classify traffic of applications and provides them with differentiated services (Diffserv). Figure 90 QoS Settings Screen Click Apply. Note that once QoS is enabled, a new tab, Traffic mapping, will become visible, see Figure 91. - 3Com 3CRWDR300A-73-US | User Guide - Page 117
. Figure 92 Edit Traffic Class Screen 1 Define the Rule name. 2 Select the traffic type from drop-down menu. 3 Select the forwarding group from the Map to Forwarding Group drop-down menu. 4 Select the value from the Remark DSCP as drop-down menu. 5 Click the ADVANCED CONFIG button, a more detailed - 3Com 3CRWDR300A-73-US | User Guide - Page 118
116 CHAPTER 5: CONFIGURING THE ROUTER Figure 93 Detailed Edit Traffic Class Screen Enter the information, then click Apply to make the settings to take effect. - 3Com 3CRWDR300A-73-US | User Guide - Page 119
) feature that provides a secure link between remote users and the corporate network by establishing an authenticated and encrypted tunnel for passing secure data over the Internet. The Router supports three modes of VPN operation: ■ IPSec (IP Security) - provides IP network-layer encryption. IPSec - 3Com 3CRWDR300A-73-US | User Guide - Page 120
118 CHAPTER 5: CONFIGURING THE ROUTER Figure 94 VPN Screen 1 Check the Enable IPSec box, configuration details screen appears. Figure 95 Enable IPSec Screen 2 Enter the Local ID Name of your VPN. (the default is 3ComVPN) 3 Click Add to create a new entry, see Figure 96. - 3Com 3CRWDR300A-73-US | User Guide - Page 121
name for the tunnel in the Tunnel Name field. 3 Remote VPN Gateway - select IP address, and then enter the IP address either IP_IPV4_ADDR or ID_USER_FQDN. This information must be entered identically on the IPSec software installed on the client's machine. If IP_IPV4_ADDR is selected, then enter the - 3Com 3CRWDR300A-73-US | User Guide - Page 122
120 CHAPTER 5: CONFIGURING THE ROUTER 5 Select the Local Party ID, and then enter the ID, Network Address and Subnet Mask of the Local Secure Group. The network address of the local secure group is usually the network address of the local network. 6 From the Key Management drop-down menu, select - 3Com 3CRWDR300A-73-US | User Guide - Page 123
VPN 121 Check the Enable L2TP box, configuration details screen appears, see Figure 97. Figure 97 Enable L2TP Screen 1 Enter the Pre- Pool for L2TP clients, enter the start/end address. 3 Click Add to create a new entry, see Figure 98. Figure 98 Add New VPN Tunnel Parameter L2TP over IPSec Screen - 3Com 3CRWDR300A-73-US | User Guide - Page 124
CHAPTER 5: CONFIGURING THE ROUTER 1 Set the Tunnel Type to L2TP over IPSec. 2 Enter a descriptive name for the tunnel in the Tunnel Name field. 3 Enter the User name and Password. 4 Enter the Idle Timeout value. 5 Set the L2TP Type Setting to L2TP Server, or L2TP Client. ■ if you set the type as - 3Com 3CRWDR300A-73-US | User Guide - Page 125
Figure 100 Add new PPTP VPN Tunnel Screen VPN 123 1 Set the Tunnel Type to PPTP. 2 Enter a descriptive name for the tunnel in the Tunnel Name field. 3 Enter the User name and Password. 4 Enter the Idle Timeout value. 5 Set the PPTP Type Setting to PPTP Server, or PPTP Client. ■ if you set the type - 3Com 3CRWDR300A-73-US | User Guide - Page 126
124 CHAPTER 5: CONFIGURING THE ROUTER System Tools These screens allow you to manage different parameters of the Router and perform certain administrative functions. Restart Router Sometimes it may be necessary to restart (or reboot) the Router. Restarting the Router from this screen will not - 3Com 3CRWDR300A-73-US | User Guide - Page 127
all of your current configuration will be lost. Upgrade From time to time 3Com may release new versions of the Router's firmware. Firmware updates contain improvements and fixes to problems that may have existed. Figure 103 Upgrade Screen Please download the firmware file to your PC first, and then - 3Com 3CRWDR300A-73-US | User Guide - Page 128
you reside in. If you reside in an area that observes Daylight Saving, then check the Enable Daylight Savings box. The system clock may not update immediately. Allow at least 15 minutes for the Router to contact the time servers on the Internet and get a response. You cannot set the clock - 3Com 3CRWDR300A-73-US | User Guide - Page 129
System Tools 127 Ping The ping tool is used to test if the network is working properly. Figure 105 Ping Screen 1 Enter the IP address or domain name in the IP Address or Domain Name field, and click Ping. 2 Select from the Number of times to Ping drop-down menu. 3 The Router keeps a log of the ping - 3Com 3CRWDR300A-73-US | User Guide - Page 130
destination. It can help you determine why your connections to a given server might be poor, and can often help you figure out where exactly the problem is. It also shows you how systems are connected to each other, letting you see how your ISP connects to the Internet as well as - 3Com 3CRWDR300A-73-US | User Guide - Page 131
System Tools 129 DNS Lookup DNS Lookup is the process of resolving an IP address (i.e. 192.168.11.137) to a host name (i.e. xxxcompany.net). Figure 107 DNS Lookup Screen 1 Enter the IP address or domain name in the IP Address or Domain Name field, and click DNS lookup. 2 The Router keeps a log of - 3Com 3CRWDR300A-73-US | User Guide - Page 132
130 CHAPTER 5: CONFIGURING THE ROUTER Status and Logs You can use the Status Screen to view version numbers for your Router's software and hardware and check the status of connections to Internet, LAN and WLAN interfaces. Status This screen shows Router status and statistics. ■ Release - use - 3Com 3CRWDR300A-73-US | User Guide - Page 133
Status and Logs 131 ADSL Status This screen shows ADSL modem status and statistics. Figure 110 ADSL Status Screen ATM PVC Status This screen shows ATM PVC status and statistics. ■ Click Disconnect to disconnect from your ISP. ■ Click Connect to make a connection with your ISP. Figure 111 ATM PVC - 3Com 3CRWDR300A-73-US | User Guide - Page 134
a file name and location, and then click OK. ■ Click Clear to clear the log (note that all current entries will be erased). ■ Click Refresh to update the record. - 3Com 3CRWDR300A-73-US | User Guide - Page 135
Status and Logs 133 Traffic Statistics This screen shows the traffic statistics. Use the Refresh button to update the information. Note that the current implementation only shows traffic statistics per forwarding group. Hence if QoS is not enabled, this screen will always show - 3Com 3CRWDR300A-73-US | User Guide - Page 136
CHAPTER 5: CONFIGURING THE ROUTER Support/Feedback You can use the Support/Feedback screen to obtain support and help, and also provide feedback to 3Com. Support Figure 115 Support Screen This screen shows support information. Feedback To provide feedback to 3Com, please click Provide Feedback - 3Com 3CRWDR300A-73-US | User Guide - Page 137
damaged cable, or incorrect configuration. If this section does not solve your problem, contact your supplier for information on what to do next. Perform these actions first: ■ Ensure all network equipment is powered on. ■ Power each piece of network equipment off, wait about five seconds and then - 3Com 3CRWDR300A-73-US | User Guide - Page 138
136 CHAPTER 6: TROUBLESHOOTING Browsing to the Router Configuration Screens If you have connected your Router and computers together but cannot browse to the Router configuration screens, check the - 3Com 3CRWDR300A-73-US | User Guide - Page 139
support. 1 Your ISP may have upgraded their DSLAM equipment: Verify your 3Com Router has the latest software/firmware available installed. Upgrades are found at http://www.3Com.com/downloads, if that does not help, contact your ISP to see if there has been any updates or upgrades on their services - 3Com 3CRWDR300A-73-US | User Guide - Page 140
required by your Service Provider ■ ADSL Data (4 on fig3) - LED on indicates the Router has logged on to the ADSL service using the user name and would be convenient. 1 Power off the Router. 2 Disconnect all your computers and the telephone line from the Router. 3 Re-apply power to the Router, and - 3Com 3CRWDR300A-73-US | User Guide - Page 141
Clients are using the same SSID or Service Area Name as the Router. The SSID Router. The Router cannot simultaneously support WPA and WEP encryption. ■ this resolves the problem consider relocating the wireless generally a licence free band for low power applications, and you may have other devices - 3Com 3CRWDR300A-73-US | User Guide - Page 142
the instructions below to upload a new copy of the system software to a Router unit in this state. Ensure that one of your computers has a copy of the new software image file stored on its hard disk or available on CD-ROM. Check on www.3com.com for the latest version firmware. 1 Remove power from - 3Com 3CRWDR300A-73-US | User Guide - Page 143
is turned on if applicable. ■ Ensure you are using only the 3Com power adapter supplied with the Router. If there is still no power, contact 3Com Technical Support for assistance. Caution: Only use the power adapter supplied with the Router or a replacement 3Com power adapter. Do not use any other - 3Com 3CRWDR300A-73-US | User Guide - Page 144
142 CHAPTER 6: TROUBLESHOOTING For reference, the part number for the power adapter supplied for your region is: 3Com Number Region 3C15VHUS US and Canada 3C15VHUK UK 3C15VHME Europe and Middle East 3C15VHAA Australasia (except Japan and Korea) 3C15VHSA South Africa 3C15VHRA Argentina - 3Com 3CRWDR300A-73-US | User Guide - Page 145
the Router support? Up to a maximum number of 253 total users on the LAN are supported. Please note that the maximum number of users supported will be .3com.com/ Does the Router support virtual private networks (VPNs)? The Router supports both VPN passthrough and VPN initiation/termination. VPN - 3Com 3CRWDR300A-73-US | User Guide - Page 146
144 CHAPTER 6: TROUBLESHOOTING - 3Com 3CRWDR300A-73-US | User Guide - Page 147
widely known and is a combination of two of the protocols (IP and TCP) working together. TCP/IP is an internationally adopted and supported networking standard that provides connectivity between equipment from many vendors over a wide variety of networking technologies. Managing the Router over the - 3Com 3CRWDR300A-73-US | User Guide - Page 148
, all devices on the network must have: ■ The same sub-network address. ■ The same subnet mask. The only value that will be different is the specific host device number. This value must always be unique. An example IP address is '192.168.100.8'. However, the size of the network determines the - 3Com 3CRWDR300A-73-US | User Guide - Page 149
will never be duplicated for devices on the network. DHCP is particularly useful for networks with large numbers of users on them. Static Addressing You must enter an IP Address and the subnet mask manually on every device. Using a static IP and subnet mask means the address is permanently fixed. - 3Com 3CRWDR300A-73-US | User Guide - Page 150
.255.0.0). If two devices allocate themselves the same address, the conflict is detected and one of the devices allocates itself a new address. Automatic IP addressing support was introduced by Microsoft in the Windows 98 operating system and is also - 3Com 3CRWDR300A-73-US | User Guide - Page 151
This section lists the technical specifications for the 3Com Wireless 11n ADSL Firewall Router. 3Com Wireless 11n Cable/DSL Firewall Router Interfaces ADSL connection LAN connection - four 10 Mbps/100 Mbps dual speed Ethernet ports (10BASE-T/100BASE-TX) Antenna Two - 3Com 3CRWDR300A-73-US | User Guide - Page 152
150 APPENDIX B: TECHNICAL SPECIFICATIONS Standard IEEE 802.11g, Direct Sequence Spread WPA/WPA2 Maximum clients: 128 E.I.R.P: 19.5 dBm Operating Temperature 0 °C to 40 °C (32 °F to 105 °F) Power 15V1A Max Humidity 0% to 90% (non-condensing) humidity Dimensions ■ Width = 178 mm (7.0 in.) ■ Depth - 3Com 3CRWDR300A-73-US | User Guide - Page 153
3Com Wireless 11n Cable/DSL Firewall Router 151 Standards Functional: ISO FCC Part68 *See Regulatory Notices for conditions of operation. System Requirements Operating Systems The Router will support the following Operating Systems: ■ Windows 98Se ■ Windows NT 4.0 ■ Windows ME ■ Windows 2000 - 3Com 3CRWDR300A-73-US | User Guide - Page 154
Ethernet Performance The Router complies to the IEEE 802.3i, u and x specifications. Cable Specifications The Router supports the following cable types and maximum lengths: ■ Category 5 (Fast Ethernet or Dual Speed Ethernet) Twisted Pair - shielded and unshielded cable types. ■ Maximum - 3Com 3CRWDR300A-73-US | User Guide - Page 155
, only use the power adapter that is supplied with the unit. WARNING user-replaceable fuses or user-serviceable parts inside the Router. If you have a physical problem with the unit that cannot be solved with problem solving actions in this guide, contact your supplier. WARNING: Disconnect the power - 3Com 3CRWDR300A-73-US | User Guide - Page 156
154 APPENDIX C: SAFETY INFORMATION WARNING: RJ-45 ports. These are shielded RJ-45 data sockets. They cannot be used as telephone sockets. Only connect RJ-45 data connectors to these sockets. Wichtige Sicherheitshinweise VORSICHT: Warnhinweise enthalten Anweisungen, die Sie zu Ihrer eigenen - 3Com 3CRWDR300A-73-US | User Guide - Page 157
importantes de sécurité VORSICHT: Es sind keine von dem Benutzer zu ersetzende oder zu wartende Teile in dem Gerät vorhanden. Wenn Sie ein Problem mit dem Router haben, das nicht mittels der Fehleranalyse in dieser Anleitung behoben werden kann, setzen Sie sich mit Ihrem Lieferanten in Verbindung - 3Com 3CRWDR300A-73-US | User Guide - Page 158
problème physique avec le moyeu qui ne peut pas être résolu avec les actions de la résolution des problèmes dans ce guide, contacter votre fournisseur. AVERTISSEMENT: Débranchez l'adaptateur électrique avant de retirer cet appareil. AVERTISSEMENT: Ports RJ-45. Il s'agit de prises femelles blindées - 3Com 3CRWDR300A-73-US | User Guide - Page 159
D END USER SOFTWARE LICENSE AGREEMENT 3Com Corporation END USER SOFTWARE LICENSE AGREEMENT YOU SHOULD CAREFULLY READ THE FOLLOWING TERMS AND CONDITIONS BEFORE DOWNLOADING, INSTALLING AND USING THIS PRODUCT, THE USE OF WHICH IS LICENSED BY 3COM CORPORATION ("3COM") TO ITS CUSTOMERS FOR THEIR USE - 3Com 3CRWDR300A-73-US | User Guide - Page 160
or electronic form, accompanying the Software; however, this End User Software License Agreement amends such Limited Warranty Card or product manual as follows: 3Com's warranty and warranty disclaimers for the materials runs from 3Com to the purchasing Internet Service Provider only (not the end - 3Com 3CRWDR300A-73-US | User Guide - Page 161
159 - 3Com 3CRWDR300A-73-US | User Guide - Page 162
your product at: http://eSupport.3com.com/ 3Com eSupport services are based on accounts that are created or that you are authorized to access. Solve Problems Online 3Com offers the following support tool: ■ 3Com Knowledgebase - Helps you to troubleshoot 3Com products. This query-based interactive - 3Com 3CRWDR300A-73-US | User Guide - Page 163
product. Separately orderable software releases and licenses are listed in the 3Com Price List and are available for purchase from your 3Com reseller. Contact Us 3Com offers telephone, internet, and e-mail access to technical support and repair services. To access these services for your region - 3Com 3CRWDR300A-73-US | User Guide - Page 164
must apply for a user name and password. Telephone numbers are correct at the time of publication. Find a current directory of 3Com resources by region at: http://csoweb4.3com.com/contactus/ Country Telephone Number Country Asia, Pacific Rim - Telephone Technical Support and Repair Australia - 3Com 3CRWDR300A-73-US | User Guide - Page 165
speakers, enter the URL: http://lat.3com.com/lat/support/form.html ■ Portuguese speakers, enter the URL: http://lat.3com.com/br/support/form.html ■ English speakers in Latin America, send e-mail to: [email protected] US and Canada - Telephone Technical Support and Repair All locations: All - 3Com 3CRWDR300A-73-US | User Guide - Page 166
164 APPENDIX E: OBTAINING SUPPORT FOR YOUR 3COM PRODUCTS - 3Com 3CRWDR300A-73-US | User Guide - Page 167
11 Mbps. The standard provides for 1, 2, 5.5 and 11 Mbps data rates. The rates will switch automatically depending on range and environment. 802.11g The IEEE specification for wireless Ethernet which allows speeds of up to 54 Mbps. The standard provides for 6, 12, 24, 36, 48 and 54 Mbps data rates - 3Com 3CRWDR300A-73-US | User Guide - Page 168
-TX) and can transmit data up to speeds of 100 Mbps. Category 5 cabling is better to use for network cabling than Category 3, because it supports both Ethernet (10 Mbps) and Fast Ethernet (100 Mbps) speeds. Channel Similar to any radio device, the Wireless Cable/DSL router allows you to choose - 3Com 3CRWDR300A-73-US | User Guide - Page 169
software that assigns IP addresses to workstations on a network. These assignments are made by the DHCP server software requested (as in typing "3com.com" into your Internet browser), the user is sent to the a more powerful level of encryption than 40/64 bit. ESSID Extended Service Set Identifier. - 3Com 3CRWDR300A-73-US | User Guide - Page 170
In the network management area, this group is responsible for the development of the SNMP protocol. Infrastructure mode Infrastructure mode is the wireless configuration supported by the Router. You will need to ensure all of your clients are set up to use infrastructure mode in order for them to - 3Com 3CRWDR300A-73-US | User Guide - Page 171
digital certificates for device authentication. When setting up an IPSec connection between two devices, make sure that they support the same encryption method. ISP Internet Service Provider. An ISP is a business that provides connectivity to the Internet for individuals and other businesses or - 3Com 3CRWDR300A-73-US | User Guide - Page 172
a network that is shared by multiple end stations. Servers provide end stations with access to shared network services such as computer files and printer queues. SSID Service Set Identifier. Some vendors of wireless products use SSID interchangeably with ESSID. Subnet Address An extension of the - 3Com 3CRWDR300A-73-US | User Guide - Page 173
the interconnection of networks. Originally a UNIX standard, TCP/IP is now supported on almost all platforms, and is the protocol of the Internet. TCP to automatically configure some, or all, of their settings and need less user configuration. URL Filter A URL Filter is a feature of a firewall that - 3Com 3CRWDR300A-73-US | User Guide - Page 174
term used to describe a desktop or mobile PC that is wirelessly connected to your wireless network. Wireless LAN Service Another term for ESSID (Extended Service Set Identifier). Area Wizard A Windows application that automates a procedure such as installation or configuration. WLAN Wireless Local - 3Com 3CRWDR300A-73-US | User Guide - Page 175
user serviceable components. Any unauthorized product changes or modifications will invalidate 3Com any other antenna or transmitter. US FEDERAL COMMUNICATIONS COMMISSION (FCC) EMC in accordance with the instructions, may cause harmful firmware-limited to channels 1 through 11. The user - 3Com 3CRWDR300A-73-US | User Guide - Page 176
. If you experience trouble with this telephone equipment, Please contact the following address and phone number for information on obtaining service or repairs. The telephone company may ask that you disconnect this equipment from the network until the problem has been corrected or until you are - 3Com 3CRWDR300A-73-US | User Guide - Page 177
in conjunction with any other antenna or transmitter. 2.4GHz operation of this product in Canada is firmware-limited to channels 1 through 11. This Class B digital apparatus complies with Canadian ICES-003. country in which the product is installed. Refer to 3CRWDR300A-73, 3CRWDR300B-73 User Guide. - 3Com 3CRWDR300A-73-US | User Guide - Page 178
tímto prohlašuje, ze tento RLAN device je ve shodě se základními pozadavky a dalšími příslušnými ustanoveními směrnice 1999/5/ES. Undertegnede 3Com Corporation erklærer herved, at følgende udstyr RLAN device overholder de væsentlige krav og øvrige relevante krav i direktiv 1999/5/EF. Hiermit erklärt - 3Com 3CRWDR300A-73-US | User Guide - Page 179
downloaded from the Product Support web page for the 3Com Wireless 11n ADSL Firewall Router at http://www.3Com.com. Also available at http://support.3com.com/doc/WL-603_EU_DOC.pdf caráter primário. This product is intended to be supplied by a UL listed power unit marked "Class 2" or 'LPS" rated 15V - 3Com 3CRWDR300A-73-US | User Guide - Page 180
178 - 3Com 3CRWDR300A-73-US | User Guide - Page 181
for Single PC Screen 53 Bridged Mode Configuration Screen 33 C Cable Specifications 91 Channels 111 Configuration Summary Screen 37 Connection Type Screen 29, 50 Conventions notice icons, About This Guide 8 text, About This Guide 8 D DDNS 70 DHCP 87 DHCP Clients List 42 DHCP server 25, 42 disabling - 3Com 3CRWDR300A-73-US | User Guide - Page 182
Remote Admin 68 Reset to Factory Default Screen 73 Reset to Factory Defaults 80 Restart Router Screen 73 RFC 1483 Bridged Mode 32, 53 RFC 1483 23, 25, 85 Technical specifications 89 standards 89 Time and Time Zone screen 76 TZO.com 70 U Universal Plug and Play 68 Upgrade Screen 74 URL Blocking
-
 1
1 -
 2
2 -
 3
3 -
 4
4 -
 5
5 -
 6
6 -
 7
7 -
8
-
9
-
10
-
11
-
12
-
13
-
14
-
15
-
16
-
17
-
18
-
19
-
20
-
21
-
22
-
23
-
24
-
25
-
26
-
27
-
28
-
29
-
30
-
31
-
32
-
33
-
34
-
35
-
36
-
37
-
38
-
39
-
40
-
41
-
42
-
43
-
44
-
45
-
46
-
47
-
48
-
49
-
50
-
51
-
52
-
53
-
54
-
55
-
56
-
57
-
58
-
59
-
60
-
61
-
62
-
63
-
64
-
65
-
66
-
67
-
68
-
69
-
70
-
71
-
72
-
73
-
74
-
75
-
76
-
77
-
78
-
79
-
80
-
81
-
82
-
83
-
84
-
85
-
86
-
87
-
88
-
89
-
90
-
91
-
92
-
93
-
94
-
95
-
96
-
97
-
98
-
99
-
100
-
101
-
102
-
103
-
104
-
105
-
106
-
107
-
108
-
109
-
110
-
111
-
112
-
113
-
114
-
115
-
116
-
117
-
118
-
119
-
120
-
121
-
122
-
123
-
124
-
125
-
126
-
127
-
128
-
129
-
130
-
131
-
132
-
133
-
134
-
135
-
136
-
137
-
138
-
139
-
140
-
141
-
142
-
143
-
144
-
145
-
146
-
147
-
148
-
149
-
150
-
151
-
152
-
153
-
154
-
155
-
156
-
157
-
158
-
159
-
160
-
161
-
162
-
163
-
164
-
165
-
166
-
167
-
168
-
169
-
170
-
171
-
172
-
173
-
174
-
175
-
176
-
177
-
178
-
179
-
180
-
181
-
182
 |
 |

Part No. 10016794 Rev AA
Published July 2008
Wireless 11n ADSL Firewall Router
User Guide
WL-603
3CRWDR300A-73
3CRWDR300B-73