ASRock 939S56-M RAID Installation Guide
ASRock 939S56-M Manual
 |
View all ASRock 939S56-M manuals
Add to My Manuals
Save this manual to your list of manuals |
ASRock 939S56-M manual content summary:
- ASRock 939S56-M | RAID Installation Guide - Page 1
Making An SATA Driver Diskette 3 2. Guide to RAID Configurations (RAID 0 / RAID 1 / JBOD 4 2.1 Introduction of RAID 4 2.2 RAID Configuration Precautions 5 2.3 RAID 0 Configuration 6 2.4 RAID 1 Configuration 13 2.5 JBOD Configuration 19 3. Guide to Windows 2000 / Windows XP Installation 23 - ASRock 939S56-M | RAID Installation Guide - Page 2
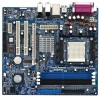
1.1 Serial ATA (SATA) Hard Disks Installation This motherboard adopts SiS 965L south bridge chipset that supports Serial ATA (SATA) hard disks. You may install SATA hard disks in this motherboard for internal storage devices. This section will guide you to install the SATA hard disks. STEP - ASRock 939S56-M | RAID Installation Guide - Page 3
Diskette If you want to install Windows 2000 or Windows XP on SATA HDDs, you will need to make an SATA driver diskette before you start the OS installation. How to make an SATA driver diskette? STEP 1: Insert the ASRock Support CD into your optical drive to boot your system. (Do NOT insert any - ASRock 939S56-M | RAID Installation Guide - Page 4
) 2.1 Introduction of RAID This motherboard adopts SiS 964 south bridge chipset that integrates RAID controller supporting RAID 0 / RAID 1 / JBOD function with two independent Serial ATA (SATA) channels. This section will introduce the basic knowledge of RAID, and the guide to configure RAID 0, RAID - ASRock 939S56-M | RAID Installation Guide - Page 5
Utility for Windows" are only available for Windows XP / Windows 2000. There is no RAID utility supporting Windows 98 SE and Windows ME. 2. "SiS SATA driver/utility/BIOS" may be updated occasionally. Please visit ASRock website for the latest driver update. ASRock website: http://www.asrock.com 5 - ASRock 939S56-M | RAID Installation Guide - Page 6
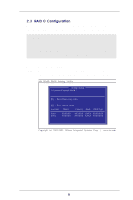
BIOS Setting Utility". NOTE In the following instruction, the term "Disk 1" refers to the SATA hard disk that you connect to "SATA1" connector on your motherboard; the term "Disk 2" refers to the SATA hard disk that you connect to "SATA2" connector on your motherboard. STEP 1: Boot-up your computer - ASRock 939S56-M | RAID Installation Guide - Page 7
XXXXXXX Copyright (c) 2003-2005. Silicon Integrated Systems Corp | www.sis.com STEP 5: Press and to select RAID 0. SiS RAID BIOS Setting Utility RAID Setup * Current Created Raid * RAID Type: JBOD RAID 0 RAID 1: 2 [Q] : Exit current menu Location Disk 1 Disk 2 Model - ASRock 939S56-M | RAID Installation Guide - Page 8
Create", the first selected disk will be the Source disk. SiS RAID BIOS Setting Utility RAID Setup * Current Created Raid * RAID 0 Auto Create Manual Create: 2 [Q] : Exit current menu Location Disk 1 Disk 2 Model XXXXXX XXXXXX Capacity Mode RAID Type XXXXXX XXXX XXXXXXX XXXXXX XXXX - ASRock 939S56-M | RAID Installation Guide - Page 9
to select disk, and press to confirm your selection. Please note that the disk you select first will be the SOURCE disk. SiS RAID BIOS Setting Utility RAID Setup * Current Created Raid * RAID 0 Use to select and press to confirm The disk you select first will be the SOURCE - ASRock 939S56-M | RAID Installation Guide - Page 10
, it will Create Stripe only. If you press and , it will split the data on source disk to RAID disks. SiS RAID BIOS Setting Utility RAID Setup * Current Created Raid * RAID 0 Split the SOURCE (Disk 1) data to RAID disks ? N [Q] : Exit current menu Location Disk 1 Disk 2 Model - ASRock 939S56-M | RAID Installation Guide - Page 11
escape the current menu. Then the following screen will appear. SiS RAID BIOS Setting Utility RAID Setup * Current Created Raid * RAID 0: Disk1 Disk com STEP 11: Press again to escape the setup Utility. SiS RAID BIOS Setting Utility RAID Setup * Current Created Raid * RAID 0: Disk1 Disk 2 - ASRock 939S56-M | RAID Installation Guide - Page 12
: Then you will see the confirming message: "Do You Want to Save Changes? N" Please press and to save changes. SiS RAID BIOS Setting Utility Disk Status RAID Setup * Current Created Raid * RAID 0: Disk1 Disk 2 [R] : E Do You Want To Save changes ? N [Q] : E Pri_Master XXXXXX XXXXXX - ASRock 939S56-M | RAID Installation Guide - Page 13
; the term "Disk 2" refers to the SATA hard disk that you connect to "SATA2" connector on your motherboard. STEP 1: Boot-up your computer. STEP 2: Press key to enter "SiS RAID BIOS Setting Utility" STEP 3: Press key to enter RAID setup utility and start to create array. SiS RAID - ASRock 939S56-M | RAID Installation Guide - Page 14
XXXXXXX Copyright (c) 2003-2005. Silicon Integrated Systems Corp | www.sis.com STEP 5: Press and to select RAID 1. SiS RAID BIOS Setting Utility RAID Setup * Current Created Raid * RAID Type: JBOD RAID 0 RAID 1: 3 [Q] : Exit current menu Location Disk 1 Disk 2 Model - ASRock 939S56-M | RAID Installation Guide - Page 15
disk will be the SOURCE disk, and the next selected disk will be the MIRROR disk. SiS RAID BIOS Setting Utility RAID Setup * Current Created Raid * RAID 1 Auto Create Manual Create: 2 [Q] : Exit current menu Location Disk 1 Disk 2 Model XXXXXX XXXXXX Capacity Mode RAID Type XXXXXX XXXX - ASRock 939S56-M | RAID Installation Guide - Page 16
to select disk, and press to confirm your selection. Please note that the disk you select first will be the SOURCE disk. SiS RAID BIOS Setting Utility RAID Setup * Current Created Raid * RAID 1 Use to select and press to confirm The disk you select first will be the SOURCE - ASRock 939S56-M | RAID Installation Guide - Page 17
>, it will Create Mirror only. If you press and , it will duplicate the data on source disk to RAID disks. SiS RAID BIOS Setting Utility RAID Setup * Current Created Raid * RAID 1 Duplicate the SOURCE (Disk 1) data to RAID disks ? N [Q] : Exit current menu Location Disk 1 Disk 2 Model - ASRock 939S56-M | RAID Installation Guide - Page 18
Utility, you will see the confirming message: "Do You Want to Save Changes? N" Please press and to save changes. SiS RAID BIOS Setting Utility Disk Status RAID Setup * Current Created Raid * RAID 1: Disk1 Disk 2 [R] : E Do You Want To Save changes ? N [Q] : E Pri_Master XXXXXX XXXXXX - ASRock 939S56-M | RAID Installation Guide - Page 19
guide you to configure JBOD. To set JBOD configuration, please follow the instruction below to use "SiS RAID BIOS Setting Utility" for the setting of JBOD configuration. NOTE In the following instruction motherboard. STEP 1: Boot-up your computer. STEP 2: Press key to enter "SiS RAID BIOS - ASRock 939S56-M | RAID Installation Guide - Page 20
XXXX XXXXXXX Copyright (c) 2003-2005. Silicon Integrated Systems Corp | www.sis.com STEP 5: Press and to select JBOD. SiS RAID BIOS Setting Utility Disk Status RAID Setup * Current Created Raid * [B] : Select Boot Disk [RR]A:IDETnytpere:Rd JsBeOtuDp liRtyAID 0 RAID - ASRock 939S56-M | RAID Installation Guide - Page 21
will be the first disk, and the next selected disk will be the second disk. SiS RAID BIOS Setting Utility RAID Setup * Current Created Raid * JBOD Auto Create Manual Create: 2 [Q] : Exit current menu Location Disk 1 Disk 2 Model XXXXXX XXXXXX Capacity Mode RAID Type XXXXXX XXXX XXXXXXX - ASRock 939S56-M | RAID Installation Guide - Page 22
Then you will see the confirming message: "Do You Want to Save Changes? N" Please press and to save changes. SiS RAID BIOS Setting Utility Disk Status RAID Setup * Current Created Raid * JBOD: Disk1 Disk 2 [R] : E Do You Want To Save changes ? N [Q] : E Pri_Master Sec_Master XXXXXX - ASRock 939S56-M | RAID Installation Guide - Page 23
configuration (see page 4 to page 22) before you install Windows 2000 / Windows XP. For the installation of the SATA drivers while installing Windows 2000 or Windows XP, please follow the instruction below. 1. Insert Windows 2000 or Windows XP CD into the optical drive. 2. Remove the floppy diskette - ASRock 939S56-M | RAID Installation Guide - Page 24
. PS=reSspsecFi6fy iAf dydoituionnaeledDetvoiceinstalEl NaTEthRi=rdCopnatirntyue SCSFI 3=orExRitAID driver . . . 4. Insert the SATA driver into drive A: and press . Windows Setup Please insert the disk labeled Manufacturer-supplied hardware support disk into Drive A: Press ENTER when ready - ASRock 939S56-M | RAID Installation Guide - Page 25
all device files and then continue the Windows 2000 / Windows XP installation. 8. Please install the driver package again while the operation system has been setup. NOTE If you would like to install windows to any RAID set, you should create RAID from BIOS utility first and then follow the steps
-
 1
1 -
 2
2 -
 3
3 -
 4
4 -
 5
5 -
 6
6 -
 7
7 -
8
-
9
-
10
-
11
-
12
-
13
-
14
-
15
-
16
-
17
-
18
-
19
-
20
-
21
-
22
-
23
-
24
-
25
 |
 |

1
Guide to SATA Hard Disks
Installation and RAID Configuration
1.
Guide to SATA Hard Disks Installation ……………..2
1.1
Serial ATA (SATA) Hard Disks Installation …… 2
1.2
Making An SATA Driver Diskette ………………
3
2.
Guide to RAID Configurations
(RAID 0 / RAID 1 / JBOD) …………………………. .
4
2.1
Introduction of RAID ……………………………
4
2.2
RAID Configuration Precautions………………
5
2.3
RAID 0 Configuration …………………………… 6
2.4
RAID 1 Configuration …………………….…….13
2.5
JBOD Configuration …………………………… 19
3.
Guide to Windows 2000 /
Windows XP Installation ………………………….. . 23