ASRock 939S56-M RAID Installation Guide - Page 19
JBOD Configuration
 |
View all ASRock 939S56-M manuals
Add to My Manuals
Save this manual to your list of manuals |
Page 19 highlights
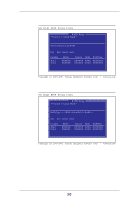
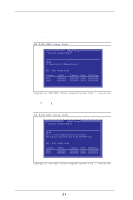
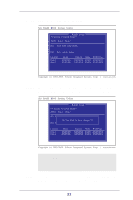
2.5 JBOD Configuration This section will guide you to configure JBOD. To set JBOD configuration, please follow the instruction below to use "SiS RAID BIOS Setting Utility" for the setting of JBOD configuration. NOTE In the following instruction, the term "Disk 1" refers to the SATA hard disk that you connect to "SATA1" connector on your motherboard; the term "Disk 2" refers to the SATA hard disk that you connect to "SATA2" connector on your motherboard. STEP 1: Boot-up your computer. STEP 2: Press key to enter "SiS RAID BIOS Setting Utility" STEP 3: Press key to enter RAID setup utility and start to create array. SiS RAID BIOS Setting Utility RAID Setup * Current Created Raid * [R] : Enter Raid setup utility [Q] : Exit current menu Location Model Capacity Mode RAID Type Disk 1 Disk 2 XXXXXX XXXXXX XXXX XXXXXXX XXXXXX XXXXXX XXXX XXXXXXX Copyright (c) 2003-2005. Silicon Integrated Systems Corp | www.sis.com 19
-
 1
1 -
2
-
3
-
4
-
5
-
6
-
7
-
8
-
9
-
10
-
11
-
12
-
13
-
 14
14 -
 15
15 -
 16
16 -
 17
17 -
 18
18 -
 19
19 -
 20
20 -
 21
21 -
 22
22 -
 23
23 -
 24
24 -
25
 |
 |
