Acer Veriton 7600GT Veriton 7600GT User's Guide - Page 125
RAID Volume Name, Strip Size, volume name must be in English alphanumeric ASCII characters.
 |
View all Acer Veriton 7600GT manuals
Add to My Manuals
Save this manual to your list of manuals |
Page 125 highlights
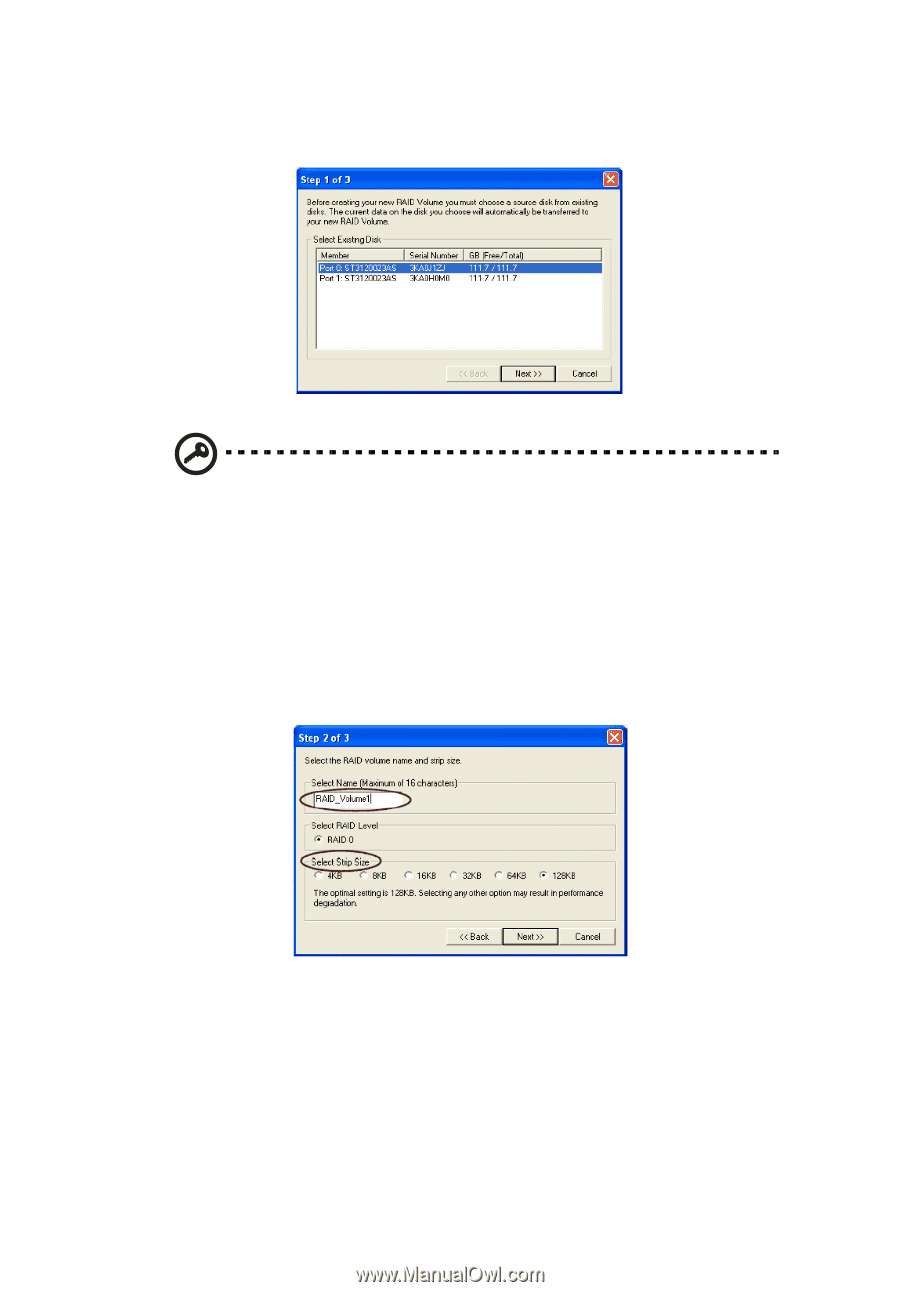
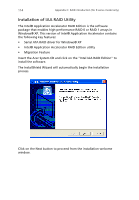
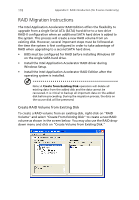
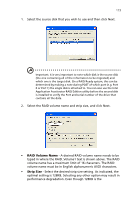
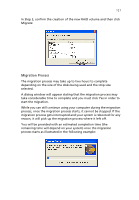
119 1. Select the source disk that you wish to use and then click Next. Important: It is very important to note which disk is the source disk (the one containing all of the information to be migrated) and which one is the target disk. On a RAID Ready system, this can be determined by making a note during POST of which port (e.g. Port 0 or Port 1) the single disk is attached to. You can also use the Intel Application Accelerator RAID Edition utility before the second disk is installed to verify the Port and serial number of the drive that contains all the data. 2. Select the RAID volume name and strip size, and click Next. • RAID Volume Name - A desired RAID volume name needs to be typed in where the RAID_Volume1 text is shown above. The RAID volume name has a maximum limit of 16 characters. The RAID volume name must be in English alphanumeric ASCII characters. • Strip Size - Select the desired strip size setting. As indicated, the optimal setting is 128KB. Selecting any other option may result in performance degradation. Even though 128KB is the
-
 1
1 -
2
-
3
-
4
-
5
-
6
-
7
-
8
-
9
-
10
-
11
-
12
-
13
-
14
-
15
-
16
-
17
-
18
-
19
-
20
-
21
-
22
-
23
-
24
-
25
-
26
-
27
-
28
-
29
-
30
-
31
-
32
-
33
-
34
-
35
-
36
-
37
-
38
-
39
-
40
-
41
-
42
-
43
-
44
-
45
-
46
-
47
-
48
-
49
-
50
-
51
-
52
-
53
-
54
-
55
-
56
-
57
-
58
-
59
-
60
-
61
-
62
-
63
-
64
-
65
-
66
-
67
-
68
-
69
-
70
-
71
-
72
-
73
-
74
-
75
-
76
-
77
-
78
-
79
-
80
-
81
-
82
-
83
-
84
-
85
-
86
-
87
-
88
-
89
-
90
-
91
-
92
-
93
-
94
-
95
-
96
-
97
-
98
-
99
-
100
-
101
-
102
-
103
-
104
-
105
-
106
-
107
-
108
-
109
-
110
-
111
-
112
-
113
-
114
-
115
-
116
-
117
-
118
-
119
-
 120
120 -
 121
121 -
 122
122 -
 123
123 -
 124
124 -
 125
125 -
 126
126 -
 127
127 -
 128
128 -
 129
129 -
 130
130
 |
 |