Adaptec 29320LPE User Guide - Page 24
Before You Begin, Installing the Adaptec SCSI Card, Connecting Disk Drives - pcie ultra320 scsi
 |
UPC - 760884154762
View all Adaptec 29320LPE manuals
Add to My Manuals
Save this manual to your list of manuals |
Page 24 highlights
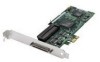
Chapter 5: Getting Started ● 24 Before You Begin ● Read the safety information on page 45. ● Familiarize yourself with your SCSI card's physical features (see page 13). ● Ensure that you have the proper cables for your SCSI card and disk drives (see page 22). ● If you have a low-profile computer cabinet, replace the original full-height bracket with the low-profile bracket supplied in the SCSI card kit. ● Handle the SCSI card by its bracket or edges only. Installing the Adaptec SCSI Card This section describes how to install your Adaptec SCSI card into your computer cabinet. ! Caution: Electrostatic Discharge (ESD) can damage your SCSI card. Handle the SCSI card carefully so that you do not expose it to static charge. 1 If you have a low-profile computer cabinet, replace the original full-height bracket on the SCSI card with the lowprofile bracket supplied in the SCSI card kit. 2 Turn off your system and disconnect the power cord. 3 Open the cabinet, following the manufacturer's instructions. 4 Insert the SCSI card into an available PCIe slot (compliant with PCIe rev. 1.0) and secure the bracket in the PCIe slot, using the retention device (for instance, a screw or lever) supplied with your system. 5 Install and connect any internal drives using the appropriate cable(s), then close the computer cabinet. Note: If you connect non-LVD/SE (Wide Ultra/Ultra) SCSI devices to the same SCSI channel as LVD (Ultra320, Ultra160 and Ultra2) SCSI devices, the data transfer rate for the LVD SCSI devices will drop to non-LVD/SE performance levels. To achieve maximum data transfer rates for the LVD SCSI devices, be sure to keep them separate. Connecting Disk Drives 1 Set the SCSI ID of each disk drive to a unique number between 0 and 15. The SCSI card is set to ID 7 by default. Although not recommended, you can change the SCSI card ID by using the SCSISelect utility (see page 34). Note: Do not change the SCSI card ID unless absolutely necessary. 2 Install a terminator (or enable termination) on the disk drive at the end of each cable, or the end of the cable itself.
-
 1
1 -
2
-
3
-
4
-
5
-
6
-
7
-
8
-
9
-
10
-
11
-
12
-
13
-
14
-
15
-
16
-
17
-
18
-
 19
19 -
 20
20 -
 21
21 -
 22
22 -
 23
23 -
 24
24 -
 25
25 -
 26
26 -
 27
27 -
 28
28 -
 29
29 -
30
-
31
-
32
-
33
-
34
-
35
-
36
-
37
-
38
-
39
-
40
-
41
-
42
-
43
-
44
-
45
-
46
-
47
-
48
-
49
-
50
-
51
-
52
-
53
-
54
-
55
-
56
-
57
-
58
-
59
-
60
-
61
-
62
-
63
-
64
-
65
-
66
 |
 |
