Alpine 9965 Owners Manual - Page 50
Graphic Equalizer Adjustments
 |
UPC - 793276500526
View all Alpine 9965 manuals
Add to My Manuals
Save this manual to your list of manuals |
Page 50 highlights
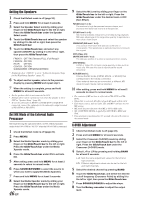
Inputting the Time Correction 4 Check that Defeat mode is off (page 20). 5 Press and hold MENU for at least 2 seconds. 6 Select the Time Correction (T.CORR/PHASE) mode by sliding your finger on the GlideTouch bar to the left or right. Press the GlideTouch bar under the Time Correction (TCR/PHASE) mode. 7 Select L+R or L/R by pressing and holding BAND for at least 2 seconds. L+R: Sets the same adjustment values for the left and right channels. L/R: Different adjustment values can be set for the left and right channels. 8 Select the desired channel by pressing BAND. 9 Adjust the calculated time correction value (0.00 to 20.00ms) by turning the Rotary encoder. • The time correction values can be adjusted with the GlideTouch bar. Switching the Phase 10 Switch the phase (PHASE) by pressing SOURCE/ POWER. 11 To adjust other channels, repeat steps 8 to 10. 12 When the setting is complete, press and hold MENU for at least 2 seconds. • When changing the time correction value, refer to "Setting the Time Correction Unit" (page 26). • When the speaker is set to the "OFF" mode, the TCR for that speaker cannot be set. Refer to "Setting the Speakers" (page 46). • The adjustment (AUTO TCR) cannot be automatically set on this unit. • When the setting is complete, it is recommended to store the setting contents. For storing, refer to page 53. Graphic Equalizer Adjustments The graphic equalizer allows you to modify the sound using 31 bands each for the front (left and right), rear (left and right) and center speakers. An additional 10 bands are available for the subwoofer. This allows you to customize the sound to suit your taste. 1 Check that Defeat mode is off (page 20) and G.EQ is selected in "Setting User's EQ mode" (page 21). 2 Press and hold MENU for at least 2 seconds. 3 Select the Graphic EQ mode by sliding your finger on the GlideTouch bar to the left or right. Press the GlideTouch bar under the Graphic EQ mode. 4 Select L+R or L/R by pressing and holding BAND for at least 2 seconds. L+R: Sets the same adjustment values for the left and right channels. L/R: Different adjustment values can be set for the left and right channels. When parametric EQ is adjusted, this setting will be turned off. 5 Select the channel by sliding your finger on the GlideTouch bar to the left or right. Press the GlideTouch bar under the channel. 6 Select the desired band by pressing BAND. 7 Adjust the level by turning the Rotary encoder. 8 To adjust other bands, repeat steps 6 to 7. 9 When the setting is complete, press and hold MENU for at least 2 seconds. • When the speaker is set to the "OFF" mode, the graphic equalizer for that speaker cannot be set. Refer to "Setting the Speakers" (page 46). • Check the playable frequency ranges of the connected speakers before making the equalizer adjustments. If the speaker's playable frequency range is 55 Hz to 30 kHz, for example, adjusting the 40 Hz or 20 Hz band has no effect. Additionally, you may overload and damage the speakers. • When graphic EQ is adjusted, the adjustment for parametric EQ becomes ineffective. • When the setting is complete, it is recommended to store the setting contents. For storing, refer to page 53. 48-EN
-
 1
1 -
2
-
3
-
4
-
5
-
6
-
7
-
8
-
9
-
10
-
11
-
12
-
13
-
14
-
15
-
16
-
17
-
18
-
19
-
20
-
21
-
22
-
23
-
24
-
25
-
26
-
27
-
28
-
29
-
30
-
31
-
32
-
33
-
34
-
35
-
36
-
37
-
38
-
39
-
40
-
41
-
42
-
43
-
44
-
 45
45 -
 46
46 -
 47
47 -
 48
48 -
 49
49 -
 50
50 -
 51
51 -
 52
52 -
 53
53 -
 54
54 -
 55
55 -
56
-
57
-
58
-
59
-
60
-
61
-
62
-
63
-
64
-
65
-
66
-
67
-
68
-
69
-
70
-
71
-
72
-
73
-
74
-
75
-
76
-
77
-
78
-
79
 |
 |
