Alpine 9965 Owners Manual - Page 54
Using the Pro Logic II Mode, Linear PCM Setting
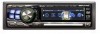 |
UPC - 793276500526
View all Alpine 9965 manuals
Add to My Manuals
Save this manual to your list of manuals |
Page 54 highlights
Using the Pro Logic II Mode Pro Logic processing can be conducted on the music signals recorded on two channels to achieve Dolby Pro Logic II surround sound. For two-channel Dolby Digital and DTS signals, there is also a "REAR FILL" function for outputting the signals of the front channel to the rear channel. 1 Check that Defeat mode is off (page 20). 2 Press and hold MENU for at least 2 seconds. 3 Select the Dolby PL II mode by sliding your finger on the GlideTouch bar to the left or right. Press the GlideTouch bar under the Dolby PL II mode. The DOLBY PL II setup mode is activated. 4 Select the DOLBY PL II by sliding your finger on the GlideTouch bar to the left or right, then press the GlideTouch bar. 5 Select the desired mode by sliding your finger on the GlideTouch bar to the left or right. Press the GlideTouch bar under the desired mode. PL II MOVIE: Suits the stereo TV shows and all programs encoded in Dolby Surround. It improves the sound field directivity to near that of discrete 5.1-channel sound. PL II MUSIC: Can be used for all stereo music recordings, and provides a wide, deep sound field. PL II FILL: Depending on the input signals, the sound may only be output from the front speakers. In this case, the "REAR FILL" function can be used to output signals from the rear speakers as well. OFF: Turns DOLBY PL II function to OFF. If PL II MUSIC is selected, the center width can be adjusted with the following operations. This function offers the optimum vocal position by adjusting the center channel position between the centre speaker and the L/R speaker. (The adjustments established in "Adjusting the acoustic image" (page 51) are ineffective while this function is activated.) Selecting the CENTER WIDTH CONT. 1) Select CENTER WIDTH by activating the DOLBY PL II setup mode in step 4 of "Using the Prologic II Mode." 2) Select ON or OFF by sliding your finger on the GlideTouch bar to the left or right. Press the GlideTouch bar under the ON or OFF. If ON is set, you can enjoy the optimum vocal position by distributing the center channel sound between the center speaker and L/R speaker. 3) Adjust the level by turning the Rotary encoder. The level can be adjusted between 0 to 7. When the level increases, the centre channel position moves from the centre speaker position to both sides. 6 When the setting is complete, press and hold MENU for at least 2 seconds. • This adjustment is effective when the setting of the centre speaker is SMALL or LARGE in the speaker setup settings. • Avoid stopping, pausing, switching the disc, cueing, fastforwarding or switching the audio channel of this unit while making this adjustment. The setting is cancelled if the Decode mode is switched. • This adjustment is ineffective when the speaker is set to CENTER OFF in "Setting the Speakers" (page 46). • This function only works with two-channel signals. This operation is ineffective when 5.1-channel DTS or Dolby Digital signals are input. • If the REAR FILL setting is made while REAR MIX is ON, the sound for rear fill is unchanged. REAR MIX is given priority during all 2 channel decoding other than linear PCM. • For linear PCM signals, the voice is output from the rear speaker regardless of the REAR FILL and REAR MIX setting. • When the setting is complete, it is recommended to store the setting contents. For storing, refer to page 53. Linear PCM Setting The output when playing discs recorded in linear PCM can be set to 2 or 3 channels. 1 Check that Defeat mode is off (page 20). 2 Press and hold MENU for at least 2 seconds. 3 Select the DVD Level mode by sliding your finger on the GlideTouch bar to the left or right. Press the GlideTouch bar under the DVD Level mode. 4 Select the PCM MODE by sliding your finger on the GlideTouch bar to the left or right. Press the GlideTouch bar under the PCM MODE. 5 Select the desired mode by sliding your finger on the GlideTouch bar to the left or right. Press the GlideTouch bar under the desired mode. 2CH OUTPUT : 2ch output (L/R) 3CH OUTPUT : 3ch output (L/R/CENTER) 6 When the setting is complete, press and hold MENU for at least 2 seconds. • This adjustment is ineffective when the speaker is set to CENTER OFF in "Setting the Speakers" (page 46). 52-EN
-
 1
1 -
2
-
3
-
4
-
5
-
6
-
7
-
8
-
9
-
10
-
11
-
12
-
13
-
14
-
15
-
16
-
17
-
18
-
19
-
20
-
21
-
22
-
23
-
24
-
25
-
26
-
27
-
28
-
29
-
30
-
31
-
32
-
33
-
34
-
35
-
36
-
37
-
38
-
39
-
40
-
41
-
42
-
43
-
44
-
45
-
46
-
47
-
48
-
 49
49 -
 50
50 -
 51
51 -
 52
52 -
 53
53 -
 54
54 -
 55
55 -
 56
56 -
 57
57 -
 58
58 -
 59
59 -
60
-
61
-
62
-
63
-
64
-
65
-
66
-
67
-
68
-
69
-
70
-
71
-
72
-
73
-
74
-
75
-
76
-
77
-
78
-
79
 |
 |
