Apple M8493 Setup Guide - Page 60
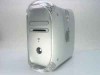
The tinted screws illustrated below indicate the four low-profile screws that came
 |
UPC - 718103028325
View all Apple M8493 manuals
Add to My Manuals
Save this manual to your list of manuals |
Page 60 highlights
5 Install the ATA drive in the U-shaped bracket. Note : The tinted screws illustrated below indicate the four low-profile screws that came in the computer's accessory kit. The untinted screws show the screws that came with the new drive . Attach an additional ATA drive (1" high) to the upper portion of the drive carrier by screwing it into position on its sides. Attach the two screws on this side first. These two tabs will bend inward as you tighten these two screws. ATA drives that are 1" high are attached to the lower portion of the drive carrier from the bottom. Position the hard disk drive on the drive carrier so that the ribbon cable connector and the power cord connector are accessible. 60 Chapter 4
-
 1
1 -
2
-
3
-
4
-
5
-
6
-
7
-
8
-
9
-
10
-
11
-
12
-
13
-
14
-
15
-
16
-
17
-
18
-
19
-
20
-
21
-
22
-
23
-
24
-
25
-
26
-
27
-
28
-
29
-
30
-
31
-
32
-
33
-
34
-
35
-
36
-
37
-
38
-
39
-
40
-
41
-
42
-
43
-
44
-
45
-
46
-
47
-
48
-
49
-
50
-
51
-
52
-
53
-
54
-
 55
55 -
 56
56 -
 57
57 -
 58
58 -
 59
59 -
 60
60 -
 61
61 -
 62
62 -
 63
63 -
 64
64 -
 65
65 -
66
-
67
-
68
-
69
-
70
-
71
-
72
-
73
-
74
-
75
-
76
-
77
-
78
-
79
-
80
-
81
-
82
-
83
-
84
-
85
-
86
-
87
-
88
-
89
-
90
-
91
-
92
 |
 |

60
Chapter
4
5
Install the ATA drive in the U-shaped bracket.
Note :
The tinted screws illustrated below indicate the four low-profile screws that came in
the computer’s accessory kit. The untinted screws show the screws that came with the new
drive.
Attach an additional ATA drive (1" high)
to the upper portion of the drive carrier
by screwing it into position on its sides.
Attach the two screws on this side first.
These two
tabs will
bend
inward as
you tighten
these two
screws.
ATA drives that are 1" high are attached
to the lower portion of the drive carrier
from the bottom.
Position the hard disk drive on the drive carrier so that the ribbon cable connector and the
power cord connector are accessible.