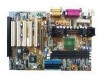
Asus K7M K7M User Manual - Page 58
Advanced Chipset Setup
 |
View all Asus K7M manuals
Add to My Manuals
Save this manual to your list of manuals |
Page 58 highlights
4. BIOS SETUP 4.4.2 Advanced Chipset Setup 4. BIOS SETUP Advanced Chipset CPU Frequency Selection [100Mhz] This field allows you to select the CPU external frequency (bus frequency), which the clock generator sends to the CPU, DRAM, and PCI bus. The external frequency multiplied by the bus multiple equals the CPU's internal frequency (the advertised CPU speed). You may select [By Jumper] to adjust the frequency through the motherboard DIP switches. Available options: [By Jumper] [90 Mhz] [95 Mhz] [100 Mhz]...[150 Mhz] WARNING! Selecting a frequency higher than the CPU manufacturer recommends may cause the system to hang or crash. If you can not start the system after overclocking the CPU, you must clear CMOS to erase your configuration and then the system will be able to run at the Setup default, 100MHz. Configure SDRAM Timing by SPD [Enabled] This sets the optimal timing for the following 5 items, depending on the memory modules that you are using. The Setup default [Enabled] configures the following 5 items by reading the contents in the SPD (Serial Presence Detect) device. This 8-pin serial EEPROM device stores critical parameter information about the module, such as memory type, size, speed, voltage interface, and module banks. Page Idle Timer This controls the amount of time in HCLKs that the DRAM controller waits to close a DRAM page after the CPU becomes idle. NOTE: To make changes to this field, the Configure SDRAM Timing by SPD field must be set to [Disabled]. Available options: [1 Cycle] [8 Cycles] [32 Cycles] [64 Cycles] 58 ASUS K7M User's Manual
-
 1
1 -
2
-
3
-
4
-
5
-
6
-
7
-
8
-
9
-
10
-
11
-
12
-
13
-
14
-
15
-
16
-
17
-
18
-
19
-
20
-
21
-
22
-
23
-
24
-
25
-
26
-
27
-
28
-
29
-
30
-
31
-
32
-
33
-
34
-
35
-
36
-
37
-
38
-
39
-
40
-
41
-
42
-
43
-
44
-
45
-
46
-
47
-
48
-
49
-
50
-
51
-
52
-
 53
53 -
 54
54 -
 55
55 -
 56
56 -
 57
57 -
 58
58 -
 59
59 -
 60
60 -
 61
61 -
 62
62 -
 63
63 -
64
-
65
-
66
-
67
-
68
-
69
-
70
-
71
-
72
-
73
-
74
-
75
-
76
-
77
-
78
-
79
-
80
-
81
-
82
-
83
-
84
-
85
-
86
-
87
-
88
-
89
-
90
-
91
-
92
-
93
-
94
-
95
-
96
 |
 |
