Asus P5Q User Manual - Page 153
Using Drive Xpert function in Express Gate environment, Drive Xpert, Choose, target volume, EZ Backup
 |
UPC - 610839163014
View all Asus P5Q manuals
Add to My Manuals
Save this manual to your list of manuals |
Page 153 highlights
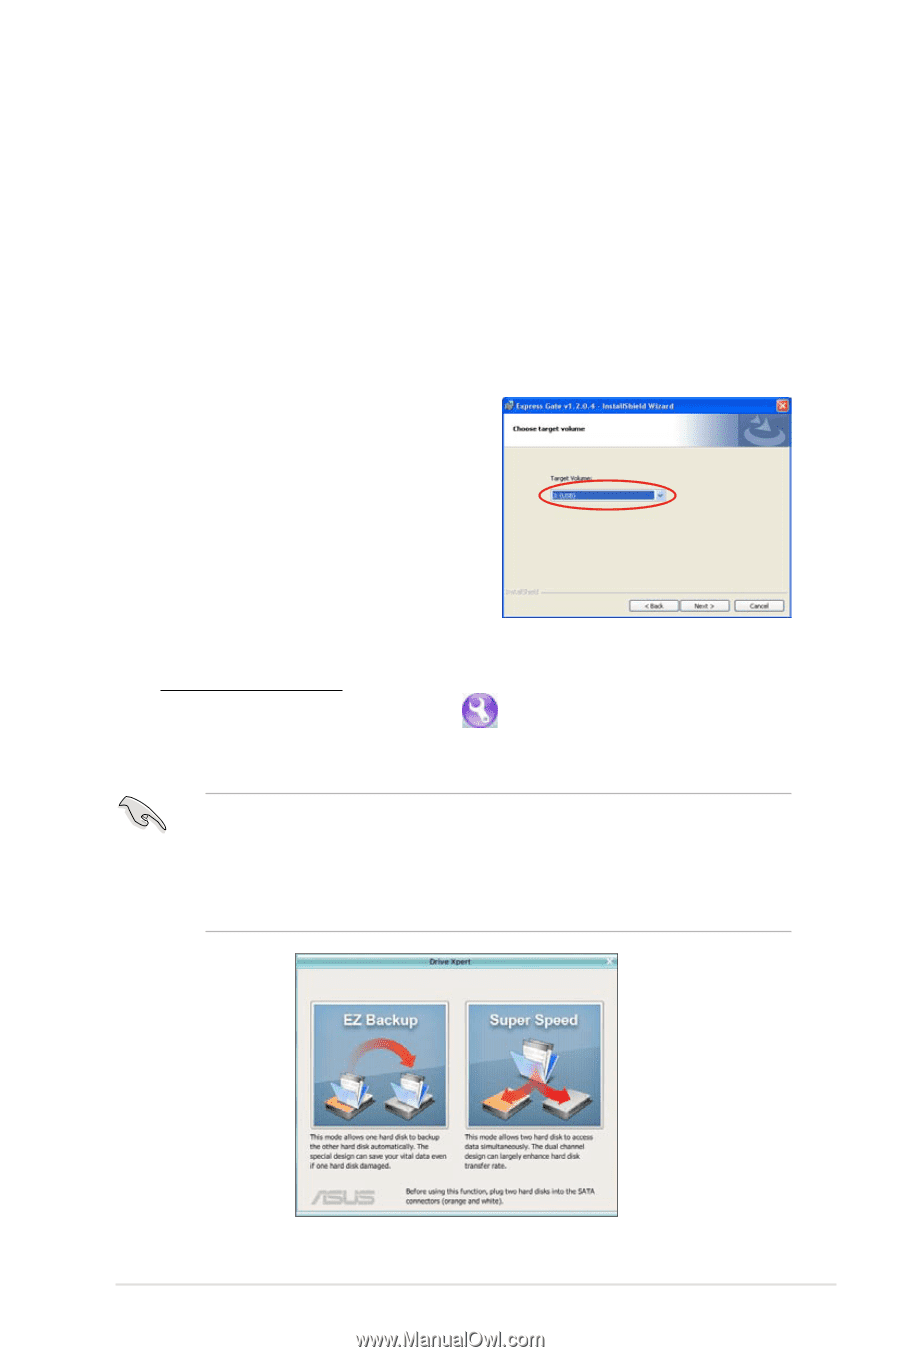
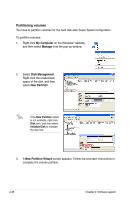
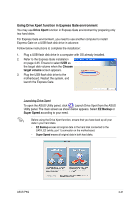
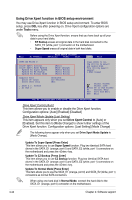
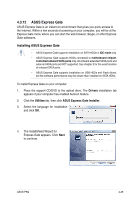
Using Drive Xpert function in Express Gate environment You may use Drive Xpert function in Express Gate environment by preparing only two hard disks. For Express Gate environment, you need to use another computer to install Express Gate on a USB flash disk drive in advance. Follow below instructions to complete the installation: 1. Plug a USB flash disk drive in a computer with OS already installed. 2. Refer to the Express Gate installation on page 4-45. Ensure to select USB as the target disk volume when the Choose target volume screen appears. 3. Plug the USB flash disk drive to the motherboard. Restart the system, and launch the Express Gate. Launching Drive Xpert To open the ASUS Utility panel, click . Launch Drive Xpert from the ASUS Utility panel. The main screen as shown below appears. Select EZ Backup or Super Speed according to your need. Before using the Drive Xpert function, ensure that you have back up all your data in your hard disks. • EZ Backup erases all original data in the hard disk connected to the SATA_E2 (white, port 1) connector on the motherboard. • Super Speed erases all original data in both hard disks. ASUS P5Q 4-41
-
 1
1 -
2
-
3
-
4
-
5
-
6
-
7
-
8
-
9
-
10
-
11
-
12
-
13
-
14
-
15
-
16
-
17
-
18
-
19
-
20
-
21
-
22
-
23
-
24
-
25
-
26
-
27
-
28
-
29
-
30
-
31
-
32
-
33
-
34
-
35
-
36
-
37
-
38
-
39
-
40
-
41
-
42
-
43
-
44
-
45
-
46
-
47
-
48
-
49
-
50
-
51
-
52
-
53
-
54
-
55
-
56
-
57
-
58
-
59
-
60
-
61
-
62
-
63
-
64
-
65
-
66
-
67
-
68
-
69
-
70
-
71
-
72
-
73
-
74
-
75
-
76
-
77
-
78
-
79
-
80
-
81
-
82
-
83
-
84
-
85
-
86
-
87
-
88
-
89
-
90
-
91
-
92
-
93
-
94
-
95
-
96
-
97
-
98
-
99
-
100
-
101
-
102
-
103
-
104
-
105
-
106
-
107
-
108
-
109
-
110
-
111
-
112
-
113
-
114
-
115
-
116
-
117
-
118
-
119
-
120
-
121
-
122
-
123
-
124
-
125
-
126
-
127
-
128
-
129
-
130
-
131
-
132
-
133
-
134
-
135
-
136
-
137
-
138
-
139
-
140
-
141
-
142
-
143
-
144
-
145
-
146
-
147
-
 148
148 -
 149
149 -
 150
150 -
 151
151 -
 152
152 -
 153
153 -
 154
154 -
 155
155 -
 156
156 -
 157
157 -
 158
158 -
159
-
160
-
161
-
162
-
163
-
164
-
165
-
166
-
167
-
168
-
169
-
170
-
171
-
172
-
173
-
174
-
175
-
176
-
177
-
178
-
179
-
180
-
181
-
182
-
183
-
184
 |
 |