Asus P5Q User Manual - Page 155
Super Speed, back up all original data in
 |
UPC - 610839163014
View all Asus P5Q manuals
Add to My Manuals
Save this manual to your list of manuals |
Page 155 highlights
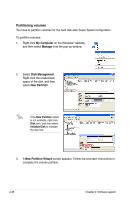
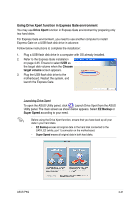
Super Speed To start Super Speed configuration: 1. Click Super Speed from the main screen. 2. Check if the SATA cables and power cords are installed properly. Click Next to continue. 3. Click Next to continue the configuration. 4. Before proceeding, ensure to back up all original data in the two hard disks. Otherwise, the system erases all data in both hard disks. Click Next to continue. 5. The setup is completed. Click OK to close the configuration window. ASUS P5Q 4-43
-
 1
1 -
2
-
3
-
4
-
5
-
6
-
7
-
8
-
9
-
10
-
11
-
12
-
13
-
14
-
15
-
16
-
17
-
18
-
19
-
20
-
21
-
22
-
23
-
24
-
25
-
26
-
27
-
28
-
29
-
30
-
31
-
32
-
33
-
34
-
35
-
36
-
37
-
38
-
39
-
40
-
41
-
42
-
43
-
44
-
45
-
46
-
47
-
48
-
49
-
50
-
51
-
52
-
53
-
54
-
55
-
56
-
57
-
58
-
59
-
60
-
61
-
62
-
63
-
64
-
65
-
66
-
67
-
68
-
69
-
70
-
71
-
72
-
73
-
74
-
75
-
76
-
77
-
78
-
79
-
80
-
81
-
82
-
83
-
84
-
85
-
86
-
87
-
88
-
89
-
90
-
91
-
92
-
93
-
94
-
95
-
96
-
97
-
98
-
99
-
100
-
101
-
102
-
103
-
104
-
105
-
106
-
107
-
108
-
109
-
110
-
111
-
112
-
113
-
114
-
115
-
116
-
117
-
118
-
119
-
120
-
121
-
122
-
123
-
124
-
125
-
126
-
127
-
128
-
129
-
130
-
131
-
132
-
133
-
134
-
135
-
136
-
137
-
138
-
139
-
140
-
141
-
142
-
143
-
144
-
145
-
146
-
147
-
148
-
149
-
 150
150 -
 151
151 -
 152
152 -
 153
153 -
 154
154 -
 155
155 -
 156
156 -
 157
157 -
 158
158 -
 159
159 -
 160
160 -
161
-
162
-
163
-
164
-
165
-
166
-
167
-
168
-
169
-
170
-
171
-
172
-
173
-
174
-
175
-
176
-
177
-
178
-
179
-
180
-
181
-
182
-
183
-
184
 |
 |
ASUS P5Q
4-43
Super Speed
To start
Super Speed
configuration:
1.
Click
Super Speed
from the main screen.
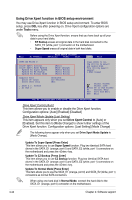
2.
Check if the SATA cables
and power cords are installed
properly. Click
Next
to
continue.
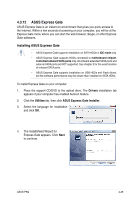
3.
Click
Next
to continue the
configuration.
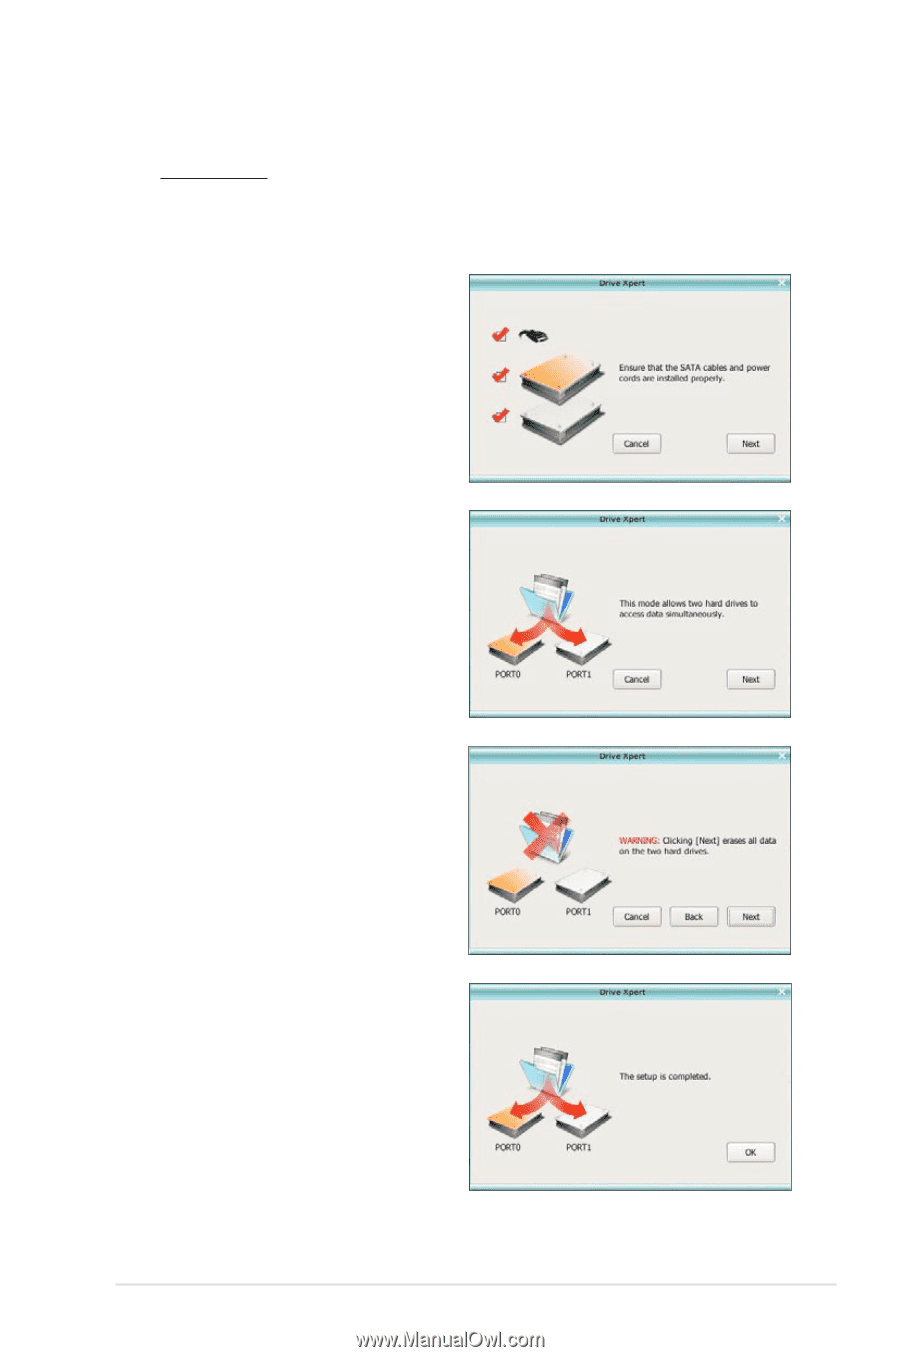
4.
Before proceeding, ensure to
back up all original data in the
two hard disks. Otherwise,
the system erases all data in
both hard disks. Click
Next
to
continue.
5.
The setup is completed. Click
OK
to close the configuration
window.