Brother International ULT-2003D Sewing Guide
Brother International ULT-2003D Manual
 |
View all Brother International ULT-2003D manuals
Add to My Manuals
Save this manual to your list of manuals |
Brother International ULT-2003D manual content summary:
- Brother International ULT-2003D | Sewing Guide - Page 1
BROTHER BACK TO BASICS ULT2003D Sewing and Embroidery Guide Book - Brother International ULT-2003D | Sewing Guide - Page 2
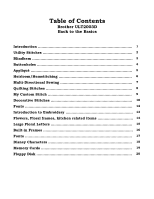
Table of Contents Brother ULT2003D Back to the Basics Introduction 1 Utility Stitches 2 Blindhem 3 Buttonholes 4 Appliqu 5 Heirloom/Hemstitching 6 Multi-Directional Sewing 7 Quilting Stitches 8 My Custom Stitch 9 Decorative Stitches 10 Fonts 12 Introduction to Embroidery 13 Flowers, - Brother International ULT-2003D | Sewing Guide - Page 3
to the Basics Guide Booklet ULT2003D INTRODUCTION The Brother ULT2003D has very unique features that will give you a lifetime of sewing enjoyment. 1. The Disney Characters welcome you on screen when the machine is turned on. The large, colored, touch screen is angled for the person sewing so it is - Brother International ULT-2003D | Sewing Guide - Page 4
Basics Guide Booklet UTILITY STITCHES Back to Basics-the Sewing Side The Brother ULT2003D has the features and benefits needed for all your sewing and embroidery needs. • Stitch number 1-01 is a straight stitch left needle position. Backstitch reinforcement can be added by touching the backstitch - Brother International ULT-2003D | Sewing Guide - Page 5
Back to the Basics Guide Booklet BLINDHEM BROTHER ULT2003D The blindhem stitch is built into the Brother ULT2003D and will create an invisible hem. • Place "R" foot on the machine. • Fold fabric in S shape. Pg 3-35 inst. book. • Select 2-01 for woven fabric. • Select 2-02 for knit fabric. • Line the - Brother International ULT-2003D | Sewing Guide - Page 6
Back to the Basics Guide Booklet BUTTONHOLES BROTHER ULT2003D A perfect buttonhole every time! Choice of 15 different styles of buttonholes. • The button determines size. • Following the directions in the instruction book insert the button in the slot at the back of the buttonhole foot. Push the - Brother International ULT-2003D | Sewing Guide - Page 7
used on top. • Stitch number 1-32 the quilting appliqué zigzag stitch is often used to create a satin stitch. The length and width can be changed on screen and locked for use later. • Hint: When appliquéing it is best to sew in a slow to medium speed. The speed control on the machine can be set for - Brother International ULT-2003D | Sewing Guide - Page 8
Back to the Basics Guide Booklet HEIRLOOM/HEMSTITCHING BROTHER ULT2003D SEWING SIDE In the Utility selection, stitch numbers 3-01 through 3-22 are labeled as hemstitching and honeycomb. These include many of the popular stitches used in Heirloom sewing. • The use of a wing needle and a lightweight - Brother International ULT-2003D | Sewing Guide - Page 9
Basics Guide Booklet MULTI-DIRECTIONAL SEWING BROTHER ULT2003D The ability to sew in a square or at an angle without turning the fabric is a very functional feature on the ULT2003D. This is a great for sewing on patches or emblems as well as patching. • Attach the monogramming foot "N". • Stitches - Brother International ULT-2003D | Sewing Guide - Page 10
to the Basics Guide Booklet QUILTING STITCHES BROTHER ULT2003D Many stitches used in quilting are built into the ULT2003D. For piecing fabric together with a perfect 1/4" seam or quilting the top, batting and backing together, the Brother ULT2003D can fulfill you quilting needs. • Stitch number 1-29 - Brother International ULT-2003D | Sewing Guide - Page 11
the maximum width is 7mm. That is the entire width of the grid on the screen. Your design should always fill the entire area unless you want a very small stitch. • Note: My Custom Stitch-A guide for Brother Pacesetter Owners-by Barbara Skimin is an excellent guide book. It is available through - Brother International ULT-2003D | Sewing Guide - Page 12
Back to the Basics Guide Booklet DECORATIVE STITCHES Character Decorative Stitch The Brother ULT2003D has 9 categories of stitches and fonts to choose from. This includes 3 styles of lettering. • The first category, top icon in left column, of decorative stitches has 9 screens to choose from. The - Brother International ULT-2003D | Sewing Guide - Page 13
Back to the Basics Guide Booklet DECORATIVE STITCHES CHARACTER DECORATIVE STITCHES DECORATIVE SATIN STITCHES • 5 screens of decorative satin stitches for a total of 64 Satin Stitch designs are built into the Brother ULT2003D. • These stitches can be edited. Size, density, mirror and invert can - Brother International ULT-2003D | Sewing Guide - Page 14
Back to the Basics Guide Booklet BUILT IN LETTERING THREE TYPES OF FONTS BROTHER ULT2003D • All three fonts have upper and lower case, numbers, and punctuation. Pg.4-6 in machine instruction book. • Gothic. Upper and lower case. Large or small size. • Script. Upper and lower case. Large or small - Brother International ULT-2003D | Sewing Guide - Page 15
. The ULT2003D has a slot in the right side of the machine for Brother Memory cards. A 3 ½" floppy disk can be inserted directly into a slot in the side of the machine. 1. Turn machine off and slide on the embroidery unit. Turn machine on. The Disney characters will welcome you. 2. Touch the screen - Brother International ULT-2003D | Sewing Guide - Page 16
70 designs are built into the Brother ULT2003D. They can be rotated, sized, mirrored and moved. When brought into the machine in Embroidery Edit, other designs or lettering can be combined. • Turn machine on. Touch screen. OK the carriage to move. • Touch Embroidery Edit. Open the Floral category - Brother International ULT-2003D | Sewing Guide - Page 17
the top of the screen. Touch zoom to see the stitches. Close, End, Sew. The design can be saved in the machine or on a floppy. 12. Stabilize, hoop and sew. Hint: Touch Embroidery Edit. Touch the large ABC and the letter of choice. Sew the letter only. Bring in one of the Disney characters and place - Brother International ULT-2003D | Sewing Guide - Page 18
to the Basics Guide Booklet BUILT IN FRAMES BROTHER ULT2003D 10 frame shapes Touch the inverted arc and move under Mickey. Close. End. 18. Touch the Sewing key. 19. Stabilize, hoop and place hoop in machine. 20. Touch the trial key to check the positioning. Move if needed. 21. Note: In this screen - Brother International ULT-2003D | Sewing Guide - Page 19
Back to the Basics Guide Booklet FONTS BROTHERULT2003D There are 11 fonts built into the Brother ULT2003D. Each font includes upper case, lower case, numbers and punctuation. 1. Turn on machine. Touch screen. OK to set emb. arm. Choose Embroidery Edit. 2. Touch the font icon. 3. Touch the first one - Brother International ULT-2003D | Sewing Guide - Page 20
Back to the Basics Guide Booklet DISNEY BUILT-IN BROTHER ULT2003D The Brother ULT2002D was the first Brother machine to be marketed with the Disney Characters built into the embroidery designs. This was the most excited news in the sewing/embroidery world since home embroidery was introduced to the - Brother International ULT-2003D | Sewing Guide - Page 21
and combined with other cards, and lettering. 1. Turn on the Brother ULT2003D. Touch the Disney welcome screen. Touch OK to set the embroidery arm. 2. Choose Embroidery Edit. 3. Insert a Brother Memory card. Touch the memory card icon. Select the design. Mirror Image may be available. Set. 4. This - Brother International ULT-2003D | Sewing Guide - Page 22
may also be saved on a floppy. • Note: Disney designs cannot be saved on a floppy. • To retrieve a design from a floppy: • Turn machine on. • Touch the Disney welcome screen. OK to set the carriage. • Touch the Embroidery Edit icon. • Touch the icon with the picture of a floppy. • The designs on the
-
 1
1 -
 2
2 -
 3
3 -
 4
4 -
 5
5 -
 6
6 -
 7
7 -
8
-
9
-
10
-
11
-
12
-
13
-
14
-
15
-
16
-
17
-
18
-
19
-
20
-
21
-
22
 |
 |

BROTHER
BACK TO BASICS
ULT2003D
Sewing and Embroidery
Guide Book