Brother International ULT-2003D Sewing Guide - Page 11
My Custom Stitch, Creating Original Stitch - pacesetter
 |
View all Brother International ULT-2003D manuals
Add to My Manuals
Save this manual to your list of manuals |
Page 11 highlights
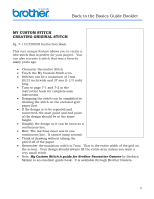
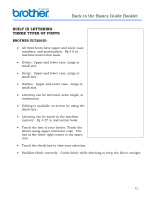
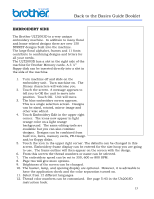
Back to the Basics Guide Booklet MY CUSTOM STITCH CREATING ORIGINAL STITCH Pg. 7-1 ULT2003D Instruction Book. This very unique feature allows you to create a new stitch that is perfect for your project. You can also recreate a stitch that was a favorite many years ago. • Character Decorative Stitch • Touch the My Custom Stitch icon. • Stitches can be a maximum of 7mm (9/32 inch) wide and 37 mm (I-1/3 inch) long. • Turn to page 7-1 and 7-2 in the instruction book for complete easy instruction. • Designing the stitch can be simplified by drawing the stitch on the enclosed grid paper first. • If the design is to be repeated and connected, the start point and end point of the design should be at the same height. • Simplify the design so it can be sewn as a continuous line. • Hint: The machine must sew in one continuous line. It cannot jump around. • Think of drawing without taking the pencil off of the paper. • Remember the maximum width is 7mm. That is the entire width of the grid on the screen. Your design should always fill the entire area unless you want a very small stitch. • Note: My Custom Stitch-A guide for Brother Pacesetter Owners-by Barbara Skimin is an excellent guide book. It is available through Brother Dealers. 9
-
 1
1 -
2
-
3
-
4
-
5
-
 6
6 -
 7
7 -
 8
8 -
 9
9 -
 10
10 -
 11
11 -
 12
12 -
 13
13 -
 14
14 -
 15
15 -
 16
16 -
17
-
18
-
19
-
20
-
21
-
22
 |
 |