Brother International ULT-2003D Sewing Guide - Page 18
Built In Frames, Brother Ult2003d - hoops
 |
View all Brother International ULT-2003D manuals
Add to My Manuals
Save this manual to your list of manuals |
Page 18 highlights
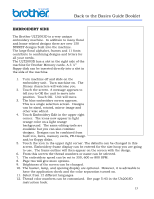
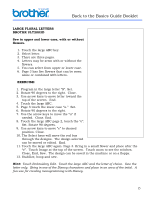
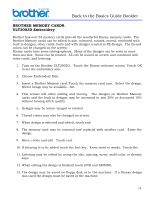
Back to the Basics Guide Booklet BUILT IN FRAMES BROTHER ULT2003D 10 frame shapes and 12 different borders add up to 120 possible frame designs. The designs can be increased or decreased in size and shape, rotated, mirrored, and moved for an endless variety of fun adventures in creating designs. The frames lend themselves to appliqués. Lettering or designs brought in from other sources can also be combined. 1. Turn machine on. Touch screen. OK. Embroidery arm will move. 2. Touch the Embroidery Edit icon at the top. 3. Touch the frame icon. 4. Select the frame in the center of the second row. 5. Select and touch the desired border. Some borders have two colors. 6. Set. Size. Increase size to about 15 X 15 cm. Close. 7. End. Touch the Mickey icon. Touch the Mickey/Minnie icon. Page three. First design in the upper left corner. 8. Set. End. 9. Touch the font icon. Choose the third one down on the left side. 10. Touch the "I". Touch the key to make a med. size. 11. Touch the space key and lower case. 12. Enter "love" by touching the letters. 13. Set. Use the arrow keys to move the letters above Mickey's head but inside the frame. Touch array. 14. Touch the ABC arc. Move the arc down if needed. Close. End. 15. Touch the font icon. Choose the same font. 16. Touch the "M"-- med size. lower case "ickey" Set. Array. 17. Touch the inverted arc and move under Mickey. Close. End. 18. Touch the Sewing key. 19. Stabilize, hoop and place hoop in machine. 20. Touch the trial key to check the positioning. Move if needed. 21. Note: In this screen the arrow keys will move the entire design. 22. Enter into machine memory. 16
-
 1
1 -
2
-
3
-
4
-
5
-
6
-
7
-
8
-
9
-
10
-
11
-
12
-
 13
13 -
 14
14 -
 15
15 -
 16
16 -
 17
17 -
 18
18 -
 19
19 -
 20
20 -
 21
21 -
 22
22
 |
 |