Brother International ULT-2003D Sewing Guide - Page 19
Fonts, Brotherult2003d - review
 |
View all Brother International ULT-2003D manuals
Add to My Manuals
Save this manual to your list of manuals |
Page 19 highlights
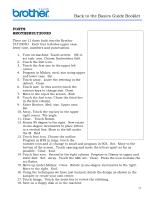
Back to the Basics Guide Booklet FONTS BROTHERULT2003D There are 11 fonts built into the Brother ULT2003D. Each font includes upper case, lower case, numbers and punctuation. 1. Turn on machine. Touch screen. OK to set emb. arm. Choose Embroidery Edit. 2. Touch the font icon. 3. Touch the first one in the upper left corner. 4. Program in Mickey, med. size using upper and lower case. Set. 5. Touch array. Leave the lettering in the default. Close. 6. Touch size. In this screen touch the various keys to change size. Close. 7. Move to the top of the screen. End. 8. Touch the font icon. Chose the third fort in the first column. 9. Enter Brother. Med. size. Upper case. Set. 10. Array. Touch the top key in the upper right corner. The angle. 11. Close. Touch Rotate. 12. Rotate 90 degree to the right. Now rotate in one-degree increments to place letters in a vertical line. Move to the left under the M. End 13. Touch font icon. Choose the outline. Program in BTS in large, touch the number icon and 2--change to small and program in 003. Set. Move to the bottom of the screen. Touch spacing and move the letters apart as far as possible. Close. End. 14. Touch font icon. Second in the right column. Program in Disney in upper and lower font. Set. Array. Touch the ABC arc. Close. Press the icon to make the arc flatter. 15. Move up under Mickey. Close. Rotate in one-degree increments to the right. Move to the right. End. 16. Using the techniques we have just learned, finish the design as shown in the sampler or create your own center. 17. Touch Image. Touch the zoom key to review the stitching. 18. Save on a floppy disk or in the machine. 17
-
 1
1 -
2
-
3
-
4
-
5
-
6
-
7
-
8
-
9
-
10
-
11
-
12
-
13
-
 14
14 -
 15
15 -
 16
16 -
 17
17 -
 18
18 -
 19
19 -
 20
20 -
 21
21 -
 22
22
 |
 |